DOWNLOAD MODS
Are you looking for something shiny for your load order? We have many exclusive mods and resources you won't find anywhere else. Start your search now...

LEARN MODDING
Ready to try your hand at making your own mod creations? Visit the Enclave, the original ES/FO modding school, and learn the tricks of the trade from veteran modders...

JOIN THE ALLIANCE
Membership is free and registering unlocks image galleries, project hosting, live chat, unlimited downloads, & more...


DaMage
-
Posts
1,293 -
Joined
-
Last visited
-
Days Won
16
1 Follower
About DaMage

- Birthday 11/27/1992
DaMage's Achievements
Blade (7/11)
91
Reputation
-
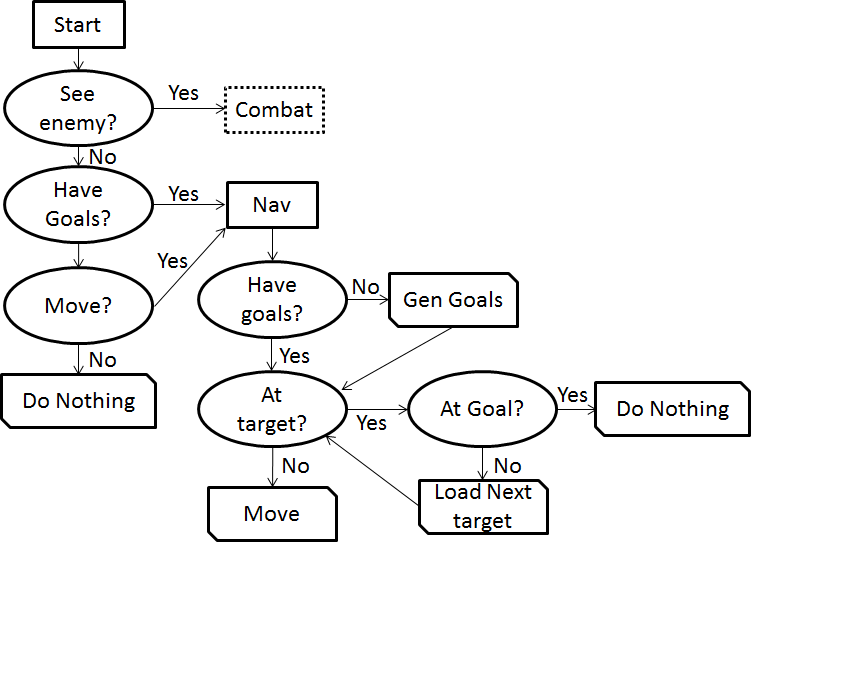
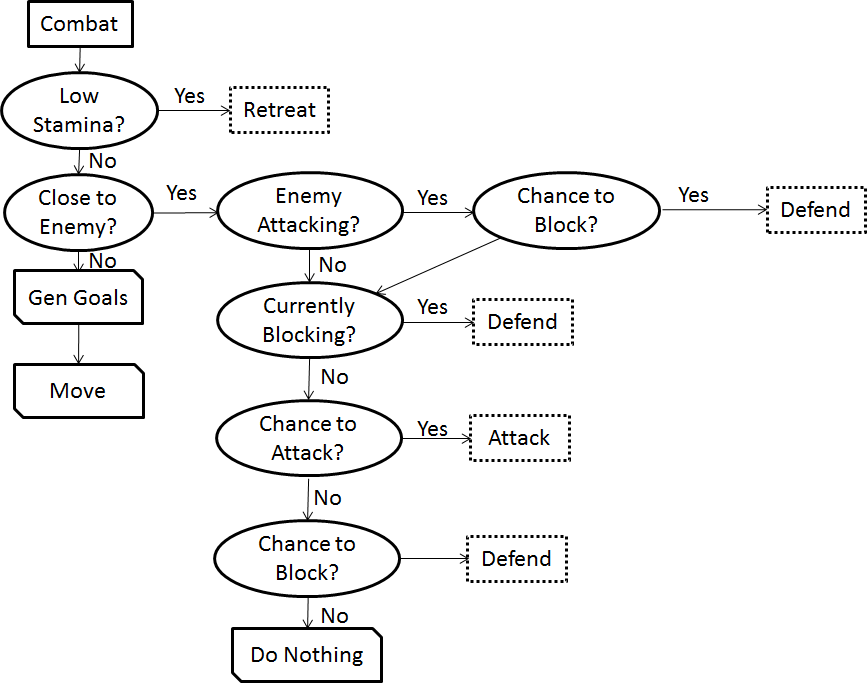
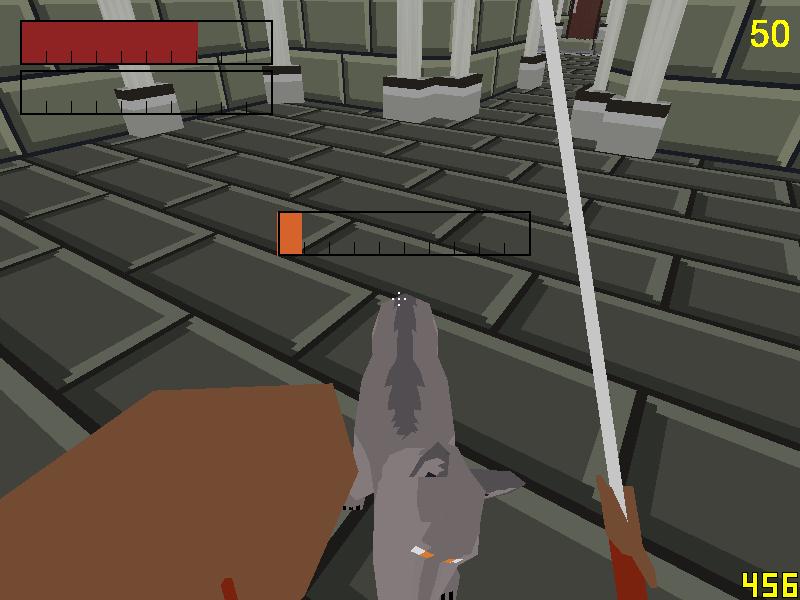
Woah, it’s been a while since I did one of these, now is as good a time as any then. Obviously I didn’t get much done on this project over the holidays, mainly due to a combination of graduating my degree at university and then getting another software job to work on. But as January and that other job was winding up, I have had some time to work on my game again. Also good news is I am into my PHD program with a scholarship, so I'm set for the next few years as far as a job goes and will hopefully have time to work on this still. After adding some ‘gameplay’ in the last post, it was really obvious that the basic AI I had was no longer going to cut it, and I needed to get that going in order to figure out if my idea for combat would work. Now the combat in my game is based around managing your fatigue while avoiding getting hit, pretty generic, but if you (or an NPC) lose all your stamina, you fall into a ‘recovery mode’ where you are very vulnerable to attacks. This allows you to either work down your enemy’s health by hitting them, or instead working their fatigue so you can knock them down. In order to fight, there are a few things you can do, attack, block or break. Attacking will cost some stamina, and will reduce the enemy health if you hit. Blocking drains stamina, but prevents attacks from doing damage, and breaking costs stamina, but will stagger your opponent regardless if they are blocking or not. Doing combinations of these actions and using recoil times and whatnot is where the skill comes into the combat. But now the real question, how do I explain this kinda complicated system to the computer? There are a few ways to do AI for this, for example the robotics lab at my university uses state machines for their AI, but for this I’ve decided to use simple flowcharts. Every AI cycle (which is every 100ms), the AI goes through a flowchart to determine what it should do next, these decisions are based on what it’s opponent is doing, what it was doing before and a bunch of random dice rolls to make it less perfect. To help design this, I actually planned out some diagrams that show the order of decisions and results of each outcome, so I’m going to put them here and explain them a bit. This is the start point for the AI. If it can see an enemy, it jumps into combat mode, otherwise it goes into a ‘wander’ state where it just moves around the level randomly. The wander states involves a bunch of pathfinding and checking where it’s at in relation to its goals and targets. Sometimes after reaching a goal, the AI will also just decide to stand there for a bit, that’s what the ‘Do Nothing’ step is about. Most of this is to do with pathfinding though, so let’s jump to combat. The decisions in combat are ordered from most important to least important, so obviously if the AI has low stamina the first and only thing it should do is try to retreat. If that’s not the case, the AI need to move towards it’s opponent, if it’s too far away pathfinding goals are generated, but if it’s close enough to attack, then we need to take action. First we check is the enemy is attacking, and roll a dice if we should block, if not, then we also check if we are currently blocking as the defend section also deals with dropping our block. Assuming nothing was chosen, we then roll a dice to see if we should attack, and then if we didn’t attack, we roll a dice to see if we start to defend. Finally, if we chose to do nothing, then nothing happens and the AI idles for a cycle. This lets the AI look like it’s thinking and allows for a player to attack. Each of these decisions breaks off to a another section of the flowchart, these are all small sections in the next diagram. First off we have defending, if we have chosen to defend and the enemy is attacking…well we really should defend, but if our enemy wasn’t attacking, we can choose to not defend anymore. This decision ‘loop’ works with the combat section and may change in the future if it gets more complex. Next we have retreating, which basically asks if we are close to the enemy, we move away, repeat until we have stamina again or we are far enough away. For attacking we check if the enemy is blocking, if they are we roll a dice to see if we will do a break on them. If they weren’t blocking, or we decided not to break, than we roll another dice to see if we attack. Now you may be wondering, why do we have so many dice rolls and why would you allow the AI to do stupid things, such as attacking into a block or deciding not to block an attack. The reason is simple, you need the AI to make mistakes otherwise it wouldn’t be fun to play with. In an earlier build I had the AI always block incoming attacks, but it made the AI nearly impossible to beat. You’d stagger them and if you didn’t time the attack perfectly, they’ve be up blocking the attack straight away. By adding some random chance in, the AI will only sometimes do that, other times it’ll try to do something else and get hit. Anyways, that’s the AI I’ve been working on, still got a bit of work to do, for example stamina isn’t implemented yet, so you can break and block as much as you like, but for this post, that’ll do! Here is a video of me fighting the AI.
-
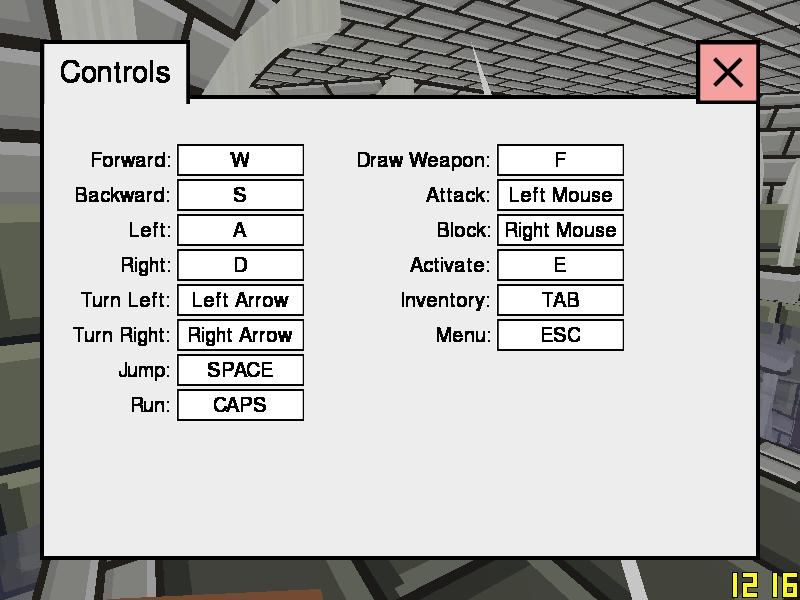
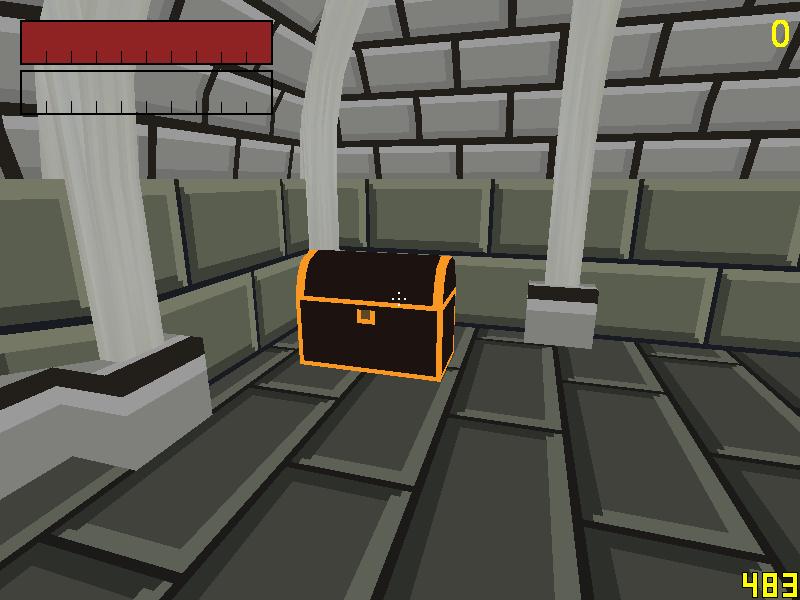
So let’s see, my calendar says it's been about a month, so it's time for an update. I'm back at university at the moment, so game dev always comes second to assignments. For my second assignment this semester I want to use my game as an example of trying different ways to play games with one handed controls. But in order to do this, I needed to polish up some things and add some 'game' to my game. First off, I needed a user interface, things like health bars and menus. Now I could have gone and found a c++ library to do this....but where is the fun in that. I have worked with many different drawing APIs over the years, so I know the basics of how you should structure and encapsulate different elements. So I've programmed a couple of UI elements that can be put into different menus that display on screen, but I'm not going to go into depth about how I structured everything to work together, cause that would be boring software engineering stuff. Important part is that now I have an escape and options menu, along with some other controls like reloading the game and exiting. The options menu is pretty sparse and just contains a page for remapping controls, which is sort of required for this assignment about control schemes. Now for the game part. Last I left off I could move around the level and have animations play, but you couldn't really 'do' anything. So first I added some UI items for health bars that appear for you in the top left, and for enemies, over their heads. Then added a system so that when an attack animation plays, it will trigger a hit at the right moment of the animation (and do all the checks to make sure it does hit). Blocking an attack also causes the attacking creature to stagger, allowing for some very simple block-attack strategies. Now there was some combat, but the AI was bone stupid, it would just run up and spam attack. To fix this, I booted up Morrowind to see how it’s AI in that game acts....since it is the most similar game in style that I could think of. In that, an enemy will run up and attack, then either pause in place, or move around to attack from a different angle. That isn't too hard to do, so I added that to my wolves. The combat feels bad, but it does work enough for now. Definitely something I'll come back to later. The last thing I wanted to add was some sort of points system to make up for the lack of any looting at the moment. My level generation has a section marked 'treasure' so I made it so that chests were placed into levels at these places. When a chest is 'activated', or a wolf is killed the player receives points, in order to have 'completed' the level for my assignment, a playthrough will need to kill all the wolves and find all the chests. The points are shown in the top right of the screen. That’s it for now, hopefully I'll get another post up sooner than a month next time...but probably not. As an aside, I've just finished organising what I'm going to be doing for the next few years now that I'm graduating. I've put in application to start a PHD with a living expenses scholarship, where I'll be working with VR technologies in one of the university labs. With any luck I'll get it and be able to continue this game dev while I'm doing research.

-
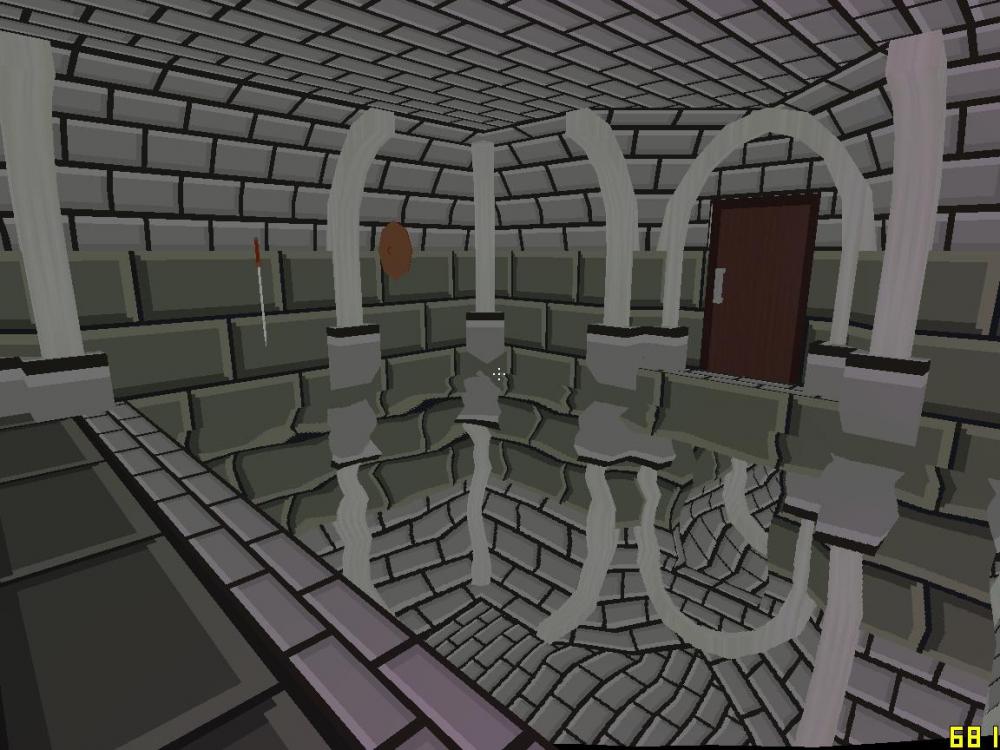
I figure I should outline what I'm doing next and why exactly it's the next feature to work on. At the moment I am doing a course at university on human computer interaction and am doing a project based around disability accessibility. The first part of the project was a written report on one handed gamers, but now for the second part I'm doing a more practical task. Using what I learnt writing that report, and my own experiences, I'm going to attempt to design a controls system for my game that would allow it to be played with one hand. The reason this is a worthwhile task is that I've made my game using the standard, movement keys and mouse look, which is actually really hard to control with one hand....just try playing Skyrim using just one hand....it's possible, but not easy. So that's the task, but what do I need to do? Well I need to add some 'game' onto my game, such as the ability to do many different actions, and some gameplay (such as killing enemies) so actually test the control on. Here is my list: 1. Finalise the character model. At the moment I have a character model, but it only has a few animations because I was unsure how many more bones I needed to add to it for animations. Hell I wasn't even sure on the visual style I wanted. But to move on I need to make a decision there. 2. Create animations Once the character model is complete, I need to create a bunch of animations. Attacking, running, jumping, blocking and stagger. 3. Program interactions. At the moment my wolf creature will load in, path to the player, and attack non-stop. I need to improve this AI a little, then allow for some simple combat. The wolf needs to attack, then pause (either moving or not) then attack again. For the combat, I need to be able to attack and do damage, block attacks and take damage. 4. Once this is all done, I can look at designing some controls systems for my project. Ideally I want this to be designing controls by the 19th, I feel if I buckle down I can achieve all this by then. The hardest part will be the programming, but it'll be the most fun aswell, so here hoping that is smooth. PS: All this animating I have to do, I hate animating. I'm a programmer damnit, not an artist. PPS: Here is a picture.

-
If you really wanted to make a 'true' sky, you could make a sphere, then use a bunch of maths to calculate what colour the sky would be based on time, sun location etc...but it's really overkill, I did a little of that in a previous project, but it's more hassle than it's worth. What makes spheres so hard to texture is that it is just difficult to map a 2D image over a 3D sphere without getting seams (think trying to put a piece of paper around a ball).....a good artist can do it, but it's definitely not easy. I think you'll find in a big AAA game, how you described is exactly how they would do it, as it gives a good artist lots of control over how things look, but I'm not a good artist, so I do a simpler technique. If you do a quick look around online for skybox textures they are normally cubes with 6 textures, one for each side, which is why I think a bigger game would be like that. This works fine if you just need a static sky, but if you want moving clouds and weather effects (like I want to do eventually) that system doesn't work. Also, the main reason I wanted to only have 4 images is because of powers of 2. For mipmapping, it helps to have textures with sizes that are a power of two (so they can be divided down easily), which is fine if you want 1, 2, or 4 images in a texture....but if you want 5? well you'l have 3 empty spaces in your texture. I hate wasting space like that, especially in a texture that is going to be big already like a skybox.
-
Sooooo....I'm really lazy. The North and South look at the same, just mirrored, so I can used the same picture for them and just flip the UV map. Then the east and west each have their own image, and then the upward plane has it's own texture. There is no sky downwards...so I just cut off that part of the box and therefore it doesn't need an image. I tended to have some 'seams' along the edges of the box, so I added some more vertices to each side and pressed the 'smooth vertex' button a few times to deform it into a sphereish shape which helps hide the seams a bit cause they are now bent instead of straight lines. I make things up as I go along, I have no idea if that the 'proper' way games do a skybox, but it works well enough for me.
-
Had a uni report that was taking up all my time over the last few weeks, but that's finished now, so it's back to some game dev. I will come back to my water shaders later, I need to work on the refraction a little bit to make it look better, but for now I want to do the next thing on my checklist. A day night cycle. First off I need to make a skybox, this is where the texture for the sky goes. I started with a cube and just grabbed a skybox texture off the internet to see how it looked....not bad but a long way from what it should be. I've decided to separate the gradient of the sky from the clouds, that way I can have a static sky and move clouds around to make it more 'dynamic'. I've talked about the gradient of the sky before on here in an old topic, but here is the basics. On a clear sky you have almost white at the horizon, and a deep blue straight up, with a gradient in-between. Using a skybox, I can have a radial gradient on my top square, then have a vertical gradient going up the side squares. Night time is also easy, since you can apply an almost black colour across the whole thing....no worries. But dawn and dusk are much harder. Now you need a variety of colours on one side of the sky, with it fading to a solid colour on the other side. I ended up using Illustrator instead of Photoshop to make these since it's gradient tools are a bit more advanced. With a bit of playing around, I ended up with a dawn texture that looks like this: Now to the implementation in the game engine. The skybox is actually quite interesting, as it is implemented differently than you'd expect. It is actually a small box placed over the head of the player, and through some graphics tricky by making everything else render in front of it, it appears as it it's far away. The reason I do this is so the horizon moves with the player, I could have made it just really huge, but then you run into depth precision problems from making your view distance too big. The cube is then rendered, and depending on the time of day, it can transition between the different sky textures to give the appearance of it changing. The other important object in the sky is the sun and moon, so that was next. The sun and moon are simply two billboards that rotate around the player's head in a similar way to the skybox. The sun is simply a white sphere with a yellow glowing edge, and the moon was just some grey smudges and lines with a smaller glowing white edge. Basing their rotation around the player's head on the time of day in the game I could simulate them moving across the sky. Then I simply applied the time of day to effect the ambient light in the level and And Ta-Da! I have a very simple day/night cycle. Here is a video I made of it:

-
Phong actually has a bit of a sad story. He defined Phong Shading and the Phong Lighting model in his PHD thesis in 1973, models that are used to this day....while he was suffering terminal leukemia and died only 2 years later. It really was a case of someone who had so much potential dying way too young.
-
I suppose you can't see it, but in the picture above that light is being generated by a wall torch, that is not a player light. Water is a tricky beast when it comes to light. For example, normally you work with Ambient, Diffuse and Specular.....but Diffuse doesn't make sense on water since the surface doesn't block light, and ambient tends to be applied as a constant. The reason I've added the player light is just to give a little definition to the water shape when there is no direct light source to generate specular. I guess you could think of it like applying the level ambient light, just as specular. Thanks
-
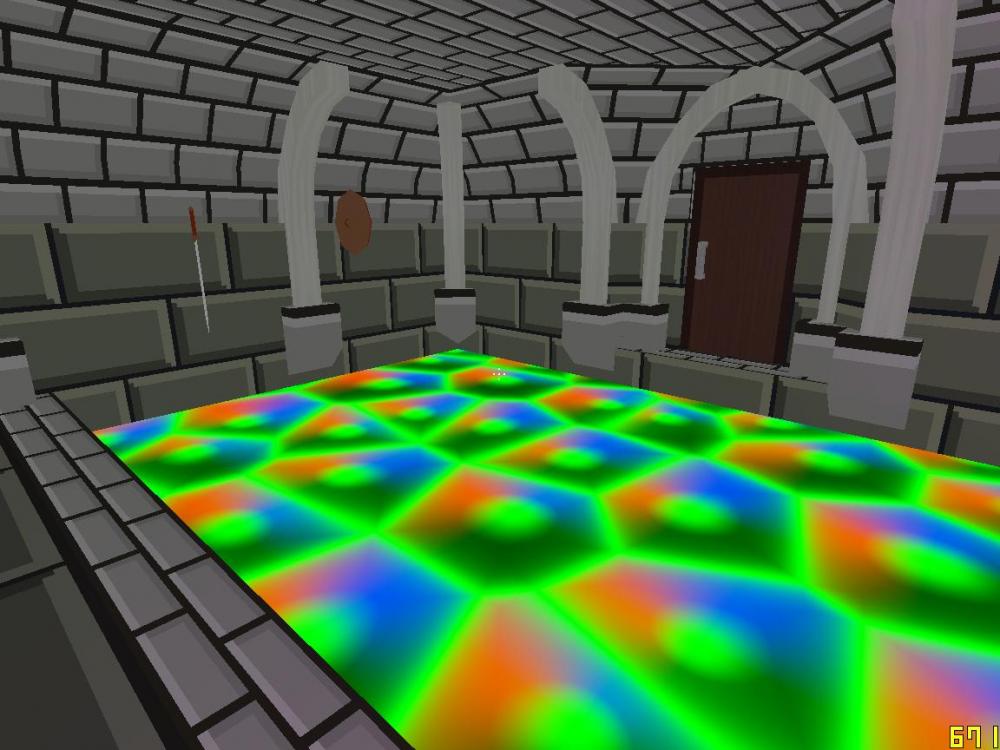
There is a rule in games graphics that near enough is good enough, perfect simulation is great, but you have to make a trade off with performance to achieve it. For example, if you want realistic lighting you would use ray tracing, but that's too expensive for games, so a variation on the Phong model(ambient, diffuse, specular) is used instead. Now I was going to calculate the normals for the waves, then use them to figure out how have the reflection would bend off the water....and I realised....that's too much. My technique of just moving the sampling position around does a fair enough job of bending the texture, who cares if that's not how real water would look. I did still need the normals though, and I wanted the water to look a bit more 3D, so I moved the heatmaping to the vertex calculations (which also makes it faster, since it is expensive and doing it per-vertex is better than per-pixel). Here is a trippy picture of the normals applied to the waves as calculated on the per-pixel basis. On a tangent, unlike regular programming, you cannot 'print' out values to debug shader code, and you can't stop it during execution to see what is happening. This is because everything is happening in massive parallel on the GPU, so your only choice in debugging is to display out colours and try to figure out what is happening. This can be very frustrating if all you are getting is a black screen though. Now with 3D water, I needed to add lighting effects to it. This was a bit hard, but long story short, this is how it works. I need to blend together the reflection, the refraction, the colour of the water and the lighting values. The refraction and reflection already have the lighting applied to it's colour from rendering the picture, so it only needs to be applied to the water colour. In order to blend the water colour, the colour based on reflections is calcuated, then the water colour with lighting is added to that value. As long as the water colour isn't too bright this works well. However there was a problem, when it was fairly dark, the water looked bad, it was mostly black so you couldn't make out the movement. To fix this, I added an extra small light coming from the player's view that only applies to water. This then adds a small, but important, specular highlight to the waves so you can see them. Here is the finished product:

-
I was actually lucky enough to do a course on the graphics at university, which is known as the hardest programming course at my university. I'm not quite sure how you'd learn to write shaders without a really in depth lessons like that. It's all matrix/vector based maths, with some trigonometry thrown in. If you were just learning shaders you can start at the bottom, translate vertices into the right places, then sample pixels from a texture. But in OpenGL 3.0 onwards even that requires knowledge of the different screen spaces and how to build a projection matrix. There are of course tutorials, but I can't really point you to any and say 'this one's good', since i never learnt from them. In fact, I'd say most people are better off using what shader system a more advanced engine has, things like Unity and Unreal have very good tutorials for writing shaders. In terms of an editor, that's all just several years worth of software engineering knowledge, I've copied things from other game engines, like Bethesda's modding tools, and Unity.....but other than that it's just making whatever I think I need. This was my second attempt at an editor, so I was able to copy paste of the bits from my old one, but it suffered from a lack of planning as it was my first attempt at such a program. The editor itself is just Windows CLR C++ program, but for someone new, they would be better off working in C# for such a thing.
-
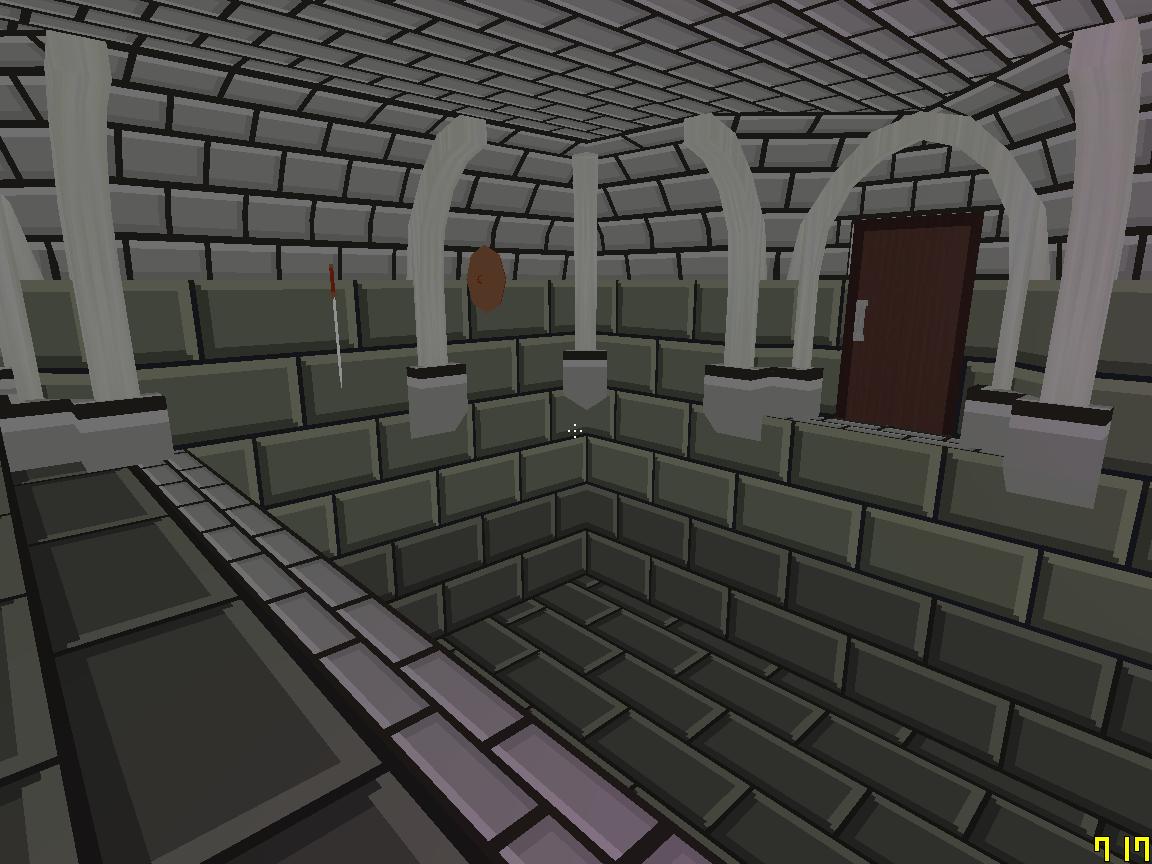
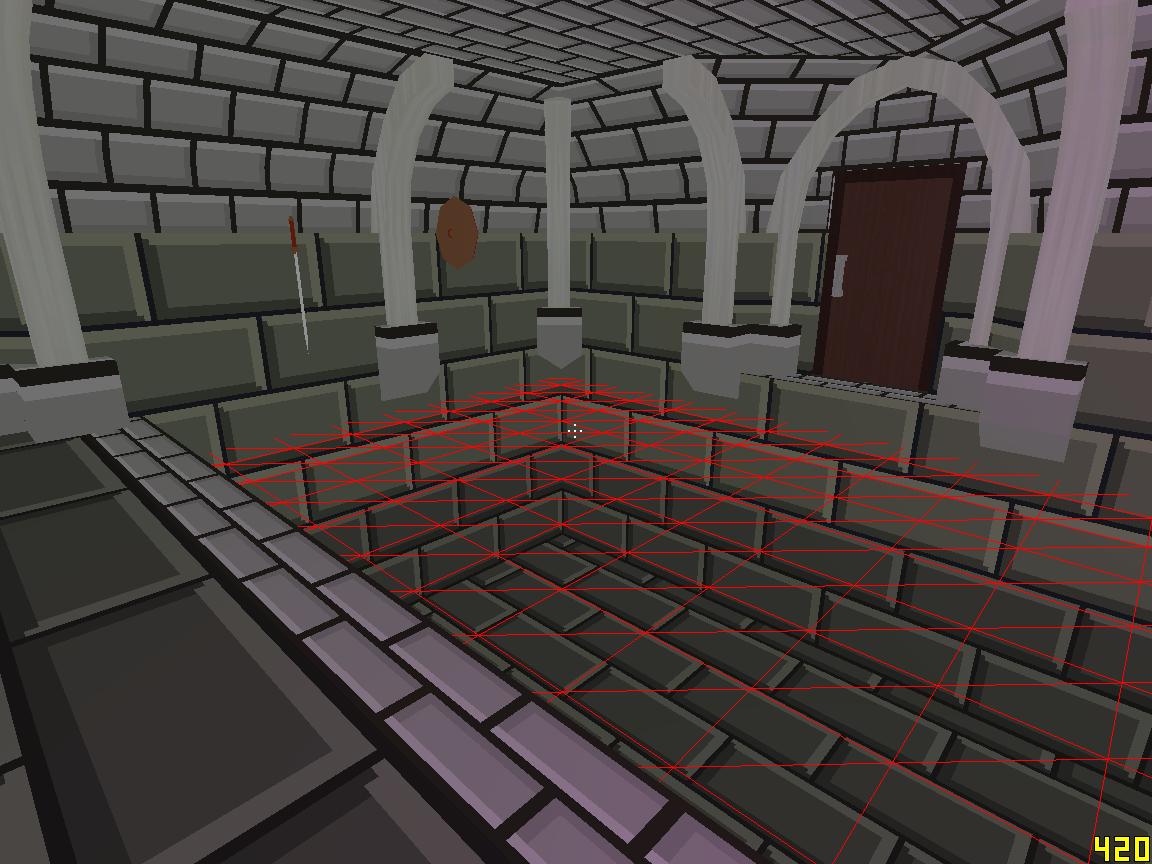
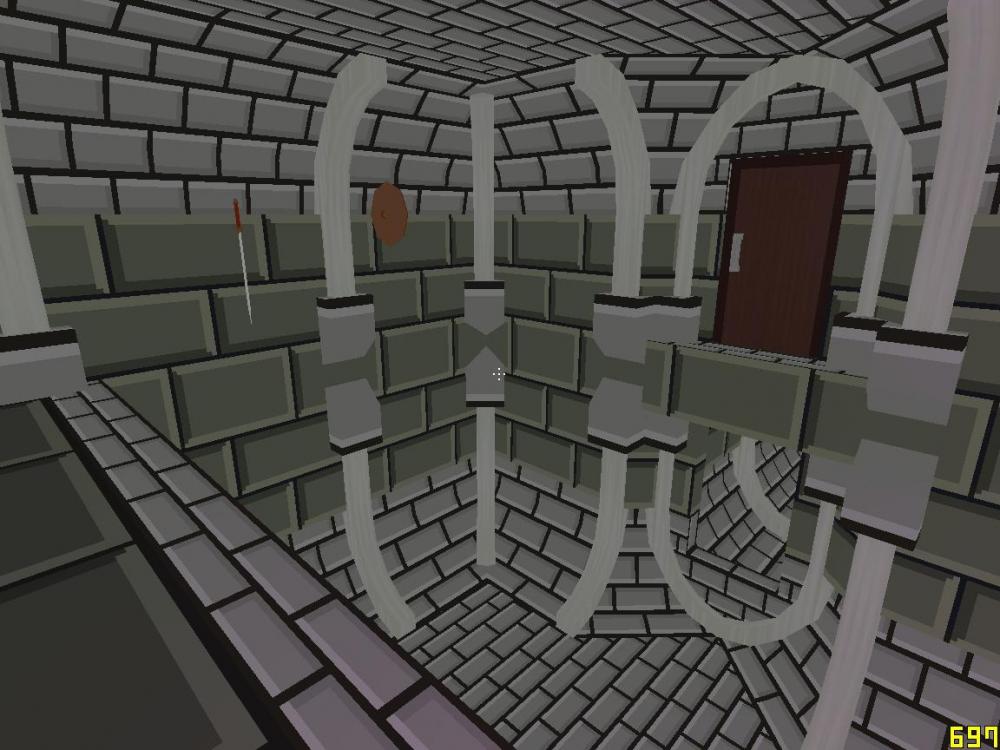
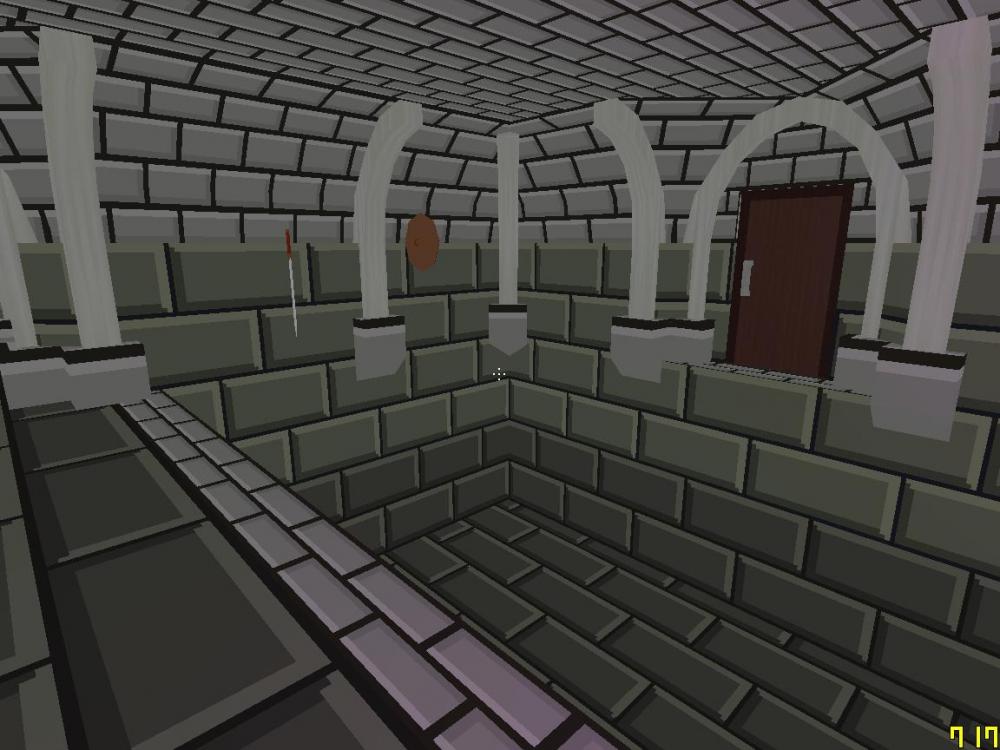
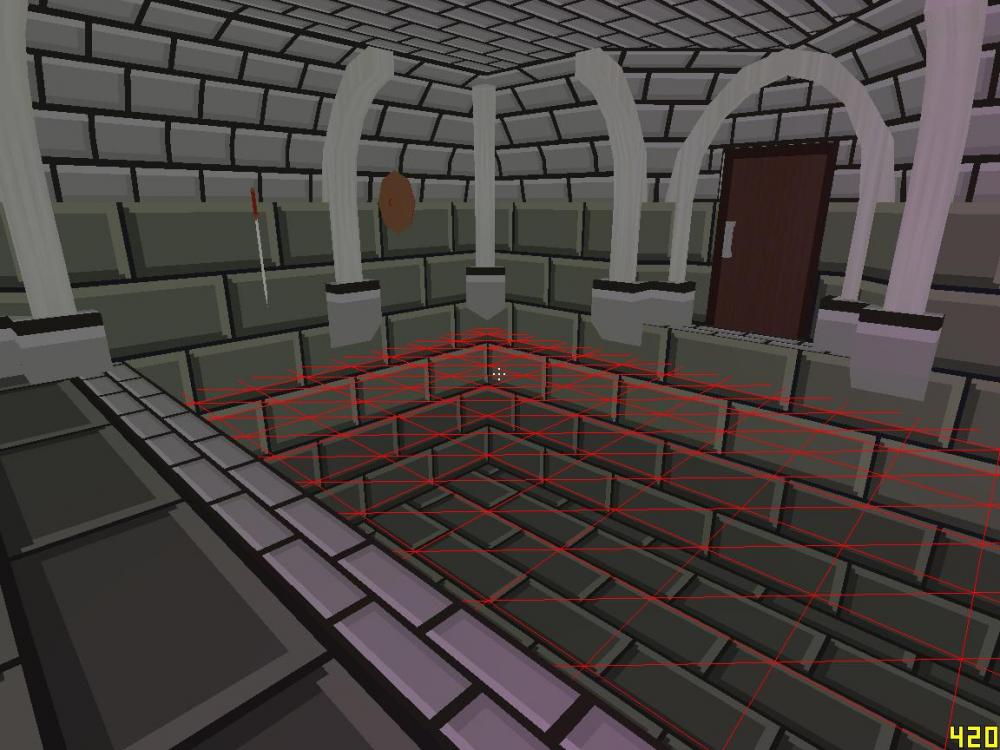
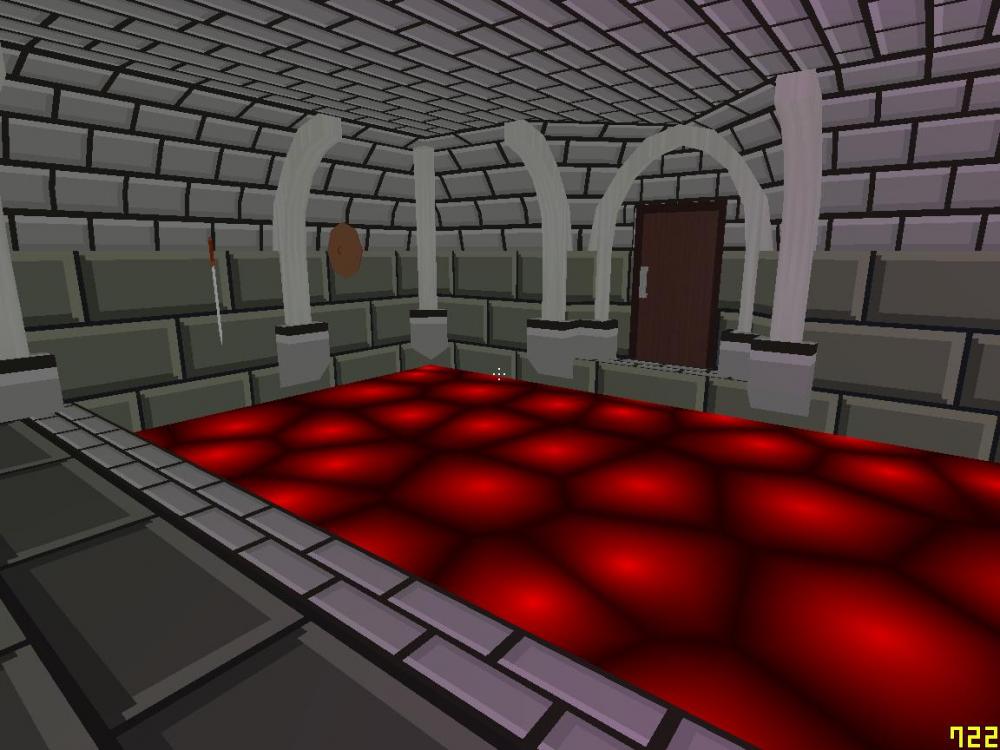
Okay, time to talk about what I've been up to. I've got a bunch done on the editor, object lists, and modifying the level. I need more game done though before i continue as some objects have not had all their attributes listed yet, so it's no worth creating editing forms for them. Here is what it looks like now. So it's back to the game, and I feel like doing some graphics stuff again....so it's time to write a water shader. In my levels all these pits are supposed to be filled with water (or not, I can set a water level in the editor). These pits: So shaders are used to colour in all the pixels on the screen once all the complex graphics stuff has happened....but a water shader is different again. Water reflects light, so if you view it at an angle you'll ofetn see a distorted reflection of the other side. Water also distorts your view underneath it, warping the shapes of things below the surface. Lastly it often has a colour to it (if not perfectly clean), so that also has to be added. So first I need to make a reflection, this is actually a common thing in complex graphics, so OpenGL has a thing specially built for this called a framebuffer. It allows me to render an image, then use that image as a texture on a future render. So we move the camera to the reflected position relative to the water, take a picture, then when we draw the scene, use that picture to draw the reflection. There is a tons of maths involved in that, but that's the simple version. Here is how it looks: That's a bit boring though, and unrealistic. Water tends to move (and in games it looks bad if it's not moving), so I need to find a way to move the water. The water itself is a single huge flat plane, so what we need to do is 'fake' some waves on it. The technique I eventually decided on, was to use pseudo-random points (not random, so they look random, but will always generate the same) and build a heatmap with them. The closer a pixel is to a point, the more it distorts the image. Without the texture, this is how the heatmap looks: Would you believe that those points are actually in a simple square grid, just a bit of cool maths to 'randomise' them, without it being random. Then when it is applied to the reflection picture: Each of the points move around in an ellipse and can overlap to give an interesting visual. However there is a big problem, water doesn't act like a perfect mirror, we need to see the bottom. Water refracts light however, so we also need to distort what we see. Another frame buffer to get a picture of everything under the water, and then we apply the same heatmap to distort that and tada! We have something that looks decent: I'm not happy though, I've done a good job at faking the water movement, but my technique is just distorting texture sampling and not doing proper transformations. For that I need to calculate normals, and if I'm going to do that, I might as well make the water plane itself move. Instead of a single huge plane, now the water is made up of many small squares, I can then apply that same heatmap to those points to physically move the vertices. That's where I'm up to, I'm going to go do that and see how it goes.


-
What do you want to do with this lesser power? Just give it to the player?