DOWNLOAD MODS
Are you looking for something shiny for your load order? We have many exclusive mods and resources you won't find anywhere else. Start your search now...

LEARN MODDING
Ready to try your hand at making your own mod creations? Visit the Enclave, the original ES/FO modding school, and learn the tricks of the trade from veteran modders...

JOIN THE ALLIANCE
Membership is free and registering unlocks image galleries, project hosting, live chat, unlimited downloads, & more...


elfmoose
-
Posts
130 -
Joined
-
Last visited
-
Days Won
2
elfmoose's Achievements
Disciple (5/11)
5
Reputation
-
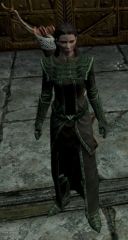
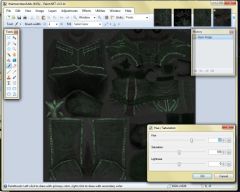
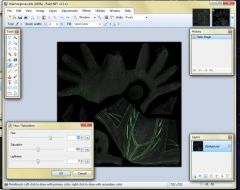
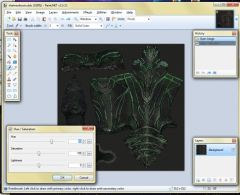
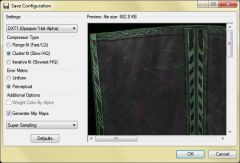
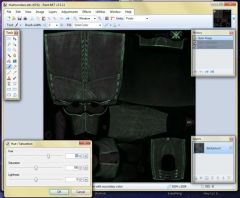
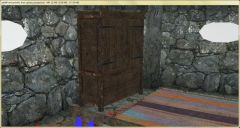
Lesson 1 homework: Thalmor robes - hue slider, save settings and in game: Male gloves and boots: Female robes and gloves: In game shots:
-
Homework screenshots
-
-
Thank you DarkRider! Wait until I get armor on all of those mannequins. version 2 of this mod will have a snout room and a book room and then I want to design some armor.....
-
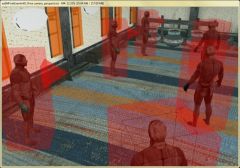
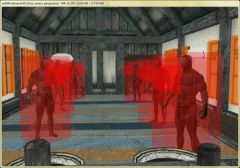
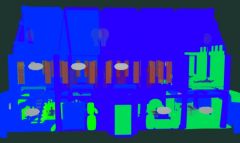
I was using my mod yesterday. Mammoth snouts seem to bounce around when you get too close to them whether havoc settling is turned off or not. I'm wishing I'd built a room and filled it with several dozen snouts with havoc settling turned on. I find them hilarious. Also, something killed all my chickens. Do you know of any chicken protection marker? Would a fence help? And I forgot to mention that the mannequin instructions from the UESP site said they work better if they are on navmesh, so I put them on top of the navmesh.
-
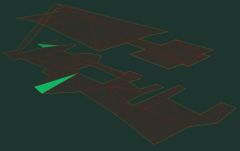
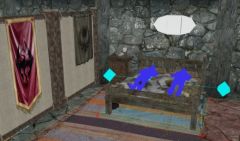
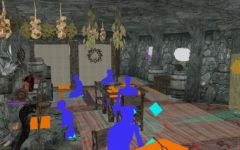
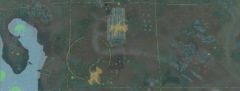
I finally got it done - the release version! Hopefully I uploaded the file and resources correctly: http://tesalliance.org/forums/index.php?/files/file/1578-elfmoose-farmzip/ My goal was to create a compact house with lots of storage, all crafting items and a place to display keen weapons and armor so I could actually SEE them. It's nearly impossible to see things with a busy stone wall behind them. I really like the farmhouse with the porch for smithing. Basically I made the house that caused me to look into modding in the first place. Also, I tried to install a working bookshelf but couldn't figure it out inspite of having detailed instructions. All books I put on the shelves zoomed to one side and fluttered like they were trying to escape. I gave up on it. Here are screenshots of the assorted requirements. The cells I chose were outside Whiterun. 10,1; 10,0 and 10,-1. The only thing I didn't do was the broken paving stones. Their dirt was a different color and also, since my lane was coming off a non-stone path it seemed weird to put stones on my path. Instead I put in two ivy covered stone walls, which look a little like caterpillars. Basement: Navemesh and some planters, archery practice area and lockpicking practice containers (respawning - and also hopefully re-locking). I had to find instructions for planters. Since these are in the basement I altered the grow list to include only mushrooms, fungus, nightshade and deathbell. Basement lighting: Exterior. There are lots of little goodies planted all over the place. Not to excess, hopefully. I also duplicated some of the insect spawning markers to see if it'd work and it seemed to. Also, here in Maine folks often mount antlers on their houses and garages. I took that a step further and mounted some animal heads on the outside of the house. Also tried to cause the dragon head to glow from inside but it didn't work out. . Exterior navmesh of all 3 plots: Interior, main floor: Note the chair and fork in the foreground. I have no idea how they got there but they are NOT in the final version. I just forgot to redo the screenshot. House navmesh and lighting: 2nd floor: Yellow wallpaper from Lilith was my solution to more visible weapons but it made it challenging to get the lighting right. I had to remove half the lights from the chandelier and remove the light from the bedroom area. The light below is no longer in the bedroom area, nor is the light effect. I changed the light to the farmhouseinterior light and that was still too bright. I put a jar of butterflies there instead and moved the lighting effect up high as if it was reflecting the chandelier light. And here are the dudes in the utility cell for the assorted planters: Let me know if you need more pics of anything.
-
Version 01
87 downloads
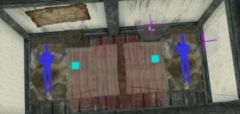
Elfmoose Farm is the place to go for storage, ingredient picking and growing and all your crafting needs. Exterior: From the main road to the river you'll find all sorts of unexpected plants for harvesting (look carefully!) as well as a garden for food, chicken nests and sheaves of wheat. The house is decorated with mounted animal heads including an extra large slaugherfish. A full blacksmithing area is on the side porch with a smelter and woodchopping area nearby. Also on the porch are 2 respawning fish barrels (don't store stuff in those) Interior 1st floor: You'll find an achemy table, enchanting table, cooking spit and oven along with lots of storage, table and chairs and sleeping area with double bed and more storage. The sleeping area is separated from the main room by dividers designed by InsanitySorry. Many thanks to Insanity for designing them! [The divider file can be downloaded here: /index.php?/files/file/1394-%20%20insanitys-room-dividers/">http://tesalliance.org/forums/index.php?/files/file/1394- insanitys-room-dividers/ Weapon plaques (the kind that hold a shield and 2 weapons) are scattered throughout. Interior basement: Here you'll find a lockpicking practice area just like the thieves guild has with 5 different locked containers that respawn (don't store stuff in those). Theoretically they'll re-lock eventually as well as respawn. There is are also 4 large planters for growing mushrooms, deathbells and nightshade only. (You can't expect to grow flowers in a basement, afterall). And there's also an archery target area. Interior 2nd floor: Massive amount of assorted mannequins and weapon racks. The walls are covered with pale yellow wallpaper so the weapons show up better, which was one of my main reasons for embarking on modding inthe first place. Many thanks to Lilith for creating the wallpapers which can be downloaded here: /index.php?/files/file/1253-%20%20liliths-wallpaper-panels-modders-resource/">http://tesalliance.org/forums/index.php?/files/file/1253- liliths-wallpaper-panels-modders-resource/ Also on this floor is more storage and 3 planters in which you can plant anything that can normally be planted. at the far end is another bedroom with 2 twin beds and a little more storage. All containers contain little goodies. A HUGE thank you to DarkRider for teaching the modding class which was incredibly thorough and challenging. This mod is the final exam for the modding class. My goal was to create a compact house with lots of storage and a place to display keen weapons and armor so I could actually SEE it. I am immensely grateful to the folks at Bethesda for creating Skyrim and for giving us the tools to tweak it. Last but not least, I thank my husband for getting me to play Skyrim. He's been a gamer forever. Skyrim was my first game. -
-
Oh Stubbkrossen! What a story. Ouch. Glad you recovered OK. What a great name origin though. I bet you don't run into others who have the same name!
-
I use moose in many things because they are odd looking and funny looking and I seem to see them frequently. When I had to come up with a user name for Steam I was about to start playing Skyrim and had decided to be an elf first. Elfmoose seemed more logical (and less silly) than MooseElf.
-
Interesting! I thought maybe you were a Michigan State University Fan.
-
Arrgh! I feel like an idiot. Had the darndest time getting pictures into posts. I searched all over for instructions but didn't think to use the word 'embed'. Duh. Finally found the appropriate tutorial AFTER finally figuring it out. Feel like stapling a sign that says NOOB to my forehead, except no one would see it.
-
Thank you everyone. The modding tutorial page should come with a disclaimer that modding can be addictive. (I couldn't find a plain smiley face in the popup row but this one is a great representation of what my eyeballs felt like after navmeshing....) Ah, I found it:
-
I'm fairly new to gaming and very new to modding. Decided to make my own mod for two reasons: to make my own little farm and to make a place to display all the keen weapons I've accumulated. The other day I saw knitting in a basket in someone's homework house. And then last night I found where they got it. Now I want to learn how to get those things into my own house and (of course) how to make my own keen stuff. That's probably too much information. I'm really happy to have found this place.
-
I'm not sure whether to ask questions here or in the class area but after reading the above it sounds like here is the preferred place. As I'm navmeshing, sometimes I accidentally hit the caplock key. For a while after I un-caplock, I can't place a point. Any way to fix that? Also, Is there a snap to edge feature for navmeshing? What I mean is, when I place a point in the middle of an edge I'd like to to attach to the edge without having to fiddle with it so much. Last, why do the 2 green vertices of the previous triangle face a wall or furniture so frequently? Should I click vertices in a different order perhaps? Thank you yet again.