DOWNLOAD MODS
Are you looking for something shiny for your load order? We have many exclusive mods and resources you won't find anywhere else. Start your search now...

LEARN MODDING
Ready to try your hand at making your own mod creations? Visit the Enclave, the original ES/FO modding school, and learn the tricks of the trade from veteran modders...

JOIN THE ALLIANCE
Membership is free and registering unlocks image galleries, project hosting, live chat, unlimited downloads, & more...

Leaderboard


Popular Content
Showing content with the highest reputation on 07/02/2012 in all areas
-
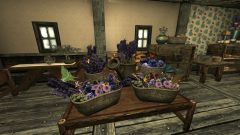
From the album: lilith's Collection
My buggy baskets have been recreated! Which means "Ready Clutter Modders Resource" will be ready for download sooner!2 points -
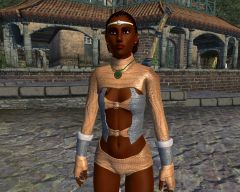
From the album: Gram's screens from Morrowind, Oblivion and Fallout 3
Out of pure boredom I added some normal maps and made new textures for gloves and shoes/boots that contain more chainmail. This is the glossy version, I like the metal parts being that shiny, a bit like Mithril should look in my imagination (silver, almost white and very reflective). The leather is not too bad, like a slightly polished leather or snake skin. The cloth part should be tweaked a bit. Anyway, this is my version of the Exnem Rogue Outfit, trying to keep the base character of the armor and still making something different (wouldn't actually use it for other body types than TGND or similar, the chainmail could stretch awfully).1 point -
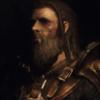
 Wow, he's hot1 point
 -
I like the combination. The leather is a bit too shiny for me, but overall the look is very nice!1 point
-
I have to disagree with echo - rigging is not easy if you have no clue of the basics of Blender to begin with. And I'll somewhat agree with Khett - start with the Oblivion modeling classes (Vince's word document downloads) to understand what Blender is and how to get around. Once you start and learn static objects, then move on to armor/wearable objects. It will be a long learning process. Btw, isn't that my teddybear?1 point
-
There's a quick and dirty tut here that will show you how to import your nif into blender, do what needs to be done to get it basically working, and export it back to a usable nif. It's the last file in the list: Tutorial_Import_Export_Armor. Another tut that really helped me understand more how work with body/armor/clothing meshes was the "Exnemizing Meshes" tutorial at TESEyeCandy. You aren't converting armors, but the parenting/rigging/weighting/etc is exactly the same process, so you'll be able to just skip the part about refitting the stuff to the body and jump in somewhere in the middle of Part 3 of the tutorial. Can't link here, because potentially borderline NSFW, but you'll find it easy enough if you search. If you enjoy doing this kind of work and want to get more into it, this tut will be the one that makes the light bulb go on. This is all after having done Vince's modeling class intro here at TESA, though. Start there if the import/export tut gives you trouble and you want to take a step back.1 point
-
1 point
-

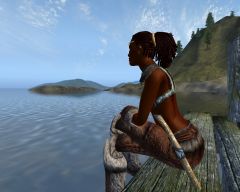
From the album: Curious and Curiouser
That's right Gene, you make a dramatic face as you ride off to adventure.1 point -
From the album: Gram's screens from Morrowind, Oblivion and Fallout 3
Actually, I like this armor the most, (kinda) vanilla fur and huntsmen vest. Looks awesome on her.1 point -
Theres two way of doing that. The easy way, and the right way. Easy way: Select Mirror under Symmetry, and move the dummy until you get the desired result. Right way: Delete the Symmetry modifier. You need to modify the mesh center pivot. Go to Hierarchy tab (just right of the Modify tab), activate Affect Pivot Only, and reposition your objects pivot where you want it. When done, unselect Affect Pivot Only. Now go to the Utilities tab (hammer), and select Reset XForm and apply. Reapply Symmetry modifier. Optional Advanced way: Warning, this technique will only work if your model is perfectly aligned with one of the axis. Also inside polys/faces are not unnecessary so delete them. Do the Right way but do not use the Symmetry modifier. Instead use the Mirror button in the main Toolbar. Choose your axis. No clone will only mirror your mesh. Copy will make a mirror copy, duh. Now the interesting ones. Instance and Reference will make a mirror copy that will change as you modify the original. But in order to attach one to the other when you're done modeling, you need to re-convert both to polys (or meshes). Alway Reset XForm when done. Hope this helps, sorry if I made your 3dsmax life more complicated.1 point
-
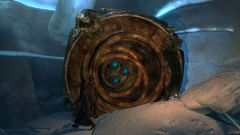
From the album: Skyrim
1 point -
Who are you calling crazy? *squeegee*1 point
-
From the album: donnato's Screens
Kinda goofy but I made this following a 30 minut 3ds tut. at a friends house while teaching her Blender..1 point -
Its actually very easy to do. It doesn't require any manipulation of the models at all. I don't know of a current tutorial to explain it, but probably someone does.1 point