DOWNLOAD MODS
Are you looking for something shiny for your load order? We have many exclusive mods and resources you won't find anywhere else. Start your search now...

LEARN MODDING
Ready to try your hand at making your own mod creations? Visit the Enclave, the original ES/FO modding school, and learn the tricks of the trade from veteran modders...

JOIN THE ALLIANCE
Membership is free and registering unlocks image galleries, project hosting, live chat, unlimited downloads, & more...

Leaderboard


Popular Content
Showing content with the highest reputation on 11/01/2012 in all areas
-
CK Basics Lesson #1: Rendering Skyrim Part I: Creating an Interior Before we dive in, if you are a beginner or approaching the CK for the first time from other toolsets, make sure you have read the Introduction to the course before proceeding. This lesson covers the very basics of working in the Render Window of the Creation Kit. Begin by familiarizing yourself with the list of hotkey controls provided here. Controls to Know: This is a list of some of the most commonly used modding hotkeys for the Creation Kit. For more hotkeys look in the CK under View > Render Window Hotkeys for a more complete list of keyboard shortcuts. Let's get started! Now that you've had a look at where your tools are and what they're for we're ready to make our first mod. If you are starting this class right from the Introduction you may already have the Skyrim.esm loaded in the CK. If not, bring up the CK then go ahead and load the Skyrim.esm now. Smarty Says: When you open the data folder to load a file you will see all the plugins from your data folder appear in the list. Beginners are sometimes tempted to load their favorite mods as well and add things they like from them to their own mods, this is called mod sniping. The trouble is the new mod will only work if you have both mods installed and this is not a technique you want to use when creating mods for release. So, resist that temptation. With the Skyrim.esm loaded in the CK, the first thing we want to do is SAVE to create an active plugin for this session. Click the Save icon on the main toolbar and name your plugin: CKBasicsTutorial It's time to start our first house interior by creating a new cell to work in. You'll note that the default worldspace on the cell view window is Interiors, that's exactly what we want. Right Click on one of the first cells in the list of interiors (AbandonedPrison01 for example) and select Edit. The Cell Window will open, just Right-Click on the first cell again and this time choose New A smaller window will open asking you to assign an ID name to the new cell. Type in a name for your cell, for this tutorial I have called mine aaDRTutorialInt01. In modding there are naming conventions when creating new IDs and they are as varied as the modders and developers who use them. Sometimes beginners think these names need to be uber technical, "Cause if it's not hard it's not modding" This is a false assumption. Confusing names are just confusing, even for you later on. Your naming convention should have a purpose, be simple, and whatever you start with you should maintain throughout the entire project. This makes it easier to track parts of your mod when they are mixed in a load order with dozens of others. In this case I chose "aaDRT" to take my custom adds to the top of every list in the CK. You NEVER want to start an ID with a number like 1 or 0 as it may confuse scripts and can cause issues later when trying to call the ID in a script. DR are my initials, but you might choose instead to use the initials for your project, that way all your plugins will be compatible with one another. Tutorial is the project name of the house we are building, "I" stands for interior, and "01" indicates it's the first of a series on interiors. Once the cell has been named it should appear first in the list. Click on the new cell in the list, then to the right, take a look at the four tabs there: Common Data, Lighting, Interior Data, and Directional Ambient Lighting. There are a lot of settings on these tabs but for this class, let's just focus on the most used settings on the first three tabs. Common Data The common data tab contains settings relating to how the selected cell reacts as part of the wider game world. The "Location"setting better defines the cell's location in the game world. The "Default Acoustic Space" setting, defines what sort of ambient sound/reverb/echo quality the cell will contain (Does it sound like a cave? Or a house?). The "Music Type" setting defines what sort of music plays in the background. The "Has Water" setting defines whether the cell has water, what type, and its depth. The "ImageSpace" setting determines the base display effects for a cell or worldspace, adding visual film type effects like blur or coloring. The other important setting on this tab for our purposes is the "Can't Travel From Here" flag which must be set for interior cells. For now, leave this tab at its default settings, we'll be coming back to this one in Lesson #4 Lighting The lighting tab has two key settings we are most concerned with. The "Lighting Template" setting allows for duplicating the light definitions from a different cell for use in the current cell. The "Ambient" setting defines the light level and color for the current cell. For our tutorial select the Lighting Template titled: FarmLightingTemplate Interior Data The interior data tab has four settings we want to change for our interior cell. The "Name" setting provides the in game name for the cell player's see when entering the cell. The "Encounter Zone" setting determines how this cell behaves with leveled lists; this setting does not apply for homes, it's for dungeons where leveled lists are placed to determine the type/strength of enemy encounters. The "Owner NPC" and "Owner Faction" settings are used to determine who owns the cell and everything within it; choose a common faction setting when more than one character shares a cell. The last section of flags determine the access permission parameters for the cell (Is it a public place like an Inn? Is it a private place like a nobleman's room? Can the player wait there?) For this tutorial, enter your interior's name, set the encounter zone as NONE, set the owner faction to PlayerFaction, and check the Public Area flag. When all of these settings have been set, click OK to close this dialog box and SAVE your plugin. You will see your new cell has appeared in the cell view window at the top of the list if you started your name with "aa" as recommended. Double click on it in the cell view window to load your cell in the Render Window. Part II: Working in the Render Window Since this is a new cell what you will see is a sad empty grey void, but we're going to change that right now. On the Object Window, you will see a category called World Objects. Click the + sign next to it to expand the categories tree. You'll see a new list of category branches under World Objects. Click the + sign next to Static to expand the most commonly used tree in Skyrim Modding! Static consists of all objects that are static in the game world, meaning players can't move them. Click on STATIC to load all statics in the object window list The objects in the Static window are listed in alphabetical order. Scroll down to FarmInt2End02 click on it with your mouse, drag it to the Render Window, and let go to drop it into our empty interior cell. Even though we can't see it, there is an invisible grid in every cell even interiors. When you set your first kit piece you want to set it to the 0,0,0 point on the grid so that everything else you add to the scene will be built to this grid. This is especially important when building things that require kits pieces to be joined together like in dungeons and caves, but it's a good habit to get into for any interior. To set our interior to the 0 point, double click on it to open the Reference Window. Smarty Says: The reference window can change an object's position, rotation, disable/enable quality, scale, or persistent status, and can access an object's Base Editor! You can double click on any object, NPC or creature to find its reference window. In the reference window for our farm interior kit, set all the position values to 0 and click ok. When the interior static moves to the 0 point you might not be able to see it in the render window anymore. Double click on the cell view window content list to move your render camera back to your house interior. Now before we go any further let's click the SAVE icon on the toolbar to save our mod. Smarty Says: Save! Save! Save! Modding Toolsets can crash at any time for any reason. Because that is its nature, you want to save often so that when it does crash, you don't lose too much work. Rarer, the toolset occasionally corrupts a .esp mod file when it crashes, so at the end of the day, backup your day's work and maintain a backup copy of your .esp just in case. Part III: Building on the Grid To maximize customization and uniqueness, most of Skyrim's interiors are made up of several kit pieces locked together on the invisible grid, including farmhouse interiors. Click on the first piece of our farmhouse interior, tap A to turn on the work light, and you'll be looking at something like this: The rainbow colored cube around this piece of the house interior is the active highlight. Whatever object has that highlight around it is the object you can actively move with your mouse. Because we set this piece to the 0 point, we do not want to move it anymore. But, by holding shift and moving your mouse, you can practice moving your camera around this piece. Learning the camera and getting used to the depth perception in a 3D drawing space are the two trickiest parts about learning how to mod. Once you get comfortable with moving the camera and using the keys, this sort of building will be something you can, ¦and likely will, ¦do in your sleep! If you do accidentally move your house, you can always tap ctrl+z to undo your last movement. Just be mindful of what you have highlighted and those accidents will be minimal. We're now ready to add some more pieces to the grid. To make sure we have no overlapping kits or open seams, we want to put our kits together using the snap to grid feature. On the main toolbar, click the preferences button to open the preferences dialog. Before using snap to grid for the first time, we want to change the default snap to grid distance from 64 to 16. Once you've changed this setting, click Apply and Close to set the changes. With this narrower margin for error set, let's turn on the Snap to Grid tool on the main toolbar to turn this function on. If you turn this tool on before dragging additional pieces into the render window, then everything you add will enter the window on grid, which is good, so make sure you turn it on before adding additional kits! When ready, find our next kit piece in the Static list FarmInt2Doorway02NoDoor and drag it into the render window. Use your mouse and alternate holding the X,Z,C hotkeys to move this piece right alongside the first. You'll notice that it moves more than one unit at a time, that's the snap to grid feature at work. Remember not to move that first piece, it's the head of the snake, we need its position to ensure all the other pieces attached to it are aligned properly; it is the start of the grid. The grid is invisible, but when you have Snap to Grid turned on, the pieces are able to find the grid. If a piece is off grid a single point, every piece you add on to it will be off a point +1 so by the time to get to the end you have a gap 30 points wide! When the second piece is properly aligned, you should be looking at something like this: Finish this interior set by finding FarmInt2End03 in the statics list, dragging it into the render window and lining it up on the grid with the others to close in the space. Smarty Says: Finding Snap to Grid to be a challenge? Visit the Additional Information on Snap to Grid section of the CS Basics course Lesson #3. Aside from the layout of the Reference box, the technique is identical so it's a valuable source of info for Oblivion and Skyrim modders alike. Part IV: Staging the Interior Now that we have all three pieces of our kit together you should be looking at something like this: For the close of this lesson we're going to add a few additional objects to begin the staging of our interior and practice the controls charted at the beginning. Start by turning OFF snap to grid. This feature is not needed for placing clutter type items. Go the object window again, choose the category MovableStatic, find FireplaceWood01Burning, and drag it into the render window. Once it's there, use your mouse and key controls listed at the start of this lesson to move your firewood into the fireplace. Tips: Hold z to move things up or down on the grid.Hold Shift and Rotate your mouse to rotate your camera around the active object.Hold the spacebar and move your mouse to adjust your camera position.Move your camera a lot to get a true perspective of where your object is in render space. Save! When done you should have this: Next we'rre going to add a couple chairs beside the fireplace. Go to World Objects>Furniture in the Object Window and click on Furniture to load the furniture in the Object Window list. Be careful not to mistake this for Static>furniture which is furniture that can't be used. We want to use furniture we can sit on so we need chairs with sit markers. Find UpperChair01L and drag it into the Render Window. You'll see the blue and orange marker on the chair. This marker is a place holder for people in game, and shows how an actor interacts with this chair so you don't want that marker to be in the floor or through any other furniture; leave space for these character animations when placing furniture. Position the chair in front of the fire place; then find UpperChair01R and set it alongside its mate in the render window. Time to light the fire! In the Object Window go to World Objects>Light, and click Light to load all the lights in the object window list, ¦seeing a pattern here? In the list find FarmInteriorFireLight01 and drag it into the Render Window. You want to position the fire light object over the fire logs in the fire pit that we added first. This fire light will lend light and shadow to the scene in game. Save! Congratulations, you have just made a plugin for Skyrim! This concludes lesson #1, you should now know how to create new interior cells, add statics, furniture and lights to the render window, how to move the render camera and how to manipulate objects in the render window! Well done, that's a big step! To see your hardwork first hand, activate your plugin in the Data page of the game's main menu before going in game. Then use the console command coc YOURCELLID (Mine would be aaDRTutorialInt01) to teleport to your cell. Repetition is the fastest road to mastery of skills. This assignment is worth 10pts and the Extra Credit Section is worth 5pts. You need 100pts to earn a medal for the CK Basics Class. So do your assignment and post a screenshot here when you are done! Your assignment before moving on to Lesson #2 is to continue adding furniture and statics to the interior we have begun to create the basis for your house. Across this course we will be building this interior as a Tavern, but you may build as a home if you so choose. Do not skip ahead, and do not confuse yourself by experimenting with objects we haven't covered. You may add additional light objects, but I recommend using static candles like CandleHornTable01 and adding a light object over the candle like HelgenCandleLight01 (Do not use more than 2 of these lights). In Lesson #2 we will cover cluttering with Misc Items like dishes and food, creating containers, adding doors, and NavMeshes. Make sure you take time to practice what you have learned here, especially your hotkeys, camera and render controls. Practice makes perfect! If you are ready to move on head to Lesson #2: Living Interiors.1 point
-
CK Basics Lesson #2: Living Interiors Welcome Back, Student! By now you should have completed the Introduction to this course as well as Lesson #1 and by completed that means, you have posted your homework assignments and points have been successfully achieved toward your CK Medal. If you haven't done the earlier assignments and are a novice, do take the time to start from the beginning or you will find this lesson confusing. In this lesson we will be learning how to develop an interior using havocked items such as table settings, how to create custom containers, and also the basics of NavMesh pathing. Part I: Reloading If you haven't done so already time to cue up the Creation Kit. We're ready to get back to work on our tutorial interior. Just like before when we started our mod, we're going to load the Skyrim.esm again, only this time, we're going to add a step. Go to File>Data, or click the Data folder icon on the main toolbar. When you check the box next to Skyrim.esm, you also want to check the box next to our tutorial mod. With the tutorial mod highlighted click "Active File" to make it the active file we're going to edit. This is an important step when you are returning to work on a mod you've already started. By making it the active file, the CK knows to include any work you do now in that same .esp. Otherwise, the CK will save your new changes as a second mod! We don't want to create a bunch of half mods that need one another to play, that would be a real headache so make sure you set your file as the active file when you load it up each time. Smarty Says: If you check your mod, but forget to set the Active file, the CK will remind you so always pay attention to the messages the CK gives you, it can save you headaches later and be useful for troubleshooting. Part II: Havocked Clutter Once the CK has loaded your mod, let's find our interior cell in the cell view window and load it in the render window by double clicking on it in the list; if you were paying attention to our naming conventions in Lesson #1, you'll find it near the top of the list. When the cell loads you'll see your house interior floating in that now familiar gray void. Click on it once and tap Y to swing your camera in alongside your interior, then zoom in with your mouse wheel until you are close enough to work, and tap A to turn on your work light. We're going to start adding to our interior design by creating a table setting on one of our tables. In Lesson #1 we added chairs to our tables and chair markers can make the scene a little difficult to navigate. Tap the M key to turn off Marker view so we can work with a table closely. Click on one of the tables in the render window, tap Y to swing alongside it, and then rotate your camera a bit so you have a good view of the table. Time to return to the Object Window, only this time we're not going to search for items under World Objects, we want to look at the Items category; just click the + sign next to items to expand the tree. You see a number of branches under the Items category, so let's take a minute to explore what these categories contain. For setting our table we want to start by clicking the Misc Items category. When the list is compiled in the list pane, find BasicPlate01 near the top of the list, and then drag it into the render window to your table. If you modded Oblivion you might expect the objects to drop in front of your camera and require manual positioning. In Skyrim, objects drop to the surface you drag them over, and then just require some minor tweaking. When tha's done, let's grab a matching cup, BasicTankard01 and add that alongside the plate. You've no doubt noticed we've been using objects starting with "basic". The Bethesda developers use naming conventions too, but just like modders they are varied depending on the dev who created those objects. Smarty Says: By paying attention to naming conventions used by developers you can better estimate where the things you want will be located. Don't get discouraged if you can't find something you want right away though, with practice you will learn and remember where things are. If you need help, try using Edit>Find Text to do a keyword search for items you need. Or just type your keywords in the filter bar to narrow your search. Now let's add some eating utensils! Find BasicFork01 and BasicKnife01 and add them to the table with our plate and tankard. Your utensils may be facing the wrong direction and need to be rotated, to do this click on the item you want to rotate, then hold your right mouse button and move your mouse to start rotating it. You may need to click and rotate a couple times to get it rotated all the way around. Once you have a place setting, we're going to save some time using duplication. Duplicating things is a useful modders shortcut. It saves you the trouble of hunting for things and drag/drop placing things repeatedly. To duplicate your place setting start by clicking on your plate. Then hold ctrl and click your cup fork and knife so that all the items are highlighted. Once highlighted, click ctrl+d to duplicate the items. Your cursor will have become a cross, indicating you can move the items you're hovered over. Left click and drag the duplicate set over to a new place at the table. Smarty Says: Sometimes when you duplicate and item your cursor doesn't turn into the move symbol. To move your duplicates, deselect by clicking a neutral item like the table, then click on your plate, hold ctrl and click on each of your items to reselect the duplicated place setting. Your cursor should change then. Not only can you duplicate and move a whole place setting, you can also rotate a whole place setting. To try this, with all the pieces still highlighted, hold your right mouse button and move your mouse to rotate it into the position you need for the other side of the table. Whatever the shape of your table you should now have 2 place settings. Save! And then let's add a bit of food to our table. Click on the + next to the Magic category to expand that category tree, then click the Potion category in the object window to load your potion, beverages, and food stuffs. In this section food items begin with "food". Find FoodBread01B in the list and drag it into the render window to a blank place on your table. Make sure you rotate your camera to check that your bread landed on the table and is not floating on your place settings. Anytime you add a havocked object like Food to another havoc object like a plate, you have to consider how these objects will relate once havoc is applied in the CK or in game. Usually, havocked objects will push against one another and you may find your food springing across the room as a result. To prevent this, double click on your food objects to open the ref edit dialog box. There you will find a flag called "Don't Havoc Settle". Check the box next to this flag and click Ok to set it. This will keep your food on the plates or table where it belongs. Let's leave the table for now, and go to the bookcase you placed in your interior. If you don't have a bookcase, go to WorldObjects>Static, look for UpperShelf01, and add it to your house now. When you have a bookcase ready, click on it, tap Y, and zoom in a bit to get it close enough to work on. In the object window, go to Items>Misc Item, find Drum, and drag/drop it on the middle shelf to place it in the bookcase. Then go to Items>Book and click book to load the books in the list. Find Book0RansomOfZarek and drag it into the window. Books are rarely at the right rotation, so double click on your book to open your reference box and change the X rotation to 90 so it's in the right position for your bookshelf, click OK, then place it on the shelf beside your drum. Save! Cluttering a house is a lot of repetition; you will want to explore the Items tree for cluttering materials. However, clutter items like books and dishes are havocked, so they behave a little differently from static items. You want to keep two things in mind Havocked items cannot be placed too close to one another or they will fly out of place when loaded by the player. Leave some space between books and place settings, or food in bowls.The more small items added in one cell, the higher the impact on a play's frame rates. A house packed with loads of clutter may look pretty to your eye, but is not practical for playing since such homes can render a player's fps to crippling levels. Be creative, but judicious. Smarty Says: The havoc sim button can be a useful tool in Skyrim modding when placing havocked items. Havoc sim in the CK behaves similarly to the in game havoc physics and can help you see how your havocked items behave in the game world; like turning on gravity. Part III: Customizing Containers It's time to talk about creating custom containers. While they are a very important part of cluttering any scene, containers are the source of two of the most common beginner modding blunders. 1. Container Mistake #1: Use of Respawning Containers for Player Storage The _NoRespawn at the end of a container's name indicates it's safe for player storage. You can easily avoid container mistake #1 by only using _NoRespawn containers when you make player homes, but many containers in Skyrim are safe and don't use this ID clue. Make sure that containers placed for player storage have their Respawn flag unchecked. Containers that are set to respawn will replenish their contents after 10 game days pass in general areas such as farms, or 30 for cleared dungeons and the like. These are great for placing in dungeons, or NPC homes, or stables. They are containers players can loot and after some time passes, the loot reappears. In a player home though, a respawning chest is an error. A player will store their gear in the containers in their homes, and a respawning chest will respawn and make the player's stored gear disappear! 2. Container Mistake #2: Altering Vanilla Containers Of course, modders like to create custom chests too, with specific goodies inside, like maybe a Daedric Sword. But it's not as easy as picking a container and adding a sword; you need to create a custom container before editing the contents. So let's create a custom chest. In the Object Window, go to World Object>Container, and locate PersonalChestSmall. Double click on it to open its base edit box to edit the base form of this container. Now this is where container mistake #2 can be avoided, before you change anything else in the base edit box, change the ID name to aaDRCustomChest01. Whenever you want to change an item by changing its inventory, its sound fx, or anything, you want to start by changing the ID name. This is true for changing any vanilla item, not just containers. When the ID name is changed, click Ok. A new smaller dialog box will open asking if you'd like to create a new form. Click Yes. This will create a duplicate of that chest physically, but with your custom name as its ID, it's changed into a new container. Let's look at our object window. Find the new container we just made in the list; should be at the top of the list if your ID starts with aa. Before we move on, I want to take a moment to really impress the importance of changing IDs on you. Right click on our new chest in the list and choose UseInfo. A use report window will open and you will see this chest hasn't been used anywhere yet. Click Ok to close the use report and go back to our vanilla PersonalChestSmall in the list. Right click on it and choose Use Info. You will see this vanilla chest is used once in WhiterunWorld but also once, twice, even three times in a lot of other places. In fact there are 153 instances of this chest scattered across Skyrim. If you change a vanilla chest, like adding a full suit of Ebony Armor, you won't just change the one in your house, you'll change all 153 instances too; imagine if they all had a suit of Ebony Armor inside! With custom containers, where you are adding a specific item for collection, change IDs, create New Form, THEN make your custom changes. Never ever change a generic vanilla container for your treasures. Now that we've covered the two common container mistakes, let's double click on our custom container in the object window to open its base edit box. The item list pane in the center shows what is inside the chest, which in this case are a few leveled items. Click on each, and tap your delete key to delete those. Then in the object window, go to Weapon and scroll down to DaedricSword. Drag it from the object window and drop it in the list pane for your chest. Make sure the respawn flag in unchecked and click Ok to save your changes. Then drag your custom chest into your house and place it near the wall. Part IV: NavMesh Pathing Pathing tells NPCs where it is safe to stand and walk in any given cell it helps them process and define the parameters of the world they live in. There are established paths in exteriors and interiors. Some modders think that it's okay to leave pathing out, but that's just lazy modding. A proper cell has pathing and so we're going to cover the basics of pathing with Skyrim's NavMesh so you can mod properly right from the start! Start by clicking the NavMesh button on the toolbar: The NavMesh toolbar will appear. For this basic course, we are only concerned with the first 3 tools from the left: Select Triangles: (T) Allows users to select triangles Select Vertex (Verticles): (V) Allows users to select vertexes Select Edges: (G) Allows users to select edges Let's start by toggling Select Vertexes on. Think of vertexes as the framework for a navmesh. Starting at the door right click on the floor in front of the door to place your first node; a green node will appear. Right-click to place another node on the opposite side of the doorframe; you should notice that this node is green but your first node has now become yellow. The green node indicates that it is the active node. Adjust your camera to the overhead view, and zoom in a bit so you can see the navmesh you are creating. We want to add a third node, center of the two, but further into the room. Navmeshes are made up of triangles so that's what we are making here. With your third node highlighted in green, hold ctrl and click the other two nodes to light them as well. When all three are green, tap A (or click the Create Triangle button on the Navmesh toolbar) to fill the triangle and create our first piece of navmesh. Smarty Says: Green nodes are active nodes you can move, yellow nodes are inactive and are not attached to the mesh attach or delete them, red nodes are part of the navmesh but are not active. The same applies to edges and triangles too; a yellow edge is not attached to your mesh and won't work. Right click on the floor to the right of our first triangle to place another node, and then click the two side nodes of the first triangle so you have three active nodes again. Tap A again to fill this second triangle. This is the start of our nav mesh, as we go we are going to form a blanket of triangles around our furniture statics. Move your camera and before placing your next node try to visualize the triangle patches. Be careful that your navmeshes don't cut through corners, furniture, or any obstacles. NPCs will consider any part of the mesh as safe to travel and stand on. You'll notice that there are two nodes highlighted as active after filling your second triangle. This function is to allow you to link triangles quickly in a technique Bethesda Devs coined "Walking the dog". With these two nodes active, you can use ctrl+right-click to drop another node and create a filled/connected triangle at the same time. This technique allows you to cover a lot of ground quickly. Place another node and link it up as before; keep working through the cell to plot out a blanket of pathing until your entire house is mapped out for NPCs to navigate. Even in a player home it's important to have pathing for companion animals, companion NPCs, and NPC messengers that might seek players out there. Save often as you go. Once you're done, go ahead and toggle the NavMesh button off, and Save! Smarty Says: There's a lot more to NavMeshing in Skyrim. For more information, continue reading the Lesson #2 Supplemental on NavMesh in post #2 of this thread Visit these wiki links for more on NavMeshes: http://www.creationkit.com/Navmesh_Cheat_Sheet http://www.creationkit.com/Navmesh http://www.creationkit.com/Bethesda_Tutorial_Navmesh Smarty Says: The Creation Kit is capable of auto generating nav meshes, but this technique is really best suited to a testing environment. Creating a NavMesh path by hand is the cleanest and ultimately the best way to path your cells even though it is generally more time consuming. This concludes Lesson #2! You should now know how to duplicate, rotate, and place clutter, create custom chests, and create a basic NavMesh in an interior. Well done! We'll discuss more about NavMeshes in lessons #3 and 4, where we will finally be exploring the exterior game world and will be creating an exterior to match our interior. Be sure to do your homework so you can earn the points for this lesson and prepare for the next. This assignment is worth 10pts and the Extra Credit Section is worth 5pts. You need 100pts to earn a medal for the CK Basics Class. So do your assignment and post a screenshot here when you are done. For this section's homework you are going to finish the interior work by adding more clutter to complete the level design of your tavern or house. You may add any statics you'd like to practice, but your house should have at least these items when your homework is done, not including what we've added in class. In Lesson #3, we'll be venturing into the exterior and exploring exterior mechanics, basic landscaping, cluttering exteriors, and linking doors. Keep studying hard, students, and practice, practice, practice! Ready to move on? Head to Lesson #3: Exterior Mechanics1 point
-
Credit Challenge 01: The Underbuilding Value: 10pts By now you should have completed Lesson #1-2 at least and have learned how to add and link doors, create new cells, add NavMesh pathing, and clutter them, so for this Credit Challenge you need to add a 5x4 underbuilding to your tutorial interior. You are free to clutter design this area to suit whatever vision you have for your project provided you use all of the pieces listed below as required. Prerequisite: You must complete Lessons #1-2 and be able to create a teleport link between two load doors to attempt this challenge. [if you don't meet this last requirement, wait until after Lesson #3 to begin.] --------------------------------------- To begin, from WorldObjects>Door add FarmBTrapdoor02 to your existing interior and adjust your navmesh pathing to accommodate its addition. Create a new interior cell, with a unique name, ambient lighting, and owned by the player or player faction, just like we did in Lesson #1 with your first interior cell. Build a small basement type underbuilding in your new cell using the static farm kit pieces that start with "FarmB". Clutter your basement using Statics, Furniture, and Containers For this Credit Challenge you are required to use these pieces: Smarty Says: Remember when starting your basement to set the first piece to the "0" point. To build your basement you will need to use Snap to Grid, as we covered in Lesson #1. TIP: Don't rotate kit pieces, align them the way they are. Once you have the pieces lined up properly, turn off snap to grid to clutter your basement; be creative and thorough! Don't forget to link your door and add navmesh pathing; make sure to use player safe containers! When finished your basement should look like this: Post an image of your underbuilding to get credit for your work!1 point
-
 Very nice.1 point
 -
 1 point
 -
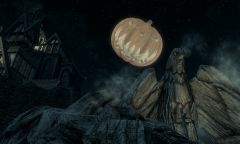
Link to site I found it on. http://projectoutreach.4umer.com/t41-morrowind-font1 point
-
Credit Challenge 03: The Outbound House Value: 10pts Before attempting this challenge you should have completed lesson #1-4 in our course as you need to have an understanding of working in the exterior and editing the exterior NavMesh. For this challenge we're going to practice those skills we've been learning about editing exterior cells and build an outbuilding behind our tavern/house near the water. Prerequisite: You must complete Lesson #4 before attempting this Credit Challenge, no exceptions. --------------------------------------- Begin, from WorldObjects>Static and enter the term shack in the filter field on the object window to isolate the shack kit pieces. Use these shack pieces to build an exterior building in neighboring cell HalfMoonMillExterior02 (Do not rename this cell) near the water and adjust your navmesh pathing to accommodate its addition to the cell. Add a dock and a rowboat to the water leading away from the shack, we can be cluttered as a hunter's shack, or a fisherman's shack, or a tool shed etc. Design your outbound house.1 point
-
Credit Challenge 02: The Crafted Sidebar Value: 10pts In this credit challenge you will have to design and develop the side porch of the exterior we established in Lesson #3 using some type of crafting materials from under WorldObjects>Furniture. Aside from the crafting component, this challenge is almost completely free form. You might design a chicken coup, or an outdoor eatery, maybe a shrine, smithy or a garden type retreat. There's no wrong answer here, this is an exercise in design and development. That said, students will need to demonstrate a clear plan of action and include some type of interactive component. Prerequisite: You must complete Lesson #3 before attempting this Credit Challenge, no exceptions. --------------------------------------- Begin by looking under Furniture for crafting materials or under MoveableStatics for activators you might use in your design. Remember to finish the NavMesh for this porch once you're finished.1 point