DOWNLOAD MODS
Are you looking for something shiny for your load order? We have many exclusive mods and resources you won't find anywhere else. Start your search now...

LEARN MODDING
Ready to try your hand at making your own mod creations? Visit the Enclave, the original ES/FO modding school, and learn the tricks of the trade from veteran modders...

JOIN THE ALLIANCE
Membership is free and registering unlocks image galleries, project hosting, live chat, unlimited downloads, & more...


Vince
-
Posts
469 -
Joined
-
Last visited
-
Days Won
13
Content Type
Profiles
Forums
Downloads
Tutorials
Gallery
Store
Events
Everything posted by Vince
-
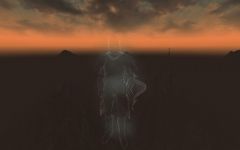 Is that something you made or part of a vanilla quest?
 -
One thing you would not normally think about is the position of the center of the object relative to the center of the mesh. I have a small shack (the Abandoned Mountain Shack) and work hard to keep the FPS up as it is an exterior home where everything counts inside and out. While I was working on this with my old computer (which shows FPS hits better than my newer ones), I noticed while one of the vines was taking up most of the FOV that the rate was about 3 FPS! It turns out that I had moved the object center to the center of the shack with the idea of being able to rotate the vine to use it on two corners of the shack. After trying several things that didn't change the frame rate, I tried moving the object center to the center of the mesh. That improved the frame rate to about 10 FPS, a more than 300% increase! Your mileage may vary.
-
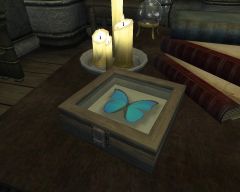
Since I discovered the problem several years ago, I use the technique described in my initial post. Here's what I remember: If you wanted to make a switchable candle, you would think you would just have two candles. One a lit candle light (e.g. CandleFat01Yellow512) and the other a static unlit candle (e.g. CandleFat01Off). You could then make an inverse parent link between them, so enabling the lit candle would disable the unlit one and visa versa. The problem was that when the unlit one was disabled, the lit one was enabled, but the actual light associated with it didn't come on. (This may have been fixed in the 1.2 CS; I didn't check). So, at least for me, I do the same thing, but with the output of the lit candle set to zero and enable a phantom light at the same time. So off is just the static unlit candle. On is the lit candle with no light output plus a phantom light. Of course, this works for any type of light, not just candles.
-
Sorry, I do what you describe for specific instances, but don't use OBSE, so no while loops. The basic idea avoids a sometime problem where, for example, you enable a lite candle and disable an unlit one and the light doesn't appear as it should. If you set the light (candle in this case) to zero output and make the switch, including an "invisible" light source as you suggest, it always works. Rather than searching for the nearest set of objects that match, how about using a standard naming sequence (eg: uniquenameLightOff, uniquenameLightOn, uniquenamePhantomLight). Then you can just copy you standard "light switch" script and make the changes for the specific instances quite easily (global search and replace with any decent editor). I know it's not as much fun as your approach, but it is a lot simpler.
-
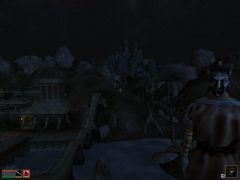 Wow! Morrowind never looked so good. Is that from Balmora looking East?
 -
donnato, I hope you will continue to see if you can get MWSnap to work. It's nice to have choices. I assume you have the latest/last version (3.0.0.74), right? I've used it for many years and found it extremely versatile. As one example, since I am a free user of PhotoBucket, I'm limited to 1024x768 (which is fine by me). Rather than capturing a larger area and cropping it in a photo editor, I just set MWSnap's fixed size to 1024x768; problem solved. According to several forum posts I found in the net, most seem to be able to use it with Windows 7. Have you tried changing the hot keys? Maybe there's a conflict that didn't exist in Vista.
-
 But, where does it go?
 -
Try the following: 1> Add a cube. 2> Switch to edge select in Edit mode and select all. 3> Press 'W' and choose Subdivide Multi and accept the default 2 cuts. 4> Click Set Smooth. Switch to Object mode. It should look horrible at this point. 5> Click Add Modifier and choose EdgeSplit. It should look dramatically better now. From there, start experimenting and learning.
-
DKS is Dragon's Knight Saga, an update/add-on to the Divinity II game. QTP3 is Quarl's Texture Pack 3, a texture enhancement mod for Oblivion. SI is Shivering Isles, an add-on for Oblivion. DDS files and Nif files were mentioned in earlier posts.
-
Trollf, do the .nif files for Divinity II actually store the textures or just pointers to them? Also, I understand that the new Dragon Knight's Saga is a significant improvement to Divinity II. Is that so and is it no longer based on the Gamebryo engine (so no more .nif files)? I loved the original Divine Divinity.
-
You can use a graphic editor as IS suggests or you can download the free program DDS Converter 2. Since you'll need a graphic editor anyway, that's probably the best solution. As IS mentioned, Paint.Net loads and saves .dds files directly. It's also free and rather easy to learn. It's a good way to start with the idea that you may later graduate to a more powerful, and more complex, editor like the GIMP or PhotoShop. Relative to your initial question, .nif files store meshes (the 3D shapes), while .dds files store textures (the 2D images to be painted onto the 3D shapes).
-
Your Blender model is a good start for a weapon, but there are several things you can do different that will make it better. I agree with some of what Trollf suggests, but respectfully disagree with some. First, you should not export the sword with Set Solid. Although that will fix the strange shading, there will be visible faceting where you don't want it. It's easiest to see the problem without the texture applied. You can do this in NifSkope using Render > Settings and temporarily unchecking Textures. You can also easily see it with solid shading in Blender. See the three images below. Initial sword in Blender with shading issues: Sword with shading issues removed: Sword with sharp transition between blade body and edge restored: The shading issues were removed using the Blender EdgeSplit modifier. Note that you will need to actually apply the modifier before export. The sharp transition between the body of the blade and the edge portion was restored using Mark Sharp on the bounding edges. You will only see the effect of Mark Sharp if there is an EdgeSplit modifier. You may want to use mark sharp on portions of the guard, grip, or pommel. Experiment with it and changing the Split Angle in the EdgeSplit modifier panel. There are other issues. Your .nif file includes NiStencilProperty and NiSpecularProperty blocks which you don't need. You can keep Blender from exporting the NiStencilProperty by unhighlighting Double Sided in Blender. You can keep Blender from exporting the NiSpecularProperty by setting the specular (Spe) color to black in the Material panel. I agree with Trollf that the alpha of your normal map should be a bit darker (more transparent) and it's always a good idea to use the NifSkope Spell: Update All Tangent Spaces on any .nif file that you export. I apologize that I'm not explaining why you have the dark shading on your mesh and why the EdgeSplit modifier fixes it. It is a rather complex issue of how surface normals are calculated from the bounding vertex normals for shading purposes. I've been meaning to write up something for TESA on this and will do so soon. I may add more later, but these are the big lumps. EDIT: I agree with Trollf's comment about the grip. You're using 32 faces around. With smoothing, somewhere between 12 to 20 is usually enough.
-
Waydaminute! Can't you just press 'G' to remove the "floor"?
-
Edit: Please disregard my post. I thought you wanted to turn a regular mesh into a collision mesh. Adalaybay understood what you wanted to do. I didn't . If you have NifSkope version 1.0.22 or later, right click on the NiTriStrips block, then Havok > Create Convex Shape. You will need to add a BSXFlags block as a child of the root node, then, as Andalaybay noted, enable bit 1 in the BSXFlags flag (the flag will = 2). If you want it to be a clutter item (something you can pickup and put in your inventory), there are a lot of pit falls. If you try what Andalaybay suggests, note that you need both bits 0 and 1 set in the BSXFlags flag (flag = 3) for a clutter item. If that doesn't work for you, export it from Blender as noted below. If you want to do it in Blender, see Blender2Oblivion Session 2 in our Modeling forum. If you export it with collision from Blender, the BSXFlags block will already be there and setup for the kind of collision you specified in the .nif exporter.
-
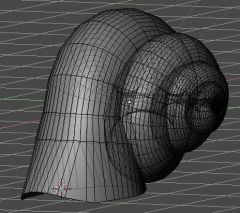 I would like to see this in Solid shading with Occlude background geometry on. It would be easier to see the wires that way. Just the same this is very good work. No, I would not want to UV map it, thank you very much!
 -
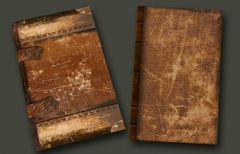
 I'm glad to hear that. That really is good work. I especially like the reptile-like skin cover on one of the books in your next gallery entry.
 -
 Very nice!
 -
These look very nice. Are they new meshes or retexures that you made?
-
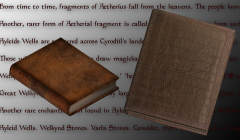
 As always 1st class work. Also, as usual I've questioning the work in some way--mainly because I'm trying to do the same thing and I learn from what you've done. The distressing in general is very believable. However, other than the edges of what look like brass reinforcements in the left image, I don't see the extra wear along the edges that I would expect. What do you think?
 -
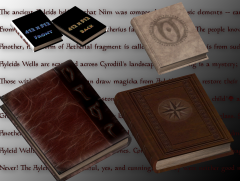
 I don't think I have ever seen a real book without text! Then again, you are being consistent with Oblivion.
 -
GothGirl', the first thing you need to do is visit LHammond's Blender Site at TES Nexus. If you still have problems after that, give me a shout.
-
StarX, let me preface my comment by stating that I think this work (all the books) is first class. However, there is one invisible elephant in the room: text.
-
 'Even better than the previous one. Are you using Xnormal or Crazy Bump?
 -
That's a function of who prebuilt it. You may remember that a year ago I had a massive virus attack, including a root kit, on my old Falcon NW computer. After Arion helped me get it to where I could run it a little in safemode, I called Falcon NW. They spent many hours with me over the next several days until it was completely virus free--I still use it today. I bought that computer in February 2004, so it was more that 6 years old at the time! Now the Falcon NW are not cheap, so you are paying for that level of support. My point it, you can build your computer from scratch. The good parts are you can save money and, more importantly, have the satisfaction of building it yourself. Or, if you have the funds, you can buy a computer with essentially unlimited support and build a sail boat instead.
-
 Wonderful--as usual.