DOWNLOAD MODS
Are you looking for something shiny for your load order? We have many exclusive mods and resources you won't find anywhere else. Start your search now...

LEARN MODDING
Ready to try your hand at making your own mod creations? Visit the Enclave, the original ES/FO modding school, and learn the tricks of the trade from veteran modders...

JOIN THE ALLIANCE
Membership is free and registering unlocks image galleries, project hosting, live chat, unlimited downloads, & more...


Artisanix
-
Posts
210 -
Joined
-
Last visited
-
Days Won
8
Content Type
Profiles
Forums
Downloads
Tutorials
Gallery
Store
Events
Everything posted by Artisanix
-
err, it was quite a long ago, so I don't remember clearly whether that was my idea or she got this from some other place/person... well the fishtanks in Korana's mod are slightly different from those made by Phitt - water object in nif file there has a special name for its material set - "lava". This allows to control the look of the water in tanks not by "normal" textures on HDD but by water settings in CS. For these fishtanks to work properly you need to enable water for that cell they are placed in and chose one of the water types from the list which looks good for you or create new water type and assign it for that property of the cell... and if your cell has no water set then the object looks just like a hyper reflective neon ;] well, couple of more objects like that were made for the mod as well (bathtub, wash bowl, etc.)
-
you can't divide lines as you see fit, oblivion's scripts are very restrictive in terms of syntax. each comparison needs to be in the same line as if / elseif: scn *NAME* begin onactivate if *OBJECTREF*.getdisabled == 1 *OBJECTREF*.enable elseif *OBJECTREF*.getdisabled == 0 *OBJECTREF*.disable endif end anyway you can write it in slightly shorter way: scn *NAME* begin onactivate if *OBJECTREF*.getdisabled *OBJECTREF*.enable else *OBJECTREF*.disable endif end
-
I know that I have to use Blender 2.49 to import and export Blender-files to the nif-format, I read about it in the forums. My picture of the simple iron plate is taken in nifskope . But do you also know that any animations and morphs from 2.5 are not possible to import to earlier version, so if you do stuff in 2.5 you are limited to simple and basic things only... so no poses, no bows, no any advanced stuff for you if you decide to use 2.5 Blender development will not stop; Niftools, Nifscripts and Nifskope will be developed further, too. Skyrim will still use the nif-format, so sooner or later it will be possible to import and export nif-files to and from Blender 2.5. True, but what if later rather than sooner? :] Well, there are so many changes in 2.5 that it should be considered rather as another and different 3D modeling program instead of "improved" version of 2.49. The point is that 2.49 is not inferior in any way in comparison to 2.5. It's just "slightly" different. Besides it is far easier for developers to add support for Skyrim for current version of NifScripts than to rewrite almost all code from scratch for the new version of Blender. And I can only presume that NifScripts won't be compatible with 2.5 until it will be out of beta stage. And these will be couple of months maybe? Or another year? Who knows? :] You may want to ask amorilla what are his plans with NifScripts ;] So why as a newbie should I start learning a complete new program using an old version? Because you're missing a point maybe? :] As modeling is not about applications, but is all about achieving the goal which is to create something. So if you want to make some simple objects or maybe even some complex renders then indeed 2.5 version may be better for that for you. But if you want to create things for Oblivion, then 2.5 is really a bad choice, as you make things much harder for yourself. So if you want to make anything for Oblivion, you have many many tutorials for 2.49 version, you have access to 3D classes here on these forums, and many people can help you how to make things that work in game - just make a thread with your questions ;] And if you choose 2.5 version with many things you are almost on your own.... And I should mention that what you can learn about modeling in 2.49 version, this knowledge is transferable to any other 3D modeling program - only interfaces may vary and maybe some ways of doing things may differ but most principles are the same ;] And when the time will finally come that NifScripts for new Blender will be made then it will be far easier for you to switch to the new program with all the modeling knowledge you gained in version 2.49 than to start to learn 2.5 now with no support for Oblivion at all and no significant help from current tutorials and community. Well, it's still your choice :] If I were a beginner at the CS I'd not start with CS 1.0 but use CS 1.2 from the beginning. CS 1.0 and 1.2 are practically the same. Besides, do you know why 1.0 version is still available on Bethesda's page to download? :] Well, because 1.2 version has some bugs and you still need to use 1.0 for certain things ;p And the case with Blender is completely different - version 2.5 has almost everything different than 2.49 - interface, animation system, keyboard shortcuts - really as I mentioned earlier, it's not an improved version of 2.49, it's more like completely different application.
-
Yes, like the pans in real life are usually made ;] The question is whether you want to learn modeling in Blender or whether you want to make usable objects for Oblivion? And that's very important one as current NifScripts which allow to import/export models from/for Oblivion aren't compatible with version 2.5+. So even while you learn how to make things in Blender 2.5, you will be forced to use blender 2.49 for importing/exporting objects via obj format to have them in game, which is kinda pointless. So, to make this short: Either you use Blender 2.5 and forget about Oblivion, or you use Blender 2.49 and only then you are able to produce usable things for this game. Alas, as for today, there's no other option. So, the decision is yours ;] Besides, all tutorials ever written for Blender related to Oblivion modeling are for 2.49 or earlier versions anyway...
-
err, no :] That's not what I meant :] You think that iron pan or pot are simple objects - well, yes they are, but only for the person who knows the basics. For someone who wants to begin an adventure with 3D modeling these are still rather complex objects to start with, so no wonder you stuck there ;] Let's see: The most simplest pan has two shapes: plate and handle. Plate, for instance, can be made from cylinder, and handle either from cube or another cylinder as well. So now the questions (to test you basic knowledge) are: Can you create a cylinder? Can you rescale it to make it look like a plate? Can you add another cylinder or cube? Can you modify it to receive a handle shape like? Can you rotate and position it correctly in the place where the handle should be? etc., etc. etc. If any of the answers on such questions is "no, I don't know how to do that", so how you even want to create any more complex objects when you don't know how to handle the most basic shapes? :]
-
Trying to learn the application itself is a really bad way of learning as it leads actually nowhere... So instead of "I want to know Blender first and I will be creating many great things then." it's far better to have an attitude like this: "I want to make a certain thing, and what should I know and what should I exactly do to create it in Blender". The point is to start with absolute basics, as if you master and understand these any future complex designs will be far easier to comprehend and create. The pattern is always almost the same like: create shape (+ collision eventually) -> create uv map -> paint texture. So you may want to start with simple cube first and try to create different uv maps for it, to texture it in various different ways (ex. with all sides the same, or as a dice, etc.). Then try other simple shapes (sphere, cone, etc.). If you will grasp an idea what it's all about with those simple shapes then you may want to start to combine them together and mess with things around (move, resize, rotate, etc.). And after that you may extend your experiments with other techniques of modeling (extrude, subdivide, etc.). But always try to make something usable by defining a goal for yourself first - like to create some spherical magic ball, simple wizard staff, simple piece of furniture, etc. This way you will learn things relatively fast and most important these will be usable skills even later if you decide to continue your 3D adventure ;] And some day you may be even surprised as if you master the basics then you will notice that you won't be limited by the lack of knowledge about the tool (Blender) anymore but only by your imagination ;] And it's worth to mention that you don't have to know all complexity and possibilities of the Blender to make an outstanding stuff. As most of the things made for Oblivion are usually about some simple shapes and decent textures, nothing really else is required to make a decent creations...
-
That's not odd, but normal. You won't find any triple channel for 1155. The reason is that triple channel is only supported by certain i7 and Xeon processors on LGA 1366 motherboards. And 1155 has no such feature at all. EDIT: As for GF 460 choice... well, it's a good card, yes, but it's not the best choice of all. For the same price or cheaper you can have Radeon 6850, which is just better (more performance and less power consumption)
-
while thermaltake does some decent cases, I like what I'm seeing here (look especially at the gallery and spec)
-
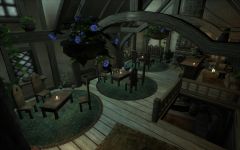
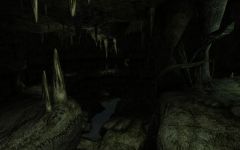
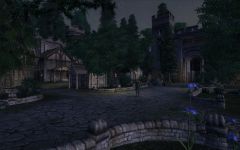
From the album: Castle West Weald II
-
Collision for weapons is not of rigid body type, you should leave that setting at its default no collision state.
-
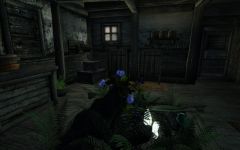
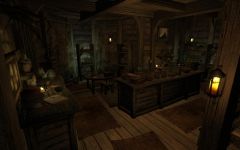 nah, just too little details there... :] it's the basement of one of the houses for NPCs - locations for player's char should be more detailed...
 -
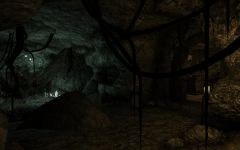
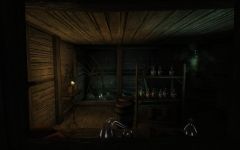
From the album: Castle West Weald II
-
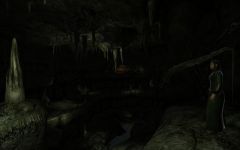
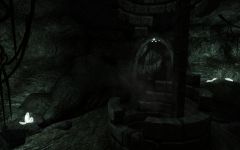
From the album: Castle West Weald II
-
Trollf's speedy manual and automated way of making all those pesky icons... INTRO: I did not like to make any icons that much in the past. And that's why I usually wanted to create them as fast and with the least effort as possible. And here comes the power of actions and shortcuts in Photoshop. Those saved my sanity, definitely. Without them I wouldn't be able to make those over 15 hundred icons for all my mods so far. The recipe is simple. Manual way should have the smallest number of clicks and options possible to be quite easy to remember and perform by hand. And should produce quite decent results in the same time. Then you just need to record your actions while creating an icon for the first time, and this step will allow you to make any further icons from any selected area in an instant. MANUAL METHOD: STEP I - PREPARATIONS: For this method to work you need to set up properly some settings in NifSkope, and foreground and background colors in PS to certain values. NifSkope's settings: - in Render menu turn off all unnecessary display settings (draw axes, nodes, and havok especially) - you need to have a clear, not obscured view of your item in NifSkope's render window - in Render -> Settings menu on Colors tab, set color of the background to pure white (that small circle in triangle needs to be in its white vertex) - while this step is not that critical for manual method, the automated way on the other hand may not work correctly when the background is set to any color but white. Photoshop's settings (with no document open): - set foreground color to pure white (exactly the same as background in NifSkope), - set background color to that which you want to see as the color of icon's outline ( I usually set it to #EAD1A3 ) STEP II - OBJECT POSITIONING IN NIFSKOPE Just open your object in NifSkope, then rotate and zoom the camera to set it to an angle and perspective from which the objects looks the best for you. When you finish just hit PrintScreen button on keyboard. STEP III - PHOTOSHOP 1. New document With PS window active press CTRL+N. You should see a window with new document settings - Preset should be set to Clipboard, dimensions exactly the same as your desktop, and you should set Background Contents to Background Color there. Hit OK. Then press CTRL+V to paste your captured screen as new layer. 2. Selecting area Press CTRL+1 to zoom to 100% percent. Chose Rectangular Marquee Tool from ToolBox. Click with LMB on center of your object and hold it, then press SHIFT and ALT buttons and hold them as well. Now drag a mouse to resize the selection's square (holding SHIFT makes the selection shape proportional, and ALT sets its center at point when you clicked first time). When you have proper selection then release LMB first, and then SHIFT and ALT after that. 3. Cropping From menu chose Image -> Crop. 4. Deletion of white background around the object From menu chose Select -> Color Range... In that window there should be such settings: Select - Sampled Colors Localized Color Clusters off Fuziness 0 Invert turned off You can switch to Selection instead of Image and set Preview to Grayscale - you should see a black silhouette of your object on white background (if not just click on any area where white background is on your image). Press OK to confirm selection. Press DELETE to remove white background around your image. Press CTRL+D to deselect the selection. 5. Brightening the image (optional step) Press CTRL+U to show Hue/Saturation dialog box and set Lightness to 15 or so there. This will make details from the shadows visible better as resizing down usually darkens an image, and this option prevents it to be too dark. 6. Resizing Chose from menu Image -> Image size... set its width and height to 64, hit OK. 7. Alpha channel - press CTRL and while holding it click with LMB on thumbnail of layer with your object on Layers tab. This should load proper selection as on layer with your object, the area around it should be transparent, - from menu chose Select -> Modify -> Expand... set it to 1 pixel and hit OK. - switch to Channels tab and click on icon at the bottom to make alpha channel from selection (that's the icon symbolized by gray rectangle with white small circle in the middle) 8. Finale - press CTRL+D to deselect any selection, - from menu chose Layer -> Flatten Image, - press CTRL+W to close the document which invokes Save As dialogue box where you will have a chance to save the icon as DXT3 compressed dds file... AUTOMATED METHOD: STEP I and STEP II are exactly the same like in MANUAL METHOD. As for STEP III only point 1 and 2 are the same. The rest of activities should be first recorded as action - then the time it takes Photoshop to do everything from Cropping to closing the document with Save As window is less than a second ;]
-
quite nice tutorial there IS... though I must admit that it doesn't show the power and quickness of PS as it could ;] especially when alpha channels can be done with three simple clicks, and certain setup of NifSkope, PS colours and its automated actions allow to make literally two brand new icons per minute from scratch ;] (where most of that time you spend to position the model properly in NifSkope than do anything in PS). I could post here my way of doing icons if anyone is interested though there may be still some other better ways to do that...
-
Kracht alone sounds far more ominous and menacing than the whole current ynglish name, me thinks ;] ps just forgot to set it ;p
-
Select BSXFlags block and check its integer data value in block details window - just click the flag there and in the small window that will appear select Bit 5... Layer settings have nothing to do with collision behavior or its visibility in game. These just only change the color of collision's wireframe, and nothing else.
-
If that's a Dutch magazine why it has an English name then? ;D
-
Collision can't be visible in game until you use a special console command to show it. What you see in the game in place of your nif is not the collision but editor marker - your nif has editor marker node present but it has no proper flag set to make it behave correctly in game - to use editor markers you need to enable bit 5 in BSXFlag block's properties.
-
From the album: Castle West Weald II
-
From the album: Castle West Weald II
-
From the album: Castle West Weald II
-
From the album: Castle West Weald II
-
From the album: Castle West Weald II
-
From the album: Castle West Weald II