

DOWNLOAD MODS
Are you looking for something shiny for your load order? We have many exclusive mods and resources you won't find anywhere else. Start your search now...

LEARN MODDING
Ready to try your hand at making your own mod creations? Visit the Enclave, the original ES/FO modding school, and learn the tricks of the trade from veteran modders...

JOIN THE ALLIANCE
Membership is free and registering unlocks image galleries, project hosting, live chat, unlimited downloads, & more...


WhoGuru
-
Posts
8,349 -
Joined
-
Last visited
-
Days Won
13
Content Type
Profiles
Forums
Downloads
Tutorials
Gallery
Store
Events
Posts posted by WhoGuru
-
-
I've got my testosterone meter handy!!
If any of them show signs of being poisoned, I'll dish out some whoop-ass stat! ....as a cure of course! Wouldn't want them getting sick! lol
Thanks for the warm welcome!
-
Why is it always one thing that just wont be fixed no matter how hard you try? lol Mage revamped the clue spawns, was convinced he had it fixed, sent me a new alpha version and don't you know the suckers still get stuck after the third clue?
On the upside, he fixed the flames on the sword. �They were showing up a sickly kind of green, they're white again now as they should be. �Couple new images added in the first post if you want to take a look.
Mage has an extra couple days to work out the bugs since the guy doing the voice work for us has laryngitis! See...murphy's law in action! He also can't seem to get the opening dream sequence to activate when the player sleeps. The quest begins as it should except for that.
-
LOL Well, I work late hours and I'm an insomniac so you have to find something to occupy you when you're bored, it's late and the only sound in the house is your boyfriend snoring.

-
The Elder Scrolls IV: Oblivion
Daedric Shrine Quest Guide for the PC
Version 1.67 April 10,2006
Written by: WhoGuru
Copyright 2006 Karen Hoyt
INTRO: This is my first FAQ, so bear with me. I couldn't find one on the
Shrines and after much frustration, decided to do it myself. If at any point,
you wonder about the order of the Shrines...if there is one, I don't know it.
This is simply the order I used. I sometimes use a previous Shrine to
reference the location of the next. So, there is method to my madness. If
I've missed something you've found, let me know. OR, if Ive made an error
somewhere, please let me know and I'll investigate. Good luck and Enjoy.
===============================================================================
-------------------------------------------------------------------------------
TABLE OF CONTENTS
-------------------------------------------------------------------------------
1: Hints,Tips and general info
2: Shrine of Azura
3: Shrine of Namira
4: Shrine of Mephala
5: Shrine of Boethia
6: Shrine of Peryites
7: Shrine of Nocturnal
8: Shrine of Sheogorath
9: Shrine of Molag Bal
10: Shrine of Hircine
11: Shrine of Clavicus Vile
#XBOX 360 fixes for the crash.
12: Shrine of Meridia
13: Shrine of Sanguine
14: Shrine of Vaermina
15: Shrine of Malacath
16: Shrine of Hermaeus Mora
17: Frequently Asked Questions
18: Credits
19: Contact Me
20: Copyright Notice
===============================================================================
1: Hints,Tips and general info
-------------------------------------------------------------------------------
Each Shrine walkthrough is laid out the same way. Requisite Level, Location,
Offering, Time of Day, Reward and the Quest. Some of the details about dungeon
delving treasure may be a bit sparse. I figure you can explore on your own
once you know where you're going.
##I did each Shrine AT THE LEVEL REQUIRED, no more. As the creatures and
treasures in Oblivion are to some extent random and level with you, you may
find yourself facing something different, or finding different treasure.
Don't take what I faced as what you'll find, more as a guide that at that
level, you're likely to face something similar.
When sneaking, removing your boots is a great idea. It lowers the chances of
anyone near hearing the sound of your footsteps. This actually works.
When beginning a Shrine quest, go ahead and save at the beginning. Do not
however save again until you've completed the quest. ie: recieved your reward
from the Daedra. You never know when something you did, or didn't do, could
negate your success. The voice of experience here. Feel free to Quicksave.
Pay attention to the level requirements, if the level is low, there's probably
a reason, as in Namira's Shrine. Low stats are the only way to get the quest.
If your stats are too high, you'll have to either skip it, find a potion/spell
or use the console codes to lower them. Not that I'm advocating cheating,
because that would just be wrong. Of course. Yeah. Anyway.
Doing these before you've advanced the main quest too far could be to your
benefit. As the main quest progresses, so do the number of Oblivion gates
opened across the countryside. Stray too near one and it starts spitting
Daedra at you. Depends on how distracted you like to be during a quest.
The bad guys really DO level up with you. Again, this goes toward the level
requirements. Some of the quests take you into Oblivion, higher level -
spunkier bad guys. Your choice.
I apologize now for the directions to some of the Shrines. You're going to
have to do some wandering. Some of them are a little difficult to give
accurate directions to. You'll see and if you think of a better way to give
the directions, let me know and I'll update it, with due credit of course.
Detect Life spells are your freinds when commencing combat with chameleonic
creatures of the night.
Clear your inventory before each quest. There's some very good,and expensive
treasure to be had here... but only if you can carry it.
It is possible to get map markers for atleast some of the Shrines by talking
to the people in each town. If you see "Daedra" as a conversation topic, that
person will give you one. However, this conversation topic is only activated
once you reach a certain point in the main quest.
Always watch your compass. When you near a Shrine, or any other landmark on
the map, the icon will appear in your compass. The Shrine Icon looks like a
little genie lamp, or maybe it's a teapot...or my glasses need a stronger
prescription.
===============================================================================
2: Shrine of Azura YOU MUST BE ATLEAST LEVEL 2 FOR THIS QUEST
-------------------------------------------------------------------------------
LOCATION: Almost Due North (NNW) of Cheydinhal Castle, past lake Arrius. I
think this is also the only Shrine marked on your map at the beginning.
OFFERING: Glow Dust, obtained from the Will O' the Wisp.
TIME: Dawn or Dusk 5-7 am or pm
REWARD: Azura's Star - reuseable soul gem
QUEST: Now, you can A: Run around the countryside hunting for the elusive
will o' the wisp or B: Go to the "Main Ingredient" shop in the Imperial City
Market District and buy some. It's cheap.
At dawn or dusk, offer the glow dust to the Shrine. Azura will speak to you
and offer a quest. Travel to the "Gutted Mine" and give the peace of death
to five of her followers who were afflicted with Porphyric Hemophelia while
cleansing said mine of Vampires. The mine is SW of her Shrine. Follow your
map marker.
There's a tripwire just inside the door, show off those acrobatic skills and
jump over it. You'll run into two of the afflicted brethren in the first
room. A detect life spell could come in handy here as one or more of them
may cast invisibility. Green map markers will show you the location of each
of the brethren.
They're all nicely spread out so you wont face more than two at a time.
Fight your way through and your journal should update after you kill the last
one. Return to Azura's Shrine for your reward.
She'll thank you for freeing her brethren and gives you Azura's Star, the
reusable soul gem you may remember from Morrowind.
NOW, go find a church and get a blessing from the altar unless you want to
play out the rest of the game as a bloodsucker. You HAVE been infected with
Porphyric Hemophelia. Three days of infection will bring on the dream. I
suggest a church because a cure disease potion didn't work for me, but it may
for you.
===============================================================================
3: Shrine of Namira YOU MUST BE ATLEAST LEVEL 5 FOR THIS QUEST
-------------------------------------------------------------------------------
LOCATION: ESE of Bruma's East Gate
OFFERING: Namira is ONLY interested in speaking to the repulsive. You need a
personality score of 20 to get this quest. Buy a few bottles of "Cheap Wine".
Each bottle will lower your personality by 10 pts. for 120 secs. Lower your
score to 20 and the quest will be yours.
TIME: Any
REWARD: Ring of Namira - Reflect Damage 12% constant effect
Reflect Spell 10% constant effect
QUEST: Namira tells of the Forgotten, a group of fanatical worshippers that
live in the darkness of Anga. Priests of Arkay are planning to bring light to
Anga and "save" the Forgotten ones. You are to use the spell Namira gives you,
Namira's shroud, on the priests, and let the Forgotten finish them off.
Anga is due south of the Shrine and is an Ayleid ruin. DO NOT use a torch in
here. the light hurts the forgotten ones and hurting Namira's fanatics might
just hurt your chances of getting a reward. Use Night Eye.
The Priests of Arkay are easy pickin's. Simply walk up, cast the spell then
stand back and watch the Forgotten work out their frustrations. All the
priests are shown on your map with the usual green markers. Once they're all
dead, return to the Shrine.
Namira thanks you for freeing her Forgotten to wallow in their misery and
awards you the Ring of Namira.
===============================================================================
4: Shrine of Mephala YOU MUST BE ATLEAST LEVEL 15 FOR THIS QUEST
-------------------------------------------------------------------------------
LOCATION: Almost due south (SSE) of Namira's Shrine and almost due north (NNE)
of Vilverin, about midway between the two.
OFFERING: Nightshade. Again, wander the hills or visit the shop.
TIME: Between midnight and dawn.
REWARD: the Ebony Blade - Silence 10 seconds on strike
Absorb Health 8 pts. on strike
Charge 3700 / 45 uses
QUEST: The Webspinner, as she's also known, asks you to go to Bleaker's Way.
There are two families there, Nord and Dunmer. You are to kill the leaders
and plant evidence on the bodies incriminating the other families. "Allow no
one to see you commit these crimes", which isn't hard.
On a side note - This is murder and "forces unseen" will take notice.
Follow your map marker to Bleaker's Way.
In Hrol Ulfgar's house, he should be alone. Knock him off, he's a pushover.
On the second floor, on a table in a side room, you'll find the Ulfgar family
ring. Take it. On to your next victim.
Nivan Dalvilu. He's home, near as I can tell, between 6pm and 6am. Enter
the house and kill him. Plant the Ulfgar family ring on his body. On a table
to the right of the door as you entered is the Dalvilu Ceremonial dagger.
Take it and return to the scene of your first crime.
Plant the dagger on Ulfgar's body. At this point your journal should update.
Go back outside and find someone, doesn't matter who, and prompt the carnage.
Heh heh. Now, stand back and enjoy the fruits of your labor, a village wide
melee. Of course, you'll have to make sure it's 6am if you want to see the
fued.
Return to the Shrine for your reward. Mephala is pleased with the strife
you've caused and awards you her Ebony Blade.
===============================================================================
5: Shrine of Boethia YOU MUST BE ATLEAST LEVEL 20 FOR THIS QUEST
-------------------------------------------------------------------------------
LOCATION: This is a cross country trek and not an easy find. Two routes:
A - (Longer) Start outside the Arcane University and travel due east. You
should run straight into the Shrine...eventually.
B - (shorter and less clear) Start at Cheydinhal and travel SSE from the city.
The Shrine is about halfway up a mountain ridge.
OFFERING: A Daedra's heart. I'm sure, by now, you can think of a few hellish
places to pick one up.
TIME: Any
REWARD: Goldbrand - Fire damage 22 pts. on Strike
Charge 3000 / 76 uses
QUEST: Boethia offers you the chance to participate in the "Tournament of
the Ten Bloods". He opens a portal to Oblivion, go through when you're
prepared for a series of ten one-on-one battles. You'll arrive in a brood
cage. Don't panic. Open the cage and move down the ramp, the first gate is
too your right. Boethia's a talkative fellow, enjoy the occasional short
monologues on the chosen's dissapointing defeats. Oh, and falling off into the
lava would be bad, know where the edge is at all times. Better yet, try not
to get caught on the bridges.
Some of the Chosen wield magic, all have enchanted weapons. There's some
choice loot here. They are also weighed down with health potions, which keeps
this from being impossibly hard. At level 20, they're not too difficult if
you're fast on your feet. Simply frag your way through Boethia's champions,
making yourself the victor, then exit back through the portal to the Shrine.
You are now Boethia's Chosen one. He rewards you with his enchanted sword,
the Goldbrand.
===============================================================================
6: Shrine of Peryites YOU MUST BE ATLEAST LEVEL 10 FOR THIS QUEST
-------------------------------------------------------------------------------
LOCATION: Due South of Boethia's Shrine on the opposite side of the river.
OFFERING: None
TIME: Any
REWARD: the Spell Breaker - Reflect spell 30% constant effect
QUEST: Five of Peryite's followers have put themselves into a trance,
transporting their souls to His Oblivion dimension. Simply click on his Shrine
to activate the quest. Your mission: Go to Oblivion, retrieve all 5 souls
to reunite them with their bodies. Activate the Shrine a second time when
you're ready to go. This place is long but fairly straight forward, not a lot
of twists and turns. There are, however, a plethora of Daedra here, heal
often. The followers will show up on your map as green markers.
Soul 1 - Follow the path around and to your left. You'll find the soul of
Ilvel Romayn in front of the Bloodwell Tower. Nothing much in the tower. On
the upper floor, you'll find a Dremora Kynmarcher with a nifty "Grand Ring of
Strength" - Fortify Strength 10 pts. constant effect. Leave the tower.
Soul 2 - Head back up the hill and turn left at the arch. Down this path and
on your right, you'll find the soul of Er-Teeus outside the door to "the
Sightless Grotto".
Soul 3 - Enter the Grotto. Inside, take the path to your left and follow
through to the "Oblivion cave to the realm of Peryite". Follow the long,
loooong path and find the soul of Kewan.
Soul 4 - Keep to the path and keep to your left or you'll find yourself back
where you started. Checking the map often is a good thing. You'll find a fork
in the path. Head left, jump some rocks over the lava, and find Maren the
Seal outside the door to another sightless grotto.
Skip the grotto if you're in a hurry. There's nothing of importance, some
common soul gems, a bit of gold and a round-a-bout path that will lead you
back to where you found Er-Teeus.
Soul 5 - Retrace your steps over the lava and back to the fork and go left.
Follow this around, whoop some Daedra and you'll find the soul of Mirie.
Release her and head back to the Portal where you came in.
Peryite thanks you for releasing his idiot followers and rewards you with his
shield, the Spell Breaker.
===============================================================================
7: Shrine of Nocturnal YOU MUST BE ATLEAST LEVEL 10 FOR THIS QUEST
-------------------------------------------------------------------------------
LOCATION: Start in Leyawiin. Leave by the North East gate and follow the
road north. You'll pass the Ayleid citadel of Veyond, Blanken March and find
a dirt path on your right leading to the Shrine.
OFFERING: None
TIME: Any
REWARD: Skeleton Key - Unlimited Uses, Fortify Security 40 pts.
QUEST: The Daedra's "Eye of Nocturnal" has been stolen, She believes by two
Argonian thieves hiding out in Leyawiin. She asks you to find them, retrieve
her eye and return it. Quick travel back to Leyawiin's North East gate and
talk to the guard just inside. He'll point you to Weebam-Na and Bejeen. They
were recently boasting about a valuable jewel they had found. Check your map
and you'll find a map marker for Weebam-Na's house.
Weebam-Na and Bejeen both play dumb when you ask them. Go back around the
corner by the door and listen in on their conversation. They've stashed the
jewel in Tidewater cave. Your journal will update at this point and give you
a map marker. They also comment on the place being overrun with Trolls.
Make your way to the cave. As you may have guessed from the name, this one
requires a little swim. When you enter, there should be a couple bears waiting
for you just inside. The path to your left is the one you want. It curves
around and you'll have to take a quick dive in the dead end to reach the jewel.
No worries.
Now, if you're up for some useful treasure, assuming it wasn't random, head
back to where you came in and take the paths that curve around to the right.
There's an underwater tunnel leading to a small chamber, don't worry, there is
air here, also a couple slaughterfish. There's a chest floating at the top.
Inside, you'll find a "Greater Soul Trap Ring" - Soul Trap 30 seconds and a
"Ring of Wizardry" - fortifies all your magical skills by 10 points, constant
effect.
As for Trolls, I only found three, and a bunch of bears and mountain lions.
Return to the Shrine and claim your reward. The Skeleton Key makes this quest
worth a little swimming, for all those aspiring thieves out there.
===============================================================================
8: Shrine of Sheogorath YOU MUST BE ATLEAST LEVEL 2 FOR THIS QUEST
-------------------------------------------------------------------------------
LOCATION: Leave Leyawiin by the West Gate and follow the road North. Stay on
this side of the river. You'll pass "White Stallion Lodge". Keep heading
North and you'll come to "Waters Edge", turn due NNW. You'll pass "Rockmilk
Cave" and should run into the Shrine a little ways later. It's slightly
further from Waters Edge as that is to White Stallion Lodge
OFFERING: A lesser soul gem, a head of lettuce and yarn.
TIME: Any
REWARD: Wabbajack Staff - Wabbajack on target Charge 3000 / 10 uses
QUEST: Let the wierdness begin. There are several faithful around the Shrine,
they're all in their undies and all mad as hatters. Ravel is the one you
want, he'll give you the absurd list of offerings you need. Buy or borrow
what you need. The imperial city market has everything on your list, either
in a shop or stashed in the street crates.
Now that you have all your goodies, approach the Shrine. Sheogorath is a real
fruit bat with too much time on his hands. He asks you to visit the settlement
of "Borderwatch", where they are "dull, dull, dull". He wants you to bring one
of their darker prophecies to life, simulating the events, and providing him
with amusement. You are to find the Shaman and ask him about the K'Sharra
prophecies. You should have a map marker for the village now.
The Shaman's name is Ri'Bassa, he's probably hanging out by the cookfire. If
he likes you enough, he'll tell you about the prophecy. It has three plagues:
a vermin infestation, all of the sheep mysteriously dying and the third, which
he wont talk about. He'll tell how thier cooking fire can be smelled across
the countryside and suggest you go to the Inn and ask the barmaid about her
cheese collection. Helpful, isn't he.
The barmaid is a stinky cheese collector. In fact, she has, in a locked case
by the bar, the stinkiest cheese ever made, the Olroy cheese. She'll tell you
if it was ever left out, it would bring rats from miles around. Show off your
sneaking skills, unlock the case, steal the cheese and go back outside. As a
point of interest, there's a "Nirnroot" in a pot on the shelf behind her.
Outside, the cooking fire is to the left of the Inn, drop in your cheese. Be
patient, if you cook it, they will come. A swarm of rats will shortly make
their way into the village. Chaos ensues and your journal will update. Your
buddy, Ri'Bassa is dropping rat poison around the square to kill them.
Now for the second plague. Grab one of the rat poison piles and head over to
the sheep pen. It's just to the left of the Inn. Drop the rat poison into the
feed trough. The sheep will gravitate to their deaths like...well...lambs to
the slaughter. Heh.
Once the last sheep drops dead, Sheogorath will speak to you again,
congratulating your victory and ask you to go to the center of town for the
final plague. You know, the one Ri'Bassa wouldn't talk about.
The center of town is the area between the two main stairs. Get comfy and look
up. Sheogorath outdoes himself and I'm not going to spoil it. Once the fun
is over, return to the Shrine for your reward.
===============================================================================
9: Shrine of Molag Bal YOU MUST BE ATLEAST LEVEL 17 FOR THIS QUEST
-------------------------------------------------------------------------------
LOCATION: From "Weynon Priory", head East along the road until you come to
"Odiil Farm". Turn South just after the farm. You'll find "Narfinsel", an
Ayleid ruin. The Shrine is just South of the ruin.
OFFERING: The Pelt of a Lion.
TIME: Any
REWARD: Mace of Molag Bal - Absorb Strength 5 pts. on Strike
Absorb Magicka 5 pts. on strike
Charge 2200 / 44 uses
QUEST: Molag Bal will give you a cursed Mace and send you to "Brindle Home".
There you must find Melus Petilius and drive him to kill you with the Mace.
Molag Bal promises to save you before you die. Probably. Melus Petilius is
a good man and a Paladin. Molag despises him of course. Follow your map
marker to "Brindle Home". It's a short walk.
Once there, ask one of the villagers about Melus. They'll tell you his wife
died while he was away fighting and he hasn't lifted a weapon since. He goes
to his wife's grave every day to mourne her. I found him there around one in
the afternoon.
Follow him to the grave. Drop the Mace in front of him and throw a fireball
at him, or some other minor attack that wont kill him. You MUST be at the
grave or he will not fight. I recommend removing all your armor, as well as
any enchanted items that reflect magic. If Melus dies, you lose. Now, go get
a drink. Have a wee. This is going to take a bit.
As you die, Molag Bal transports you back to the Shrine, true to his word,
alive and well. He thanks you for corrupting the Paladin and creating another
ruined soul. As a reward he gives you his Mace.
===============================================================================
10: Shrine of Hircine YOU MUST BE ATLEAST LEVEL 17 FOR THIS QUEST
-------------------------------------------------------------------------------
LOCATION: Start outside the south wall of the "Arcane University". Travel
South. Just before you cross the water, you'll find "Fatback Cave". On the
other side, you'll find "Sardavar Leed", an Ayleid ruin. As you pass on its
East side, a Shrine icon should appear in your compass. Follow this to the
Shrine, just South and a little East of the ruin.
OFFERING: A Bear pelt or a Wolf pelt
TIME: Any
REWARD: Savior's Hide Cuirass - Resist Magic 25% constant effect
QUEST: Hircine is the great white hunter type. and he demands proof of your
skills. You're to go to the "Harcane Grove", slay a Unicorn and bring the horn
back to Hircine as a trophy. Follow your map marker.
There are three Guardians of the Grove. Minotaurs with Elven Warhammers. Try
to only attract the attention of one at a time. They're alot easier to take
on that way. Once you've dealt with the Guardians, go after the Unicorn.
He'll just stand there as long as your weapon is sheathed. Almost seems a
shame to kill him as you can ride him. Unfortunately, if you do take him, when
you get off, he'll return to the Grove. You can't keep him.
Once you've killed him, assuming you're not riding in style now, take the
Unicorn's horn back to Hircine and recieve your reward.
===============================================================================
11: Shrine of Clavicus Vile YOU MUST BE ATLEAST LEVEL 20 FOR THIS QUEST
-------------------------------------------------------------------------------
LOCATION: Leave the Imperial City from "Talos Plaza" and cross the bridge into
"Weye". Take the first left on the road and follow it South, staying along
the waterfront. You'll find "Fanacasecul", an Ayleid ruin. Pass it by and
keep following the road, well, more of a path now, South until you find "Fort
Virtue". From here, turn to face SW and you should see a Shrine icon appear in
your compass.
OFFERING: 500 gold
TIME: Any
REWARD: Mask of Clavicus Vile - Fortify Personality 20 pts. constant effect
OR
Umbra Sword - Soul Trap for 120 seconds
QUEST: Clavicus Vile has a deal for you. He wants you to go after the Umbra
Sword. It holds the soul of a hero he had dealings with. In return, he'll
give you his mask. He tells you to start in "Pell's Gate". You now have a map
marker. You also recieve a statuette of a dog. His name is Barbas, the Hound
of Clavicus Vile.
Once you reach "Pell's Gate", Barbas tells you returning Umbra to Clavicus
would be a big mistake, things always end badly with that sword. Like we're
going to listen to that. Onward we go.
In "Pell's Gate". speak with Irroke the Wide and he'll tell you about Umbra.
His apprentice, Lenwin, found the sword, became bloodthirsty, joined up with
mercenaries and began calling herself Umbra. She was last seen near the Ayleid
ruin, "Vindasel". Follow your new map marker.
Enter "Vindasel". Keep alert for traps, there are a couple in here of the near
instant death variety. In the first large chamber is a drop away section of
floor with, you geussed it, spikes. Kill the rats, try not to be impaled.
In the next large Chamber, stay away from the center of the room. It spews
poison gas. More rats, no loot. Head down the passage. In the next, small
room, another rat and a small coffer with a strong potion of healing. Go
through the gate and down the hall.
Here you'll find Umbra; the sword and the person. She offers you a choice:
Stay and die or leave and live your life. Barbas the dog pipes up at this
point, trying to convince you to go back to the Shrine and take your chances
with a dissapointed Clavicus. We're not going to listen. She's tough, but not
that tough. Once you've killed her, pick up the sword. The dog tries to talk
you out of giving it to Clavicus one more time, saying it will ruin him. Back
to the Shrine, avoiding traps on your way out.
Now you have a choice. Give back the sword or keep it. If you keep it,
Clavicus is mad and swears to watch you from now on, the sword also goes from
weighing nothing to 45 lbs. It's also one of the most powerful swords in the
game, not too mention handy for enchanters.
If you give him the sword, you'll recieve the Mask of Clavicus Vile. If you
found this in Morrowind, you'll know it's a sweet piece of armor.
Either way, Barbas the dog will leave you once you've made your choice and
return to his masters side.
If you notice your magicka not regenerating, you've been cursed with "Astral
Vapors". Just go to the nearest church and get a blessing from the altar.
###On the XBOX 360, there is a now infamous glitch. If you go to the Shrine
and get this quest, you're given the statue of the dog. The Dog WILL
crash your game when you bring the sword back to the Shrine, as soon as he
leaves your inventory to return to Vile.
The only real solution for this is to go get the sword BEFORE recieving the
quest. Go to Vindasel, Kill Umbra and take the sword. At some point, your
journal will update telling you to go to the Shrine.
Go to the Shrine, talk first to the Khajiit priest, then the Shrine. If you
don't talk to the priest first, the dog statue will STILL appear in your
inventory, causing the glitch. Once you've spoken to the Khajiit, talk to
the Shrine and either return the sword or keep it. This way you can finish
the quest without ever having the dog in your inventory.
###If you can't go back to a save before you took the quest, try this. Talk to
the Shrine and give back the sword or keep it, whichever. AS SOON as you're
done talking to the shrine, hit your journal button, go to your map and
quick travel to Bruma. If you get there and start to hear the dog begin to
speak, go into your map and quick travel somewhere else, fast as you can.
It's the dog that's crashing your game. Keeping him from speaking is your
only way to avoid the crash. You may have to do this several times and it
doesn't always work, timing is everything. Good luck.
===============================================================================
12: Shrine of Meridia YOU MUST BE ATLEAST LEVEL 10 FOR THIS QUEST
-------------------------------------------------------------------------------
LOCATION: Start at Castle Skingrad. Leave by the West Gate. Follow the road
west until it turns south. GO offroad here, still heading west and you'll find
the "Cursed Mine". The Shrine is just a short hop West of this atop a small
hill.
OFFERING: Mort Flesh, Ectoplasm or Bonemeal
TIME: Any
REWARD: Ring of Khajiiti - Chameleon 35%
Fortify speed 10 pts.
Constant Effect
QUEST: Once you make the correct offering, Meridia will speak. She despises
the undead and wants you to take care of a group of necromancers for her.
You're to go to "Howling Cave". It's on the other side of Skingrad, follow
your map marker.
Inside, you'll find rats, a zombie and a skeleton on your way to the back of
the cave. No loot out here. When you enter the necromancer's lair, watch for
the tripwire just inside the door. The necromancers are spread out and all
of them have few undead freinds. Watch your health as they just seem to keep
coming. Nothing in here is hard to kill, they just try to overwhelm you with
numbers. Go for the necromancers first, some of the horde trying to kill you
are summons and will dissappear with the necros death.
When the last one dies, your journal will update. Return to the Shrine and
Meridia will award you the Ring of Khajiiti. Very handy.
===============================================================================
13: Shrine of Sanguine YOU MUST BE ATLEAST LEVEL 8 FOR THIS QUEST
-------------------------------------------------------------------------------
LOCATION: From Skingrad's west gate, travel west along the road until it turns
south. Leave the road at that point, continuing west until you find the
"Cursed Mine". The Shrine is due North of the mine, just over a small hill.
OFFERING: Cyrodilic Brandy
TIME: Any
REWARD: Sanguine Rose staff - Sanguine Rose on Target
Charge 3000 / 10 Uses
QUEST: You can find a couple bottles of Cyrodilic Brandy at the Gilded Carafe
in the Imperial Market. Once you have your offering, speak to Sanguine. He
wants you to go to Leyawiin and liven up the Countess's dinner party with the
spell he provides you; Stark Reality. He suggest you be insconspicuous and
says you'll need to find a way into the party, as it's invite only. Head over
to Castle Leyawiin.
##NOTE: The Countess is out of town on the 15, 16 and 17 of every month. If
you've gotten to the party, and she wont show up, check the date.
One of her maids will give you this information if you ask.
What you need here is a set of exquisite clothes, ot atleast high end clothing.
You should be able to find what you need upstairs in the family's private
quarters. Don your new outfit and head back to the throne room. You can't
open the door. Speak to the guard in front of it, you must be wearing your new
threads. If he likes you enough, you'll be able to bribe him to let you into
the room. The spell must hit ALL the dinner guests and the Countess. The
spell also has a range of 300 ft. so it's going to get you to. Every item in
your inventory is going to vanish. Don't panic. It's been transported to a
chest next to Sanguine's shrine.
Now, you have to choices. You ARE going to be caught. After several hours of
trying to find a way to throw the spell without being caught, I couldn't find
one. Your choices are:
Go to jail - because all your belongings are now in the chest at Sanguine's
Shrine, you wont lose any items, however, jailtime does mean a drop in all
your skills. You can use this a learning experience, it'll give you the
chance to train your skills up again.
You could drop a lockpick before you cast the spell, pick it up afterward, and
use it escape the prison, avoiding the skill drop, but the guards will still
catch you, so I go with option two if you're a member of the Thieves Guild...
Resist Arrest - Don't bother fighting, there's no point really. Run. That's
it. Pick up your feet and flee the guards. You wont take much damage if
you're fast on your feet. Run to the west gate and steal a horse from the
stables. Your faster on horseback than on foot and you'll be able to outrun
the guards. Once you're far enough away from them, you'll be able to quick
travel back to the Shrine. Get your reward from Sanguine, your loot from the
chest and then head for the Imperial city. At the waterfront have Armand,
your local Thieves Guild rep, remove the bounty from your head.
NYEKOBUG says: "I found a way to do the quest without ticking the guards off.
I did it with one chameleon and one invisibility potion and a decent sneak
skill. Talk to the guard, get him to open the door for you and back all the
way out across the castle hall. You should still be able to see into the
dining hall. Drink the chameleon potion and go into sneak mode. When noone
can detect you, save and fire off the stark reality spell into the room. As
the spell leaves your hand, drink an invisibility potion. When the spell hits
the room, all of your items will still dissappear but the guards wont know who
did it
"SERRAPPHYM SAYS: "I can add something about the Sanguine quest. To escape the
room, all you have to do is cast a 100 power charm spell for 4 sec on a guard,
yield and he will pay your bounty."
This really does work beautifully!
===============================================================================
14: Shrine of Vaermina YOU MUST BE ATLEAST LEVEL 5 FOR THIS QUEST
-------------------------------------------------------------------------------
LOCATION: Start at Black waterside stables outside Cheydinhal. Turn so you
are facing directly between S and SW on your compass. Keep that bearing as you
travel. The Shrine is located on the NE shore of Lake Poppad.
OFFERING: Black Soul Gem - To get this you need an empty grand soul gem and a
soul trap spell. Travel Due East from the Shrine until you find "Dark Fissure"
cave. Outside the door is an altar. Once a week, at night, a light will shine
down on the altar until midnight. Place your gem inside the altar and cast
soul trap on the altar. Instant Black Soul Gem.
TIME: Any
REWARD: Skull of Corruption - Corruption 30 secs. on target
Charge 3000 / 20 uses
QUEST: Vaermina has had an orb stolen by the wizard, Arkved. Follow the map
marker to his tower, retrieve the orb and return it to the Shrine. I strongly
reccomend having a night eye spell. There's an area in the tower where a torch
does you little good, you'll want to be able to see more than three feet in
front of you, sheer drop offs, certain death, that kind of thing.
Once at the tower, you can explore the outside, not much here, corpses and a
few potions. Inside the tower, the first two rooms are vacant. Couple chests
and some potions, not much in the way of loot. The last room before Arkved's
Void will find you duking it out with a Flame Atronach and a Clanfear Runt.
Quicksaving before you enter the void is a good thing.
Arkved's void is near pitch black. There are thin walkway's you must traverse.
Watch your step, it's a long way down and a torch wont give you enough light to
see where you're going until it's too late. Follow the straight path across to
the other side and the entrance to Arkved's Lost Halls.
The first large chamber has three Clanfear Runts for you to deal with.
Straight across is a short hall leading to Arkved's Oasis. Go check it out for
the view and watch out for a Scamp who'll try and knock you off the ledge.
It's a loooong way down.
Back in the first room, take the flight of stairs. On the other side of the
door are a couple of Flame Atronachs. You'll find what looks like a Giant's
bedroom. There's a trapdoor to Arkved's Oasis, nothing interesting except
for the splatted body of the Scamp I knocked off the observation deck.
Go back to the bedroom and take the door to Arkved's Hall of Changes. Aside
from the Clanfear Runts, there's a pillar in the center of the room that lobs
the magical equivalent of a grenade at you every five seconds. There are two
doors. You want the door across from you.
The next room looks like a Zombie morgue. They're dead and a Flame Atronach is
standing guard. The trap door in the floor goes to Arkved's Retreat, a creepy
room with dozens of bodies dangling from the ceiling and a chest.
The door to your right is where you're headed. This leads to another room with
another annoying pillar, lightning this time. You want the door to the left as
you enter. Down a short hall and a trap door to Arkved's Rending Halls.
Through a long set of halls populated by clanfears, scamps, and Flame Atronachs
and littered with corpses to the entrance to Arkved's Death Quarters.
In here, you'll find Vaermina's Orb on a table to your right. Arkved is
unconcious in his bed. This is a good place to up your sneak skill as he wont
wake up. Find a comfy corner, sneak and hit auto walk. You'll get about a
level a minute.
Across the room is a door leading straight out to Nibenay Basin. Before you
wonder, no, the trap door you come out of isn't there before you go in. That
would have been too easy.
Return to the Shrine and collect your reward from a grateful Daedra.
===============================================================================
15: Shrine of Malacath YOU MUST BE ATLEAST LEVEL 10 FOR THIS QUEST
-------------------------------------------------------------------------------
LOCATION: Start from Horse Whisperer Stables outside Anvil. Follow the road
until you get to the point where it starts to curve eastward. Leave the road
here and head Due North. You'll pass Atrene Camp on your right, keep heading
North. Just past the camp, you'll see the Shrine marker appear in your compass
follow that North and you can't miss it.
OFFERING: Troll Fat
TIME: Any
REWARD: Volendrung - Paralyze 3 secs. on Strike
Drain Health 5 pts. for 20 secs. on Strike
Charge 2500 / 16 uses
QUEST: You're at a disadvantage here if you're not an Orc. You'll have to
max out Shobo Gro-Rugdush's disposition before he'll tell you what you need.
Malacath likes Ogres. An uppity Lord Drad has enslaved some of his Ogres to
work in his mine and Malacath's mad. Head to Lord Drad's estate. When you
speak to Lord Drad, he gets angry, he thinks using Ogres for slaves is a good
thing. After he tells you off, speak to his wife and she'll tell you the Ogres
are working in the Bleak Mine. It's not far and you'll have to go free the
Ogres. VERY IMPORTANT: If even one of the Ogres dies, your quest is over.
You lose.
Once inside the Mine, I suggest killing all the guards before you release the
Ogres. Seems this doesn't count as murder since you don't gain a bounty for
slaying them. Be warned, these guys are heavily armored but they also
didn't come to each others aide, so it shouldn't be much of a problem. If you
let them live, they will attack the Ogres as they try to leave and you could
lose one. Hence the aforementioned pre-freedom slaughter.
Once all the guards have been dealt with, free the Ogres and go back to Lord
Drad's estate. You'll see Lord and Lady Drad working the fields under the
careful supervision of the Ogres. Feel free to raid the house for any goodies
you may want, it's empty.
Return to the Shrine for your reward.
===============================================================================
16: Shrine of Hermaeus Mora NO LEVEL REQUIREMENT
-------------------------------------------------------------------------------
LOCATION: Due West of Cloud Ruler Temple. It's a hell of a trek. You'll find
a trail west of Cloud Ruler Temple. As long as your traveling uphill and west,
you'll find it. Keep an eye on your compass. The Shrine is near the top of
the mountain. Follow the Shrine icon when it appears in your compass and you
wont get lost.
OFFERING: You MUST have completed all the other Shrine quests successfully,
obtained the Mysterium Xarxes as part of the Main Quest and received the
Daedric Artifact quest from Martin. Once you've achieved all this, sleep and a
servant of Hermaeus Mora will come to you, demanding your presence at his
Shrine.
TIME: Any
REWARD: Oghma Infinium - see below for details.
QUEST: Hermaeus Mora is impressed with the deeds you've done for the other
Daedra and wants you to serve him now. He needs you to collect the souls of
the ten races. He will give you his soul gem and a spell, Mora's Soul Trap.
Make sure you only hit one person at a time with this spell. I'm told hitting
two or more will cause some kind of glitch that prevents you from finishing the
quest.
The best way to harvest these souls without racking up a sizeable bounty is to
pick your victims from the faithful at the Shrines you've already visited.
If you only kill one per Shrine, the other faithful don't take much notice.
Because there are no guards around, you shouldn't get a bounty or be attacked
by the others if you leave fast.
You will need: Khajiit, Argonian, Breton, Nord, Imperial, Dunmer, Altmer,
Bosmer, Orc and RedGuard.
Each time you gain a soul on your hit list, your journal will update. Once you
have them all, return to Mora's Shrine for your reward, the Oghma Infinium.
A rather nifty book. Read the book and you're given a choice of three paths.
Each one will raise three skills ten points each, hopefully bumping one of
those to the next level of mastery, and two attributes.
Once you use the book, it will dissapear.
PATH OF STEEL: Strength, Speed, Blade, Blunt, and Heavy Armor.
PATH OF SHADOW: Speed, Acrobatics, Sneak, Security, Light Armor
PATH OF SPIRIT: Intelligence, Alteration, Destruction, Conjuration, Restoration
===============================================================================
17: Frequently Asked Questions
===============================================================================
Q: What are Wabbajack, Sanguine Rose, and Corruption? What do they do?
A: Use Wabbajack on a non-human npc and it randomly changes them into
another creature.
Use Sanguine Rose on a non-human npc and it will summon a random daedra.
Whether the daedra will fight for you or fight for the creature you
summoned it on also seems to be random. Try standing at a distance when
you use it.
Corruption creates what we'll call an evil twin of whatever you use it
on. The twin will begin attacking whatever you summoned it on.
Q: In the Shrine of Sanguine quest i have got into the dinner party but the
countess is not there! i have looked everywhere in the castle but i can
not find her.
A: The dinner party happens in the evening so try to be in the dining room
after six pm. If she isn't there, try leaving the castle and coming back
in forcing the castle to reload. Jump ahead an hour at a time from 6.
She'll be there eventually. I think she likes to be fashionable late.
Q: Hey, regarding the Sanguine shrine quest, I can't seem to hit all the
people with my spell. Do I have to hit them all with ONE cast? If so, is
there a good spot to aim to do this?
A: How I managed it, from the door, I aimed at the guy to the right of the
Countess, on the other side of the table. Hitting him from the door was
how I finally got the update that I'd hit everyone. Tried it four times
to be sure, worked every time.
Q: I somehow managed to get a 1,040 bounty and a one point bump to infamy
collecting souls for Hermaeous Mora at the other Shrines. How, when there
weren't any guards around?
A: I had the same thing happen. Turns out there was an Imperial Forrester
somehwere nearby. A good sneak skill or a decent frenzy spell is the
best way to avoid being seen by a passing forrester. Though I simply
went and paid mine off with the Thieves Guild.
===============================================================================
18: Credits
===============================================================================
Many thanks to my Husband who beta tested all my directions so I didn't walk
anyone off a cliff.
Thanks to Deathbyfate on the ElderScrolls forums for telling me how to get a
black soul gem. I was at a loss, he saved my FAQ.
Thanks to the ElderScrolls forums. A great bunch of ES addicts that can answer
just about any question, no matter how stupid.
Thank you GameFaqs for posting my little contribution and solving many a gaming
riddle for me.
Thanks to nyekobug and Kama_returns for finding a way to complete the Sanguine
quest without getting caught.
Thanks Plethorex and Spartacus_prime for pointing out a mistake with the
Skeleton key.
Thanks to the puppetmaster for correcting me about the Umbra sword and Clavicus
Vile - you don't have to give it back.
Thanks to Dave for pointing out a glaring error in the directions for Mephala's
Shrine: Got my Shrines confused, heh.
Thanks to Nathan for pointing out that I forgot to mention the Countess being
out of town on the Sanguine quest.
Thanks to Serrapphym on Nirnroot for a wonderful Sanguine solution.
===============================================================================
19: Contact Me
===============================================================================
Please contact me at whoguru@hotmail.com with any questions, corrections,
suggestions, additions, etc... When you send an email, please put "Shrine FAQ"
in the heading so I'll know it's not spam.
===============================================================================
20: Copyright Notice
===============================================================================
This may be not be reproduced under any circumstances except for personal,
private use. It may not be placed on any web site or otherwise distributed
publicly without advance written permission. Use of this guide on any other web
site or as a part of any public display is strictly prohibited, and a violation
of copyright.
-
The Elder Scrolls IV: Oblivion
Ayleid Statue Guide for the PC
Version 1.00 May 5, 2006
Written by: WhoGuru
Copyright 2006 Karen Hoyt
INTRO: To begin the Ayleid statues quest for the collector, acquire one of the
statues. Vilverin is easy as you most likely know where it is already. Once
you have your statue you can do one of two things to start the quest.
1: Go to Umbacano Manor in the Talos Plaza District of the Imperial City and
talk to Jolring. Tell him you have something to show his master and he'll
take you to him.
2: Sell your statue at any of the merchants in the Imperial City and sleep
over in the city for a night or two. Jolring will come find you and offer
to take you to his master.
Umbacano is a collector of Ayleid antiquities and desperately wants a complete
set of Ayleid statues. There are ten. He will pay you 500 gold for each,
and will double your reward should you bring him all ten.
Once you bring him a second statue, he will give you the locations of five more
Ruins.
###There is no statue in Sardavar Leed. The Guide is wrong.
###If you come across an Ayleid Ruin called Miscarcand and have not done the
Main Quest yet, LEAVE IT ALONE, especially if you're on the xbox. This ruin
contains an item essential for the MQ, the Great Welkynd Stone. It's nothing
you can use, is a quest item so is undroppable and if you pick it up without
having the quest, you may have trouble finishing the main quest later.
If you're on PC and this has already happened to you, these codes will allow you
to drop the stone and then add it back into your inventory, fixing the quest.
player.removeitem 000345AF 1 - Takes the Welkynd Stone out of your inventory,
and once your quest updates, either go back to Miscarand,or enter:
player.additem 000345AF 1 - Puts the Stone backk in your inventory.
This is a very straight forward guide: Directions to each Ayleid ruin, the
general location of each statue within the ruins, and any special actions
needed to get the statue. Directions to the statues once you are in the
ruins will be very general as you can use your maps and see far better than I
can tell you.
You'll notice I bypass a lot of locked doors. I always assume the person using
this doesn't have the skeleton key, has trouble with hard locks, or is out of
lockpicks. There's always a way around locked doors in Ayleid ruins. I look
for the alternate path. If you can pick the lock, go ahead, you may even find
it's a shorter path to the statue.
===============================================================================
-------------------------------------------------------------------------------
TABLE OF CONTENTS
-------------------------------------------------------------------------------
1: Tips and general knowledge
2: Vilverin
3: Culotte
4: Moranda
5: Ninendava
6: Fanacas
7: Mackamentain
8: Wenyandawik
9: Wendir
10: Welke
11: Wendelbeck
12: "Nothing You Can Possess" - second quest from Umbacano
Malada Ruin
13: "Secrets of the Ayleids" - Third quest from Umbacano
Lindai Ruin
Nenalata Ruin
FREQUENTLY ASKED QUESTIONS - Coming soon!
CREDITS
CONTACT ME
COPYRIGHT NOTICE
===============================================================================
1: TIPS AND GENERAL KNOWLEDGE
-------------------------------------------------------------------------------
Get a horse. Most of these ruins are in the backwater of nowhere. Taking your
horse will make this go alot faster.
Keep an eye out for traps. Ayleid ruins are notorius for the instant death
variety.
If you find a door you can't open or see a path on the map you can't seem to
find, backtrack a little. You're looking for small blue switches in the wall
or on a pillar and square pressure plates in the floor, usually found in
alcoves.
When hunting for an Ayleid ruin, always keep your eye on your compass. When
you get near a ruin or any other landmark, the icon will appear in your compass
to guide you.
Night Eye is the handiest ability you can have in an Ayleid ruin. It makes
switches and floor pressure plates stand out. Detect Life is also helpful. It
will keep you from stumbling into zombies, skeletons and the like unprepared,
as well as revealing hidden areas by showing you the bad guys hiding inside.
Since creatures in Oblivion level with you, you'll face tougher enemies at
higher levels. Come prepared.
Consider investing in a resist poison spell, potions, or enchantments. Ayleid
ruins are famous for poison gas traps. You can lose a lot of health very
fast.
===============================================================================
2: VILVERIN
-------------------------------------------------------------------------------
LOCATION: Directly across the river from where you exited the palace sewers
at the beginning of the game, outside the Imperial City.
STATUE: Inside Vilverin, enter the Vilverin Canosel. Keep an eye out for the
floor switches to open the hidden doors. From the Canosel, enter the Vilverin
Wendesel. Be careful. In the first room is a section of floor that drops
onto spikes. Walk across either side, hugging the wall, and it shouldn't drop.
At the "T" junction, turn left and head to the Vilverin Sel Sancremathi. In
the first room, in the area at the center of the swinging blades, you'll find
a pedestal, the statue is resting here.
Grab your trophy and have fun killing the necromancer on the way out.
===============================================================================
3: Culotte
-------------------------------------------------------------------------------
LOCATION: Start at Cheydinhall, Black Waterside Stables. Leave on the Blue
Road going west. Follow the road to the coast, across from the Imperial City.
At the "T" junction, turn left and follow the road South. You'll pass
Wellspring Cave, Fort Magia and the burnt out ruins of All Things Alchemical.
Keep heading south until you reach the river. Do not cross. Follow the shore
of the river as it curves SE and you can't miss the ruin sitting half on the
bank, half in the water.
STATUE: Culotte is not a complicated ruin, only having a single floor. The
statue is easy to find and easy to get to as there are no monsters on your way
in. You'll need to find a pressure plate to open the door. It's in the room
straight back from the entrance. As you cross the bridge, part of it will
crumble away.
The statue is in a room, sitting on the floor in the center of three pillars.
Once you pick up the statue, the dead awaken in the crypt behind you. Watch
your step on the way out. As you can't take the bridge back out, follow the
side path on your way out to what looks like a dead end and drop down onto the
bridge below, bypassing the crumbled portion. Now retrace your steps to the
entrance.
===============================================================================
4: MORANDA
-------------------------------------------------------------------------------
LOCATION: Start in Weynon Priory. Take the road out heading East. This is a
bit of a trek. Stay to the road, checking your map often. You're looking for
the words "The Orange Road" written on the map. When you reach the "THE" in
The Orange Road, turn off the road and head North. Watch for the Ayleid ruin
map marker to appear in your compass. It's not too far North of the road.
STATUE: When you enter, you'll find a passage on your right blocked by a gate
with a very hard lock. If you can't pick this, go around the long way to your
right and enter the Moranda Aratasel. This will lead you back to the Main
floor, on the other side of the blocked passages. Keep an eye out for Varla
stones, there are two of them in Maranda.
Enter the Moranda Abaspania. The statue is on this level and there are no
creatures here. What there is is poison gas. The floors down here are filled
with it. Take the statue in the central chamber and find the other door back
to Moranda's main floor. If you checked every chest and casket, you should now
have a key for the locked gate, unless you picked your way through it the first
time around.
##When you bring Umbacano your third statue, he will offer a second quest,
"Nothing You Can Possess". I recommend leaving this until you have
collected and been paid for all ten statues. Finishing this one may make it
impossible for you to get the bonus for acquiring all ten.
===============================================================================
5: NINENDAVA
-------------------------------------------------------------------------------
LOCATION: Due NW of Moranda in the mountains above it. Also due West of Bruma
if you need a second reference. Quite a ways West.
STATUE: Ninendava is a single floor. The statue is in the room furthest north
behind a hard locked gate. Not up to picking it? Visit the complex on the
left side of the map. You'll find vampires and in a small alcove, a Ninendava
key atop a copy of Darkest Darkness.
##Upon returning with your fourth statue, you'll be greeted in the street by
Claude Maric, who says he's another of Umbacano's treasure hunters. Follow
him to the Tiber Septim hotel where you can speak with him. He has some
information about the "Nothing You Can Possess" quest Umbacano offered you.
He'll tell you to go to the First Edition bookstore and read their copy of
"Cleansing the High Fane". It will give you a map marker for the High Fane.
If you'ld rather not read it, just butter him up a bit and he'll give you
the map marker himself.
If you ask Umbacano about Claude, he'll tell you he feels competition is
good for the spirit.
===============================================================================
6: FANACAS
-------------------------------------------------------------------------------
LOCATION: From Cheydinhall's East gate, head NNE. It's pretty much on top of
a mountain.
STATUE: The statue is in an alcove straight back from the entrance at the rear
of the ruin. You'll have to take a quick swim to get to it as the entrance is
submerged. The place seems a bit of a maze, but as it's only one floor, it's
fairly easy once you figure it out.
===============================================================================
7: MACKAMENTAIN
-------------------------------------------------------------------------------
LOCATION: Middle O' Nowhere. Look on your map. Find the words "Nibenay
Basin" far below Cheydinhall. There is a small lake next to the word "Basin".
The ruin is just above the NW corner of the lake.
STATUE: Inside the ruin, head straight back from the entrance. In the first
large chamber, there are four Varla stone cages. The switches, two of them,
are on opposite sides of the room in small alcoves.
In the next room, over the smashing floor panel o' death, is the entrance to
the Tombs of the Undead.
In the Tombs, make your way to the area furthest left of where you came in.
You'll find a door to the Necromancer's Asylum.
The statue is on an altar in the center of the large chamber. On the far side,
you'll find a door back to the main floor. Press the switch and make your way
back out.
===============================================================================
8: WENYANDAWIK
-------------------------------------------------------------------------------
LOCATION: A short ride WNW of Bravil.
STATUE: Inside the first large chamber, there are three doors to the
Wenyandawik Edesel. Take the door on your right, push the switch to the left
of the gate to reach it.
Once in the Edesel, the room on the right contains two Varla stones. The
switches are on either side of the room, look carefully.
Go back down the hall. As you near the end, a secret wall will open revealing
a hidden room. Go through and you'll find the statue sitting on a pedestal.
Go through the gate on the other side. It leads you out onto a short walkway.
Drop down and the door to the Main floor is right next to you.
===============================================================================
9: WENDIR
-------------------------------------------------------------------------------
LOCATION: SSW of Chorrol. See the words, "The Black Road" on your map? The
ruin is due south of the word "Black".
STATUE: Inside, to your right, is a hard locked gate. To your left is a break
in the wall where you can jump down into the central chamber. I jumped. There
are three sets of spikes in here. Look up at the ceiling to find them and
watch your step. Make your way to the entrance to the Wendir Nagasel.
In the Nagasel, there are floor spikes in the center of the first chamber.
Avoid these and head into the next room. Poison gas here. Go to your right
and follow the passage to a flight of stairs. At the top, there's a passage on
your right and a gate straight ahead. Go to the gate, hit the switch to the
left of the gate. The statue is on an altar to your right.
Backtrack and take the passage to your right. As you enter, take the stairs on
your right. Follow the passage at the top of the stairs and you'll find a door
that leads back to the main floor.
===============================================================================
10: WELKE
-------------------------------------------------------------------------------
LOCATION: East of Bravil, find the words "Panther River" on your map. Welke
is just south west of the word "Panther". WSW actually, above the river bank.
STATUE: Inside, turn left. Follow the twisting passages to the large chamber.
In the center is a door to the Welke Ceyede.
In the Ceyede, you'll have to take a quick swim to reach the central chamber.
Once there, at the back of the room, you'll find a door to the Welke Edesel.
In the Edesel, the statue is on an altar at the center of the room.
===============================================================================
11: WENDELBECK
-------------------------------------------------------------------------------
LOCATION: East of Bravil, find the words "Panther River" on your map. The
ruin is across the river, due North of the word "Panther".
Statue: As you enter, you'll find a large balcony overlooking the central
chamber blocked by a hard locked gate. Jump the balcony to the floor below.
#Be careful. On the floor past the pillar is a vent, in the center of a large
square. If you step anywhere in the square, Walls will shoot up around you,
locking you in with the poison gas vent. They take about five seconds to drop
back down. If you get trapped, heal often until they drop, then get out fast
before they raise again.
Take the hall at the back right of this chamber. It leads to another poison
gas filled room. If you can pick the lock on that gate, you can bypass both
these rooms.
Enter the Wendelbeck Aldmerisel. To get to the next level, go to the passage
in the far right corner of this room. Follow it back, hit the switch, and you
can now reach the door to the Wendelbeck Sel Aran Mathmedli. It's on your
left.
This next area is irritating. Poison gas and my favorite pillars that shoot at
you if you get too close. Turn left, then right. Hit the switch to drop the
gate and the statue is on an altar to your right. You may now explore the
rest of the ruin at your leisure.
===============================================================================
12: "NOTHING YOU CAN POSSESS" - SECOND QUEST FROM UMBACANO
-------------------------------------------------------------------------------
Umbacano wants you to find the High Fane and retrieve a carved panel for him.
You can get a map marker for this by going to the First Edition bookshop and
reading their copy of "Cleansing the High Fane". It's now known as Malada.
If you already talked to Claude Maric, you may already have the map marker.
MALADA: This ruin is on the far east side of the map, ESE of Mackementain.
You should have a map marker for it by now. Enjoy the scenery, it's a long
walk. As you near the ruin, you'll see two people standing on a rise to your
left. They aren't interested in telling you why they're there. The Khajiit on
the hill above the ruin however will, if he likes you. He'll offer to help you
get the better of Claude Maric, if you come out alive, for half your reward.
Inside Malada, the chamber you're looking for is the furthest west and south of
the entrance. This floor seems a bit confusing at first but is really straight
forward.
When you take the carved panel, the wall it rests in will crumble forward. Back
up quickly to avoid taking damage. Go through the door to the Malada
Aldmerisel for a Varla stone and a roundabout way back to the main floor.
When you exit Malada, you'll find Claude Maric and his three freinds waiting
for you. Claude wants the panel and orders them to kill you when you refuse.
Your Khajiit freind will help in the fight. Claude however makes for his
horse. He's fast. If you need a little revenge, ranged attacks or a bow are
the best way to take him down. It wont be the last you see of him though.
Bring the carved panel back to Umbacano. He rewards you 500 septims and offers
another task. "Secrets of the Ayleids".
===============================================================================
13: "SECRETS OF THE AYLEIDS" - THIRD QUEST FROM UMBACANO
-------------------------------------------------------------------------------
There is one more relic Umbacano wants, the Crown of the last Ayleid King. His
collector rival, Herminia Cinna, has it. He'll give you 1000 septims to go and
buy it from her.
Herminia isn't interested in selling the crown for any price. She's convinced
Umbacano will use it badly. She tells you of a second crown, in the ruins of
Lindai. Umbacano, having never seen the real thing, will not know the
difference.
You have a choice: Steal the real crown from Herminia Cinna's house or go to
Lindai, recover the second crown, and give that to Umbacano.
STEALING THE CROWN: Herminia goes to the cemetery at the Palace every day
around eleven am. Sneak into her house and upstairs to her bedroom. In the
desk you'll find a key to an Ayleid cask. The cask is on a table on the other
side of the room. Take the Crown of Nenalata.
GOING TO LINDAI: It's due East of Chorrol, a short walk. Inside, watch out
for two sets of swinging blades in the entry hall. Follow the winding paths
through two chambers. In the third, there are three floor panels in the center
of the room. The ones on either end lead to ceiling spikes. The one in the
middle will lift you up to a switch to open the gates on either side of the
room. You can easily walk around the outside of this room. At the back is a
door to the Lindai Inner Tombs.
In here you'll find two Varla stone cages. The switches are on either side of
the room. At the back is an Ayleid cask holding the Crown of the Lindai.
Return to Umbacano with the crown of your choice. Whichever you give him, he
notices no real difference.
Umbacano has one last task. He needs you to take him to the ruins of Nenalata
so he can complete his research on the last King of the Ayleids. You'll find
Nenalata East of Bravil on the opposite shore of Niben Bay. Umbacano gives
you three days to meet him there. I recommend going in ahead of time and
clearing out all the mobs before he arrives.
NENALATA: Though expansive, Nenalata is simple. There's only ever one way
to go and there are no traps. Just follow the passages, first to the Nenalata
Wendesel. Then from there to the Nenalata Sel Aran Arpena.
In the Sel Aran Arpena, at the very back of the central chamber, is a wall you
can't get through without Umbacano. On your way out of this room, be sure to
grab the two Varla stones in brasiers.
Outside, you'll find your freind Claude waiting, if you have detect life that
is. He's invisible. He says he holds no hard feelings and is truly there at
Umbacano's request. He wants both of you to escort him to the throne room.
When Umbacano arrives, lead them back to the chamber you couldn't enter.
Umbacano will open the door and seat himself on the throne with his crown,
proclaiming himself the new king. The outcome of this is determined by which
crown you gave him.
If you gave him the crown of Nenelata, you'll be able to keep it as it's a nice
piece of enchanted armor.
If you gave him the crown of Lindai, it will be irreversibly broken.
Leaving the ruins after this will officially complete the quest in your
journal.
Enjoy the fireworks. =)
===============================================================================
FREQUENTLY ASKED QUESTIONS
-------------------------------------------------------------------------------
Q: I've gotten Umbacano to the throne room and he wont sit on the throne. I've
pushed him up to it, gone out and come back in, reloaded an earlier save and
he just wont sit down. What do I do?
A: Some have found that when they get Umbacano into the Throne room, for
whatever reason, he wont sit on the throne, preventing you from finishing
the quest. If this happens to you, kill him yourself. Your journal should
update, telling you to leave the ruins, and the quest will clear once
you're outside.
Q: Do you know why after giving Umbacanco two statues and he gave me the
locations of the ruins, why is it that his house is suddenly lokced up 24/7? I
can't get in and give him his statues without getting in trouble.
A: Are you running any mods or patches? You'd be surprised the things they
can glitch. Disable any mods or patches you're using temporarily, and
then reload your game. Several people have had all shops in the game
closed 24/7 because they were running mods.
===============================================================================
CREDITS
-------------------------------------------------------------------------------
Thanks to the ElderScrolls forums. A great bunch of ES addicts that can answer
just about any question, no matter how stupid.
Thank you GameFaqs for posting my little contribution and solving many a gaming
riddle for me.
Many more thanks to my oh so patient Husband for testing all my directions.
Many thanks to tones12 for finding the console codes regarding the Great
Welkynd Stone.
Many, many thanks to the Avid Alchemist's Alcove, who's wonderful Obliv-O-Map
helped me locate several of the ruins.
Thanks to nuclearstab5 for finding that killing Umbacanowill finish the quest
if it glitches at the throne.
Thanks to John Fisher for reminding me to put the fate of both crowns in here.
Thanks to bf42lvr for pointing out an error in the directions to Moranda.
===============================================================================
CONTACT ME
-------------------------------------------------------------------------------
Please contact me at whoguru@hotmail.com with any questions, corrections,
suggestions, additions, etc... When you send an email, please put "Statues" or
"Ayleid" in the heading so I'll know it's not spam.
===============================================================================
COPYRIGHT NOTICE
-------------------------------------------------------------------------------
This may be not be reproduced under any circumstances except for personal,
private use. It may not be placed on any web site or otherwise distributed
publicly without advance written permission. Use of this guide on any other web
site or as a part of any public display is strictly prohibited, and a violation
of copyright.
-
===============================================================================
-------------------------------------------------------------------------------
Once Martin has donned the Amulet, he'll ask you to escort him to the Imperial
City Palace to meet with Ocato. He needs to formally present his claim as the
Emporer before he lights the dragonfires.
If you still want to collect Sigil Stones, now is the time to do it. Once you
finish this, the Oblivion Gates will be closed forever.
Tell Martin to follow you and fast travel to the Imperial City Palace. Meet
with Ocato in the Council Chambers and he'll inform you the council has already
voted to accept Martin. As Ocato kneels and proclaims Martin Emporer, a guard
rushes in. Oblivion Gates have opened all over the city, pouring Daedra into
the streets. You must now get Martin safely to the Temple of the One. Don't
fast travel here, you'll leave Martin behind. Lead the charge and he should
stay right behind you.
When you reach the Temple District, run around the right side of the Temple.
Ignore the Daedra, they're inexhaustible and Martin's health is not.
As you round the right side of the building, Mehrunes Dagon himself appears.
Find Martin at once, he should be close behind you, and speak with him. Now
that Mehrunes has crossed into Tamriel, lighting the dragonfires wont be
enough. Martin has a drastic idea though. Tell him to follow you.
Run around Dagon's legs on the left and get into the Temple fast. Martin will
be pulled safely with you. Talk to Martin again and get a comfy seat.
Mehrunes Dagon rips the roof off the building and Martin uses the Amulet to
summon Akatosh. The Amulet is destroyed in the process and Mehrune's is sent
back to Oblivion forever. The Oblivion Gates are likewise gone forever.
Tamriel is safe again and a Statue of Akatosh now resides in the Temple of the
One. Once you leave the Temple, you'll be able to come back and click on the
statue to recieve Akatosh's blessing. A couple nice bonuses that last for
about a week.
Congratulations. You have completed the Main Quest and saved the world.
Now...go do something useful, maybe join the Dark brotherhood? =)
===============================================================================
-------------------------------------------------------------------------------
Speak with Chancelor Ocato after the battle. He proclaims you Champion of
Cyrodiil, a title bestowed on few others and has ordered a suit of Imperial
Dragon Armor to be made for you. This armor is normally only worn by the
Emporers but he feels you deserve no less for your service.
You can pick it up in two weeks at the Armory in the Imperial Legion Compound
of the Imperial City. You're journal will update and tell you when it's
ready.
As a further point of interest: After you destroyed the Great Gate at Bruma,
saving the city, a statue was commissioned for you. It should be complete by
now. You'll find it inside the city, next to Bruma's North Gate. Click on the
base to get a cliff's notes version of your victory.
===============================================================================
===============================================================================
Coming soon
===============================================================================
===============================================================================
Many thanks to my husband for testing all my directions and instructions. He
keeps me from sending anyone off a cliff, and often finds solutions I miss.
Many, many thanks to the Avid Alchemist's Alcove, who's wonderful Obliv-O-Map
keeps me from wandering the countryside for days.
Thanks to the ElderScrolls forums. A great bunch of ES addicts that can answer
just about any question, no matter how stupid.
===============================================================================
===============================================================================
Please contact me at whoguru@hotmail.com with any questions, corrections,
suggestions, additions, etc... When you send an email, please put "Main Quest"
in the heading so I'll know it's not spam.
===============================================================================
===============================================================================
This may be not be reproduced under any circumstances except for personal,
private use. It may not be placed on any web site or otherwise distributed
publicly without advance written permission. Use of this guide on any other web
site or as a part of any public display is strictly prohibited, and a violation
of copyright.
-
The Elder Scrolls IV: Oblivion
Main Quest Guide for the PC
Version 1.00 June 3,2006
Written by: WhoGuru
Copyright 2006 Karen Hoyt
TABLE OF CONTENTS
================================================================================
1: Hints Tips and General Info
2: Tutorial
5: Breaking the Seige of Kvatch
On Oblivion
On Sigil Stones
6: The Battle for Castle Kvatch
10: Dagon Shrine
11: Spies
13: Bruma Gate
14: Allies for Bruma
14.1 Anvil
14.2 Bravil
14.3 Cheydinhal
14.4 Chorrol
14.5 Kvatch
14.6 Leyawiin
14.7 Skingrad
16: Miscarcand
17: Defense of Bruma
18: Great Gate
19: Paradise
================================================================================
1: HINTS, TIPS, and GENERAL INFO
================================================================================
Pick up some Alchemical equipment. It's a great way to make your own potions
and ensure a X5 multiplier to your intelligence at every level if you make good
use of it. Alchemy is also a great way to make money early on.
Pick ingredients wherever you go, make potions and sell them. You'll never be
completely poor this way. A Mortar and Pestle is all you'll need to get
started. Adding the other three alchemical tools will make your potions
stronger: Alembic, Calcinator and Retort.
When Closing Oblivion Gates, ALWAYS ALWAYS keep a save from before you entered
the gate. Many people have had issues with a gate not closing after they have
taken the Sigil Stone. Reloading and trying again will keep you from getting
stuck.
At each phase of a quest, check your journal. This will keep you from missing
steps and let you know of any special requirements to complete the quest. Some
things are time specific and require you to wait. Your journal will tell you
how long.
Use your map markers. An active quest will usually, not always, give you a map
marker to guide you. If you're lost, this is a good way to get back on track.
===============================================================================
2: TUTORIAL
-------------------------------------------------------------------------------
#This is going to be brief, short and sweet, as this is the tutorial after all
and the point is to teach you the basics. You don't need me to repeat them.
This will just give you general directions, where you should be going, things
you should look out for, etc... As there's really only one direction you can
go at any given time, you really can't get lost in here.
You'll begin the game, oddly enough, as a prisoner in your cell. The Emporer
and three guards will come through, escaping assassins that have already killed
his sons. Follow them into the tunnels. Once Captain Renault has been killed,
make sure to pick up her sword. The Emporer and his guards will leave through
a door to the Imperial Subterrane. You can't follow as it's locked. Turn to
your right and you'll see a hole in the wall. This is your exit and will lead
you to another entrance into the Imperial Substructure. Loot every chest,
barrel and corpse you come across. You'll find enough weapons, armor and
potions to keep you on your feet if you're careful.
Enter the substructure. Watch out for Rats and follow these tunnels to the
entrance to the Natural Caverns. You'll run into a Goblin here, use him to
work on your sneak skill. On the crate next to his fire is a nice Mortar and
Pestle. Pick this up as Alchemy is a great way to make money, raise your
intelligence and avoid having to pay for potions.
I suggest trying to sneak through here wherever possible as the place is
crawling with Goblins. Keep your eyes on the floor to spot the tripwire at the
entrance to the Goblin's cavern. Before you leave, grab the Goblin Shaman's
staff. It's not very powerful but useful for whittling down your enemies
health froma distance.
Enter the Imperial Subterrane. You'll find you've caught up with the Emporer.
At this point, you can choose which sign you were born under. Now, stay with
the Emporer and help fend off assassins on your way to the Sanctum. Of course,
you can always stand back and let the Blades handle it.
===============================================================================
-------------------------------------------------------------------------------
The Mythic Dawn assassins will attack one more time in here. The Emporer will
give you the Amulet of Kings and ask you to deliver it to Brother Jauffre at
Weynon Priory. He knows the location of the Emporer's last remaining son.
You can't stop it, the Emporer will be killed after handing you the Amulet.
Take out the last assassin. Baurus will give you directions to Weynon Priory,
a map marker and a key to get into the sewers. You'll also choose your class
at this point.
Either pick from the list or custom create your own. Baurus will also thank
you for returning Captain Renault's sword and take it. I know. Don't worry,
you can get another one later.
Now, head through the archway next to the Emporer's body and you'll find an
entrance to the sewers. Save when you enter. You'll have a final opportunity
to alter your Race, Class and Birthsign. If you're not sure, go play in the
ruin across the water when you exit and see if you like the way your character
is set up. If not, re-load your save from inside the sewers and change it.
Once outside, Weynon Priory is due West of your position. You can walk or open
your map, click on Weynon Priory and Fast Travel there. Before you go, you may
want to stop at the Imperial City Market District. Repair your armor, sell
off the stuff you don't need, upgrade your weaponry and maybe pick up a few
new spells. Don't bother buying repair hammers as you can always find a small
supply in the street containers, crates and boxes of any city. WHy spend the
money?
Make your way to Weynon Priory. You'll find Jauffre upstairs at his desk on
the second floor of Weynon House. Deliver the AMulet to him and tell him of
the Emporer's last words and request.
===============================================================================
-------------------------------------------------------------------------------
The Emporer had an illegitimate son whom Jauffre hid many years ago. His name
is Martin and he should be serving in the Chapel of Akatosh in Kvatch. Jauffre
bids you hurry as the assassins who killed the Emporer must surely know of
Martin's existence by now. Ask Juaffre about "Assistance" before you leave and
he'll offer the contents of his chest to aid you. Ask the other monks about
Assistance as well. Brother Piner will give you a copy of "A Warp in the West"
which will raise your block skill. Prior Maborel will offer you his horse to
speed you on your journey and Eranor the Shepard will give you a repair hammer.
On to Kvatch, or rather the camp outside of it. You'll find it SW of Weynon
Priory. Either ride or fast travel there.
When you reach the refugee camp, you'll be told the city has been sacked by
forces from Oblivion. Great portals opened and flooded the city with Daedra.
You need to find Savlian Matius, a Kvatch guard, to find out about Martin.
He's up at the barricade before the city gates.
Before you go, check to see if you need any last minute supplies. At the
campfire you'll find Sigrid who sells a few restorative potions and Batul gra-
Sharob the armorer.
Now that you're outfitted, head up the hill to the gate. As you head up the
winding path, the sky darkens with an evil red glow and thunder begins to pulse
like the beating of some great heart. You have your first view of the fiery
portal of an Oblivion gate. Savlian Matius will head you off as you approach,
warning you away for your safety. As we're not worried about our safety, talk
to Savlian and ask about Martin. He last saw him leading a group of survivors
toward the Chapel. Savlian and his men can't get into the city to rescue them
because of the Oblivion Gate blocking the way. Offer your assistance and he
will ask you to close the gate.
===============================================================================
5: BREAKING THE SIEGE OF KVATCH
-------------------------------------------------------------------------------
Savlian has already sent men into the gate to try and close it. None returned.
He and his men will clear you a path to the gate through the Daedra. Head for
the gate. As you approach the glowing portal, you'll see a door icon appear
saying "Oblivion Gate to the Plane of Oblivion". Click and you will be
transported.
Welcome to Oblivion. Your goal is the tall tower in the distance, the one with
the yellow light at the top. Head to your left and you'll find one of the
Kvatch guards, Ilend Vonius, being attacked by Daedra. Finish them off and
Ilend will tell you what befell the other guards. They were ambushed on the
bridge. Only Ilend escaped but another guard, Menien, was taken to the tower.
You'll need to find him. At this point you can send Ilend back out to Savlian
or take him with you. I sent him back. I am my own cannon fodder.
ON OBLIVION: There are some things to watch out for: Avoid clumps of tall,
standing roots. These are Harada roots and will lash you if you pass too near.
In some palces you may find landmines on the ground. Get too close and they
pop into the air and explode. Always listen carefully for the sound of falling
rocks. Lanslides are common and can push you off into the lava. If you see
tall, yellow flowers, walk carefully around them. They spew poison that will
drain your speed. Fleshy pods contain useful potions and other items.
Follow the path around to your left. It curves around back to the right and
will lead you straight to the tower. Enter the Bloodfeast. As you enter,
you'll see two blue fountains. These will restore some of your magicka. The
red, or blood fountains, restore your health. The flowing column of fire in
the center is always how you'll know you're in the right tower.
Now enter the Rending Halls. Good rule of thumb for Oblivion towers: As long
as you're heading up, you're going in the right direction. Follow this hall
up and take one of the two doors back to the Blood Feast. Up the ramp to
either side and take the door to the Corridors of Dark Salvation. At the top
of this hall, take the door to the Plane of Oblivion. You'll need a key for
the citadel hall doors.
Cross the bridge to the other tower. You'll hear a man calling to you as you
enter. Head to the top and deal with his jailor. Be sure to take the Sigil
Keep Key off his corpse. Menien is trapped in a brood cage and tells you
you'll need to reach the top of the tower and take the Sigil Stone to close the
gate. You can't save Menien. Had back to the main tower.
Use the key to open one the citadel hall door on your left and head up.
Re-enter the Blood Feast and take the ramp to either side. At the top, on the
floor, you'll see a glowing runed portal to the Blood Feast. Click on this
and you'll be transported to the top floor. Take the ramp again and you'll
find what you're looking for, the Sigillum Sanguis.
You'll find yourself in the dome at the top of the tower. Head up the ramps
and at the top you'll see a glowing black orb at the top of the pillar of
flame. This is the Sigil Stone. Take this, the gate will close and you'll be
transported back to Kvatch.
ON SIGIL STONES: Each Sigil Stone has two enchantable effects, one offensive
and one defensive. All you need to do to use it is click on it in your
inventory and choose the item you wish to enchant, no altars required.
There are five levels of stones:
Descendant - Levels 1-4
Subjacent - Levels 5-8
Latent - Levels 9-12
Ascendant - Levels 13-16
Transcendant - level 17+
The higher the stones level, the more powerful the effects.
Example: Descendant- Turn Undead 30 pts. 20 sec OR Detect life 30 pts.
Transcendant- Turn Undead 100 pts 30 sec OR Detect Life 180 pts.
You can use one or the other of the stones effects when enchanting, not both.
Always quick-save before you take the stone then take it and check the effects.
If you don't like what you got, reload and do it again. They spawn randomly
so the grab and load method will get you what you want, if you're patient.
Now that the Gate is closed, find Savlian back at the barricade and tell him
the way into the city is cleared. You're not done yet. Savlian asks if you'd
help rescue those trapped in the Chapel. Agree and follow the charge to the
city gates.
Watch where you swing. You're not alone. Savlian and his guards are very good
at jumping in front of you as you swing your weapon. If you kill one of them,
you'll have to load your last save and try again as they'll call you murderer
and attack you. Savlian is unkillable, he'll just go unconcious. Once you've
cleared the Daedra out of the plaza, speak to Savlian again and follow him into
the chapel. You'll find the survivors in here, including Martin. Savlian
sends them to the refugee camp and asks your help in retaking the castle.
At this point, you can speak to Martin or ignore him. If you don't talk to
him, he'll follow the other refugees down to the camp and be there when you
decide to find him. You can also ask him to follow you now. We're going to
help Savlian liberate the castle and take Martin with us. Don't worry about
him. At this point, like Savlian, he is unkillable and handy with a sword.
===============================================================================
6: THE BATTLE FOR CASTLE KVATCH
-------------------------------------------------------------------------------
Savlian needs to get into the Castle to try and save the Count, who holed up
inside with some men to hold off the Daedra. Agree to help and follow him
outside. Wipe out the Daedra in the plaza and speak to Savlian again. Seems
the Daedra have barred the gate from the inside and you need to find another
way. Savlian tells you to find Berich Inian. He's at the chapel, has a key
and knows a back way into the gatehouse.
Berich is just inside the door of the Chapel and will offer to lead you through
the undercroft and to a passage leading into the gatehouse. Three Imperial
Legion soldiers will also offer their help, having seen the fires from the
road. If Berich should die, you'll need to get the key from his body and
follow your map marker to the passage entrance. Follow him through the
undercroft and back outside again. Watch where you're swinging. You don't
want to hit any of your merry men. Berich will lead you to a trap door to a
Castle Kvatch Passageway, and unlock it for you before going back to wait with
Savlian at the gate.
This passage is a straight shot. Walk across to the ladder on the other side.
You and your men will come out between the castle gates. On the other side,
up a short flight of stairs, is the wheel lever that will open the gates.
Raise the gates and help Savlian defeat the Daedra in the courtyard. This is
going to get a little hectic. The mobs are out in force so check your swings.
Once you're clear, follow Savlian into the Castle.
Clear the mobs from the hall. Savlian and his men will hold their postion
while you head back to find the Count. Straight back you'll find a door to the
Great Hall. In here, at the back, are the Count's Quarters. You'll find the
Count face down in a pool of his own blood. Take the Colovian Signet Ring from
his body and return to Savlian with the bad news.
He's crushed by the Counts death and grateful you retrieved his Signet Ring.
Savlian awards you his Kvatch Cuirass. This is a great piece of Light Armor
early on as it fortifies your Endurance and Strength.
===============================================================================
-------------------------------------------------------------------------------
Now that Kvatch is free, you and Martin must return to Weynon priory and
Jauffre. As before, you can walk or use your map and Fast Travel. Martin will
be pulled along with you if you choose the short route.
If you opted not to take Martin with you, you'll find him down at the refugee
camp wandering around. Just make Finding the Heir your active quest and you
should recieve a map marker for him if you're having trouble finding him.
===============================================================================
-------------------------------------------------------------------------------
When you arrive, the Priory is under attack by the same assassins who killed
the Emporer. Prior Maborel is already dead and Eranor believes Jauffre was in
the chapel praying when they attacked.
Head inside the chapel and you'll find Jauffre being attacked by three of the
assassins. Deal with them quickly. Jauffre is afraid they came for the Amulet
of Kings. Follow him to check on it's hiding place. As he suspected, the
amulet is gone. Reassure him that you have found Martin. He's relieved and
suggests a safer place to protect him, Cloud Ruler Temple, the ancient fortress
of the Blades. It's in the mountains just above Bruma. Head outside and
Martin and Jauffre will mount up on the remaining horses.
You can ride the Orange Road all the way to the Temple. It's a lovely, scenic
ride. However, Jauffre has a tendency to take off into the outback after
wolves and anything that he thinks needs killing. He can dissapear for quite a
while on these side trips of his. This is a problem as you can't get in to
Cloud Ruler Temple unless Jauffre is with you. If you opt to ride, make sure
to keep track of him.
On reaching Cloud Ruler Temple with your entourage intact, the gates open. The
Blades hail Martin Septim as the true heir. Martin gives a lackluster speech
and thanks you for saving his life. You'll get to remind him he's going to be
Emporer here.
Now, speak to Jauffre about how to retrieve the Amulet.
===============================================================================
-------------------------------------------------------------------------------
At this point, Jauffre will offer to make you a Knight Brother or Sister of the
Blades. Don't get excited. You can't rise in the ranks as there are no quests
to do for the Blades.
Jauffre wants you to speak to Baurus. He may have a lead on how to get the
amulet back. You'll find him at Luther Broad's Boarding House in the Elven
Gardens District of the Imperial City.
Before you leave, visit the East Wing of Cloud Ruler Temple. In the armory
you'll find a full set of Blades Heavy Armor, weapons and a couple repair
hammers. Upstairs in the library are a skill book and a set of Novice Alchemy
equipment. You can also use the beds in the west wing anytime. Outside, head
over to the practice square where two of the Blades are sparring. Watch for a
minute and you'll gain permanent +2 bonuses to both your Blade and Block
skills.
On to the Imperial City and Luther Broad's Boarding House. You'll find Baurus
having a drink at the bar. He'll tell you not to say anything and sit. Grab
the stool next to him. The man in the corner has been watching Baurus. When
he gets up and the stranger follows, you're to follow him and see what happens.
Follow them into the basement where the stanger reveals himself to be a member
of the Mythic Dawn. Waste him and search his body. You'll find an odd book
called Mythic Dawn Commenteries Volume 1. Take this and speak with Baurus. He
has learned the assassins are members of the Mythic Dawn Cult which worships
Mehrunes Dagon. He asks you to take the book to Tar-Meena, a scholar at the
Arcane University. Find out what she knows and report back.
You can find Tar-Meena in the Arch Mage's Lobby. It seems a man named Mankar
Cameron is the leader of the cult and penned the Commenteries. There are four
volumes, each containing clues to the location of the Mythic Dawn's hidden
shrine to Mehrunes Dagon. You'll need to find the other three. Tar-Meena will
give you the library's copy of Volume 2 and refer you to Phintias at the First
Edition in the Market District to find the other two. Be sure to read all four
volumes as they are skill books.
Head over to the First Edition and talk to Phintias. You'll need to work on
his disposition a bit. He does have a copy of Volume three he's holding for a
cutomer. If he likes you enough, he'll sell it to you for 100 gold.
If you're short on cash, or just don't want to buy the book, don't worry.
Phintias tells you the cutomer, Gwinas, is late to pick up his book. Go
outside and wait for Gwinas to enter the shop, follow him in, and wait until
Phintias has given him the book. Now speak to Gwinas. Inform him the Mythic
Dawn are the ones who killed the Emporer and he has a bit of a breakdown.
He'll give you his copy gladly and also tell you the only way to get a copy of
volume four is from a member of the cult. He has a meeting set up to meet a
sponsor from the cult and gives you the note detailing the location of the
meeting in the sewers below the Elven Gardens. Report back to baurus with this
information.
Baurus knows the place in the note and will lead you through the sewers. Stay
close and try to keep him alive if possible. You'll find mudcrabs, rats and
Goblins aplenty on your way to the meeting.
When you reach the door, you'll have the option to take the meeting yourself
or go upstairs, sneak and cover Baurus's back while he meets with the sponsor.
I reccomend letting Buarus take the meet if you want him to have a better
chance of coming out alive.
Head up the stairs and through the door. The sponsor will arrive and talk to
Baurus. Meanwhile, two Mythic Dawn guards will find you and attack. Dispatch
them quickly and help Baurus finish off the sponsor. Loot his body to find
Volume 4 of the Commenteries. Baurus will now leave for Cloud Ruler Temple.
You should make your way back to Tar-Meena and see what she can discover from
the books.
Tar-Meena wants to study the first two volumes. Wait twenty-four hours and
return. She thinks she's found the secret to Mankar Camerons writings and asks
you to wait one more day while she puzzles it out. The next day, she has found
the hidden message contained in the books. "Green Emporer Way where tower
touches mid-day sun."
Head over to Green Emporer Way, the graveyard surrounding the Imperial City
Palace. On the SW side of the palace, you'll find the Tomb of Prince Camarril.
Be there at noon and you'll see a softly glowing, red outline of Cyrodiil.
Click on this and you'll recieve a map marker for Lake Arrius Caverns, home of
the Mythic Dawn.
===============================================================================
10: DAGON SHRINE
-------------------------------------------------------------------------------
Lake Arrius Cavern is NNW of Cheydinhal, on the shore of Lake Arrius. Follow
your map marker to the cave entrance.
When you enter, you'll see a man in Mythic Dawn robes by a door.
You can handle this place two ways: (A) Go in, swords swinging and kill all
that cross your path or (
Play along quietly and you'll be led right to the
amulet. We're going to play along.
Speak to the doorkeeper and answer "Greet the new day." He welcomes you and
opens the door, saying Harrow will escort you to your initiation. Now, my tip
on surviving this: Just inside the door, BEFORE you talk to Harrow who is just
around the corner, drop your weapon, armor and a few restorative potions on the
floor. Now go down the hall and you'll run into Harrow, the Warden of the
Shrine. He asks for all your posessions and offers an intiate robe. Don't
worry, you'll get it all back, hand it over. When he's sone talking, go back
to the door and pick up all your stuff. At this point, he doesn't care. Now
follow him into the Shrine. No lamb to the slaughter for us.
Inside, you'll find Mankar Cameron himself giving a long winded, evil genious
monologue to the troops. He's also wearing the Amulet of Kings. Wait while he
wraps up the floor show. Don't get overzealous. You can't catch him and kill
him before he escapes. You'll get another shot at him later. When he's gone,
his daughter, Ruma Cameron, will ask you to come forward and make your offering
to Dagon. She wants you to slay the Argonian sacrifice. Agree to slay him.
If you want to kill him, grab the silver dagger from the podium and do it. If
you want to save him, click on him and choose to release the prisoner. It's
important to free him BEFORE you grab the book as when you do, the statue will
fall on the prisoner and kill him. Either way, all oblivion breaks loose and
Dagon's faithful are after you now. Re-equip your weapon and armor and send
them to meet their god. Make sure to find a kill Harrow. Sholdn't be an issue
as he's a little mad at you. Loot his corpse and you'll find everything you
gave him.
Once you've dealt with all the faithful down here, go back up the stairs and
turn right. You can't go out the way you came in as the door is now barred.
You'll have to escape through the living quarters. If you saved the Argonian
prisoner, he will lead you out. He's a not a fighter, stick close, if you lose
him he's dead. Jeelius is fast and runs back to you when confronted if you're
close enough. Once you reach the entry chamber, where you came in, Jeelius
will thank you for saving him and ask that you visit him at the Temple of the
One in the Imperial City. Now you can back and loot the living quarters.
Now that you've escaped with the Mysterium Xarxes, return to Cloud Ruler Temple
and speak with Martin. Stop off at the Temple of the One on your way. Again,
if you saved Jeelius, he will raise your Restoration, Mysticism and Alchemy
skills a point each. #Watch your back in cities now. You've earned the anger
of the Mythic Dawn and their hidden agents in the cities will jump you in the
streets.
Back at Cloud Ruler, you'll most likely find Martin in the great hall, pouring
over musty books. Martin, worried at the loss of the amulet, is hopeful now
that you have found the Mysterium Xarxes. He thinks he may be able to find a
way into Mankar Cameron's Paradise with it. He'll need some time to study it.
In the meantime, Jauffre has a job for you.
Speak to Baurus before you leave Cloud Ruler. In gratitude for helping him, he
will raise your Blade, Block and Heavy Armor skills a point each.
===============================================================================
11: SPIES
-------------------------------------------------------------------------------
Jauffre has had reports of Spies in the hills around Bruma. He needs you to
identify and eliminate them. He'll refer you to Captain Steffen, here in Cloud
Ruler and Captain Byrd in Bruma for more information.
Find Captain Steffen and ask about Spies. He's seen them on the road to the
Temple, just north of Bruma by the Runestone at dusk.
Make your way to the runestone and wait until 5pm. You'll find a woman, Jearl,
waiting at the runestone. Kill her and loot her house keys from her corpse.
Now head into Bruma and you'll find Captain Byrd in the Castle Bruma Barracks
in the evening. Upon hearing that Jearl was a spy, he authorizes you to search
her house and take care of anything you find, any way you see fit. Head over
to Jearl's house after 7am and you'll find the second spy, Saveri Faram, asleep
in Jearl's bed. Deal with her and then head into the basement through the trap
door by the table. You'll find a couple sopies of the commenteries and Jearl's
orders, detailing an all out attack on Bruma, as well as a mention of finding
out who helped Martin escape Kvatch.
Return to jauffre with the orders. He is pleased with your work and pledges
to warn the countess of the impending attack. You should speak to Martin again
as he's made some progress with the Xarxes.
===============================================================================
-------------------------------------------------------------------------------
Martin has decipherd part of the ritual needed to reach Cameron's Paradise. He
needs the blood of a daedra, specifically a daedric artifact and you get to
find one for him. You'll find a copy of Modern Heretics on his table. Read it
and you'll recieve a map marker for the Shrine of Azura. I don't reccomend you
give him Azura's Star as it's a re-usable soul gem, the only one in the game.
Whatever artifact you give him will be destroyed. There are 15 Shrines to
choose from. As my character is currently level 2, we're going to do the
Shrine of Sheogorath. If you want to use a different artifact, check out my
Daedric Shrine Guide for details on all the Shrines and their rewards to find
one you don't mind parting with permanently.
SHRINE OF SHEOGORATH:
LOCATION: Leave Leyawiin by the West Gate and follow the road North. Stay on
this side of the river. You'll pass "White Stallion Lodge". Keep heading
North and you'll come to "Waters Edge", turn due NNW. You'll pass "Rockmilk
Cave" and should run into the Shrine a little ways later. It's slightly
further from Waters Edge as that is to White Stallion Lodge
OFFERING: A lesser soul gem, a head of lettuce and yarn.
TIME: Any
REWARD: Wabbajack Staff - Wabbajack on target Charge 3000 / 10 uses
QUEST: Let the wierdness begin. There are several faithful around the Shrine,
they're all in their undies and all mad as hatters. Ravel is the one you
want, he'll give you the absurd list of offerings you need. Buy or borrow
what you need. The imperial city market has everything on your list, either
in a shop or stashed in the street crates.
Now that you have all your goodies, approach the Shrine. Sheogorath is a real
fruit bat with too much time on his hands. He asks you to visit the settlement
of "Borderwatch", where they are "dull, dull, dull". He wants you to bring one
of their darker prophecies to life, simulating the events, and providing him
with amusement. You are to find the Shaman and ask him about the K'Sharra
prophecies. You should have a map marker for the village now.
The Shaman's name is Ri'Bassa, he's probably hanging out by the cookfire. If
he likes you enough, he'll tell you about the prophecy. It has three plagues:
a vermin infestation, all of the sheep mysteriously dying and the third, which
he wont talk about. He'll tell how thier cooking fire can be smelled across
the countryside and suggest you go to the Inn and ask the barmaid about her
cheese collection. Helpful, isn't he.
The barmaid is a stinky cheese collector. In fact, she has, in a locked case
by the bar, the stinkiest cheese ever made, the Olroy cheese. She'll tell you
if it was ever left out, it would bring rats from miles around. Show off your
sneaking skills, unlock the case, steal the cheese and go back outside. As a
point of interest, there's a "Nirnroot" in a pot on the shelf behind her.
Outside, the cooking fire is to the left of the Inn, drop in your cheese. Be
patient, if you cook it, they will come. A swarm of rats will shortly make
their way into the village. Chaos ensues and your journal will update. Your
buddy, Ri'Bassa is dropping rat poison around the square to kill them.
Now for the second plague. Grab one of the rat poison piles and head over to
the sheep pen. It's just to the left of the Inn. Drop the rat poison into the
feed trough. The sheep will gravitate to their deaths like...well...lambs to
the slaughter. Heh.
Once the last sheep drops dead, Sheogorath will speak to you again,
congratulating your victory and ask you to go to the center of town for the
final plague. You know, the one Ri'Bassa wouldn't talk about.
The center of town is the area between the two main stairs. Get comfy and look
up. Sheogorath outdoes himself and I'm not going to spoil it. Once the fun
is over, return to the Shrine for your reward.
Now that you have the Daedric Artifact of your choice, return to Cloud Ruler
Temple and hand it over to Martin. Martin needs a few more days to figure out
the next part of the ritual.
===============================================================================
13: BRUMA GATE
-------------------------------------------------------------------------------
Find Jauffre, he has another job for you. An Oblivion Gate has opened outside
Bruma. The Countess wants you to lead Captain Burd into the gate and show him
how to close it.
Head to Bruma and find Captain Burd outside the East gate with a small force of
guards. After a short speech to his men, Burd will charge into the Gate. Once
inside, you'll need to speak to Burd before he'll follow you. Don't worry too
much about the Captain, he's unkillable. Watch your swings and feel free to
let him draw some of the fire.
If you follow the path as it curves around to your left, it will take you right
to the tower. Watch out for pillars lobbing fireballs at you.
Inside the fury spike, enter the Rending Halls. On the upper floor, go through
the Citadel Hall Door to the next floor up and re-enter the Fury Spike. Head
up the ramp and enter the Corridors of Dark Salvation. Follow the passage all
the way up and back into the Fury Spike.
You're now on the top floor and will run into the Sigil Keeper. Kill him and
loot the Sigil Key from his corpse. Enter the Sigillum Sanguis and head up
the ramps to the Sigil Stone. Quicksave before taking the stone, just in case.
Grab the Sigil stone and you and Captain Burd will be transported back to
Bruma. Speak to him and he'll thank you, updating your journal. He and his
men can now close any other gates that open at Bruma.
Head back to Jauffre at Cloud Ruler Temple and report your success.
===============================================================================
14: ALLIES FOR BRUMA
-------------------------------------------------------------------------------
##This portion of the Main Quest line is optional. If you choose not to do it,
Bruma will defend herself. However, You'll miss out on a substantial boost to
your fame rating, about 20 points worth.
Jauffre worries the Bruma guard isn't up to an all out attack. He wants you to
visit each city in Cyrodiil and convince them to send reinforcements to protect
Bruma and Martin.
Out first step is the Imperial City and Chancelor Ocato. I found him at the
Elder Council Chambers between 3pm and 4pm. He is sorry, but he can provide
no aid. The Imperial Legions are already committed to fighting the Daedra
invasion throughout Cyrodiil.
If there's a way to get aid from the Mages Guilds, I was unable to find it.
Noone I spoke to had the option to ask about Aid for Bruma.
On to the cities where you're going to do the same thing, six times in a row
and probably get real sick, real fast of Oblivion Gates. We'll go city by city
in alphebetical order.
-------------------------------------------------------------------------------
14.1 ANVIL - The Flesh Spire
At the castle, speak to Countess Millona Umbranox. She wants to send help but
can't while an Oblivion gate is open outside the city. Head outside Anvil's
Main Gate and the Oblivion Gate is off to the west, close enough that you have
an icon in your compass.
Enter the gate. The tower is above you, you'll have to navigate Nethertunnels
to reach it. Head up the path and follow it to your left as it curves around
the base of the mountain. You'll find the entrance to the Nethertunnels just
past one of those spinning pillars. The door is hard to spot and on you're
right. Use your area map to help you locate it.
Enter and find yourself in the Hate Tunnels. Follow these to the lowest level
and enter the door marked Oblivion Cave. You'll find yourself in the Molten
Halls. Follow this tunnel to a dead end room and jump through the hole in the
floor. There are two holes to jump down in here, either one is fine and will
lead you to another door to an Oblivion Cave, the Scratch Paths.
In here, you'll start heading up again. Enter another Oblivion cave door at
the top of the ramps, back out to the Oblivion Realm. You're higher up on the
mountain now. Follow the path around to your left and enter the Oblivion Cave
to the Red Gnash Tunnels. Just keep heading up in here and you'll find a door
back to the wastes of Oblivion.
As you exit, quickly run to your right as a rockfall will drop right on your
head. Follow this path and it will switch back and take you right to the tower
door.
Enter the Tower Portal. You'll find Magicka Essence and Blood Fountains in
here. Enter either door to the Rending Halls. Watch out for the trap on the
first landing. You can trigger it with the claw lever on your left in the
archway. Head up the second ramp and re-enter the Flesh Spire, go up the ramp
and enter the Dead Halls. Up again and back to the Flesh Spire. Take the ramp
to either side and enter the Corridors of Dark Salvation.
Head up, past the shooting pillars and through the Citadel Hall Door to the
next floor. You'll find another pillar. Run past and re-enter the Flesh
Spire. From here you can reach the Sigillum Sanguis.
Head up the ramps, quicksave and take the Sigil Stone. When you're returned
to Anvil, go to the Countess and she will gratefully send aid to Bruma.
-------------------------------------------------------------------------------
14.2 BRAVIL - The Dreaded Refuge
At the castle, Count Regulus Terentius is unable to send aid to Bruma with an
Oblivion Gate outside the city. Time to close another gate. It's just North
of the city, you can't miss it.
When you arrive, you can see the Sigil tower in front of you but the entrance
is blocked by a gate. Take the path on your left. Follow this and cross the
bridge on your right. This path will curve back to the right and lead you to
the entrance to the Caverns of the Abused. Head down until you find a hole in
the floor. Drop down to the floor below and look for the door to the
Bloodwell. This takes you into a smaller tower. Use the lift to get to the
next level and head to the top where you'll find a gate control. Now head back
down the tower and take the door out to the Wastes of Oblivion. The Sigil
Tower is just across the bridge.
Enter the Tower Portal, then the Rending Halls. As always, keep heading up.
At the top, you'll enter the Dreaded Refuge. This ramp will take you all the
way up to the Sigillum Sanguis. At the top, take the stone, be returned to
Bravil and the Count will agree to send his Guard Captain to Bruma.
-------------------------------------------------------------------------------
14.3 CHEYDINHAL - The Chaos Stronghold
The Count of Cheydinhal, like the others, is besieged by an Oblivion Gate and
can send no aid while his city is under threat. As an added complication, his
fop of a son, Farwil, has gone into the gate with the Knights of the Thorn to
try and close it and not returned.
Head out for the gate. As you approach, find a guard, Amminus Gregori, keeping
watch outside the gate. He'll give you the journal update and quest for Farwil
and tell you the Count has offered a reward for his sons safe return or proof
of his demise. You really want to invest in a Heal Other spell before going
after the idiot son, Convalescance is a good choice as it's not expensive to
cast and is an apprentice level spell.
Step through the gate into Oblivion. If "The Wayward Knight" is your active
quest, you'll have a map marker to head you in the right direction. You'll
find a fallen Knight of Thorn just inside the gate. He had a messy end you'll
be wishing on Farwil later. Head past him, down the path to your right.
Listen for rockfalls in here. The path will turn back on itself and lead to a
door to The Bowels.
Enter the Bowels and you'll see a hole in the floor. Drop down to the floor
below then jump through the next hole beside you. You'll find another fallen
knight and a door back out to the Oblivion Realm. Make your way down the path
to your right.
You'll find yet another fallen knight at the bottom of this path, next to a
door back into the Bowels. Head inside and follow this passage down and drop
through yet another hole. This passage will lead you down and back out to
the realm of Oblivion.
As you exit, you'll find Farwil and the last surviving Knight of the Thorn.
Farwil gives you a story about single handedly cutting down two score of
Daedra. Bremman will give the accurate version. You have no choice, Farwil
and Bremman are going to follow you to reach the Sigil Stone and you can't
tell them to wait.
Now for the fun. Save now, you may need to re-load a few times to keep Farwil
alive. The irritating little ponce is danger happy and will dive into the
lava to chase down a falling daedra. If he does die, and you just don't want
to bother trying to save him, be sure to take the Indarys Signet Ring from his
body to give to the Count later.
The best way to get them across the bridge before they boil themselves is this:
Ignore the daedra. Sheathe your weapon, you'll run faster that way, and charge
across the bridge and into the Chaos Stronghold. If alive, Farwil and Bremman
will be pulled along with you.
The fun's not over. They'll now charge recklessly through the tower after the
daedra. Stay with them and try to keep Farwil from being overwhelmed. You are
going to need to heal Farwil as he wont heal himself. This tower is very
straight forward. Just keep heading up and follow the passages to the top.
In the Sigillum Sanguis, take the stone and you, and your jeapordy freindly
buddy, will be transported back to Cheydinhal.
Speak with Farwil. In gratitude, he will make you a member of the Knights of
the Thorn and bestow a Knights of the Thorn Medallion on you. It fortifies
your speechcraft.
Return to the Count and he will agree to send troops to Bruma.
If you managed to keep Farwil alive, the Count will reward you one of two
weapons:
Thornblade - Disintegrate Armor (Leveled)
Staff of Indarys - Damage Strength/Shock Damage (Leveled)
If Farwil died, you'll recieve a knights of the thorn medallion and a leveled
amount of gold, but only if you return his signet ring.
-------------------------------------------------------------------------------
14.4 CHORROL - The Portals of Natural Disaster
Speak with Countess Arriana Valga in the Castle to be given the journal update
about the Oblivion Gate. Leave by the South Gate and you can't miss the
Oblivion Gate.
Enter the gate to the Wastes of Oblivion. You'll see seven towers. The Sigil
Tower is in the center and you can't reach it yet. You can go left or right
here.
We're going to go right and enter the Tower Door to Tsunami. Hop on the Corpse
Masher and make your way to the top of the tower. Once there, pull the Tornado
Gate Control. Now exit through the door across from you and cross the bridge
to the central tower, the Portals of Natural Disaster.
Inside, turn right and exit through the next door, back out to Oblivion and
cross the bridge.
In the Tornado Tower, pull the Tsunami Gate Control and go back to the central
tower. Turn right, exit through the next door and cross the bridge.
In the Landslide Tower, pull the Eruption Gate Control. Back to the central
tower, turn right, exit through the last door, cross the bridge.
In the Eruption Tower, pull the landslide Gate Control. Stay in this tower and
head down to the bottom. Exit the lower door to the wastes of Oblivion.
Head left and you'll see the gates are open. Bear left again and enter the
Earthquake tower. Use the Corpse Masher to get to the next floor. Halfway up
the tower, you'll find a dor to Oblivion. Exit and cross the bridge back to
the central tower.
Now you can reach the Rending Halls. In here, use the Citadel Hall Doors
directly across from you and head up. Be careful in this passage dodging the
blades. At the top, you'll re-enter the Portals of Natural Disaster. Up the
ramp and into the Corridors of Dark Salvation. Follow the ramps all the way
to the top, back out to the center of the tower and up the ramp. Enter the
Sigillum Sanguis. Take the stone and be returned to Chorrol.
The Countess will now gladly send reinforcements.
-------------------------------------------------------------------------------
14.5 KVATCH
If you already completed the Battle for Castle Kvatch, Savlian Matius will
quickly agree to send troops to Bruma, in gratitude for your help. You'll find
him in the Great Hall of what's left of the castle.
If you haven't done that quest yet, you'll have to complete it before he will
help.
-------------------------------------------------------------------------------
14.6 LEYAWIIN - The Lust Keep
Speak to the Count who, of course, is unwilling to help until you close the
Gate outside his city.
From Leyawiin's North East Gate, turn right and cross the river to reach the
correct Oblivion Gate.
Once in Oblivion, turn left as you can't cross the lava, and enter the Nether
Tunnels. Drop down the hole and follow the passages to an Oblion Cave door.
Enter and the passage will lead you to a door back out to the wastes. You're
now on the other side of the lava.
There is a switchback path to your left that winds steeply up this minor
mountain. At the top, enter the Bloodwell Tower. Head to the top and pull the
Gate Control. Now head back outside and you can enter the Tower Portal to the
Lust Keep.
Enter the Rending Halls. Follow the ramps up and back into the Lust Keep.
Take this ramp and enter the Corridors of Dark Salvation. At the first landing
go through the Citadel Hall Door on your right and up to the next landing. The
door is to your, back into the keep. Use the ramp on your right to head up and
use the Runed Portal at the top to reach the Sigillum Sanguis.
Take the stone, return to Leyawiin and recieve the Count's promise to send aid.
-------------------------------------------------------------------------------
14.7 SKINGRAD - The Brooding Fotress, The Sorrow Keep, The Anguish Keep
At the Castle, speak to Mercator Hosidus and he'll get the Count for you. Like
the rest, you must close the Oblivion Gate threatening the city to secure his
aid. The Gate is ENE of the Castle.
Once in Oblivion, head to your right and enter the Anguish Keep. In the Halls
of Eternal Twilight, head up to the first landing and take the Citadel Hall
door on your left. This takes you back into the keep. Up the ramp and through
the second door on your right to the Halls of Shame. Up to the landing, past
the pillars and through the Citadel Hall Door on your left. Head all the way
up, back out to the keep and up the ramp to the Anguish Shrine.
On the second level, pull the Geared Batten lever and release the first of two
locks. Now, use the door below to the wastes of Oblivion and cross the
extending bridge to the Sorrow Shrine.
In the Sorrow Shrine, go to the second level and pull the Geared Batten,
releasing the second lock. Now use the doors on wither side to enter the
Sorrow Keep. Head down the ramp and into the Halls of Shame. Use the Citadel
Hall doors to head down and back into the keep. Down the ramp and take the
door out to the wastes. Cross the extending bridge and enter the Brooding
Fortress.
From here, head up the ramp and into the Corridors of Dark Salvation. Follow
these passages up, back into the keep. Head up the ramp and enter the
Sigillum Sanguis.
Take the stone and be returned to Skingrad. The Count will happily send men
to defend Bruma.
===============================================================================
-------------------------------------------------------------------------------
Speak with Martin and he's deciphered the next item he needs, the Blood of the
Divines. You'll need the blood of Tiber Septim, who was once mortal but
ascended to godhood. Find Jauffre as he knows where you can get it.
Jauffre believes the Armor of Tiber Septim will give Martin what he needs, it's
said to be splashed with his blood. The armor is entombed in the catacombs of
Sancre Tor. They have become an evil place and none who have entered have
returned. He warns you to be careful and gives you a map marker for the fort.
Sancre Tor is West of Bruma and NNE of Chorrol, in the middle of nowhere.
Make your way there.
Inside Sancre Tor, watch out for the occasional dart trap. It's extensive but
difficult to get lost. The first floor is a big circle, follow this and you'll
find an Undead Blade. Kill him and his spirit will appear. The UnderKing
sealed Tiber Septim's Shrine and cursed him and his three companions to guard
it forever. He promises to try and lift the curse if you'll find and free the
other Undead Blades.
Go through the wooden door to Sancre Tor's Entry Hall. Don't bother with the
Tomb of the Reman Emporers yet. You can't do anything until you've found the
other Blades. Head to the Hall of Judgement.
In the Hall of Judgement, turn right at the fork. Follow the passages down to
the large chamber where you'll find the next Blade. Now, head back to where
you came in, pass the door to the Entry Hall and enter the Catacombs. You'll
find the third Blade as you enter. Free him and make your way back to the
Entry Hall. The last Blade is in the Prison.
In here, kill the skeleton of Warden Kastav and take his key. It will open
the door behind him. You'll find the last Blade at the very back of the Prison
Complex. Once you've released him, return to the Entry Hall.
Enter the Tomb of the Reman Emporers. The four Blades will kneel and break the
Underking's curse. You'll find the Armor of Tiber Septim inside on a small
pedestal.
Take it and return to Martin at Cloud Ruler Temple.
===============================================================================
16: MISCARCAND
-------------------------------------------------------------------------------
Martin now knows the third item needed for the ritual is a Great Welkind Stone.
The only Ayleid Ruin to still contain one is Miscarcand and it's said to be
guarded by the Last King of the Aylieds.
Rest up, repair your armor and head out. You'll find Miscarcand between Kvatch
and Skingrad.
In Miscarcand, you'll find Goblins and the Undead duking it out. Follow the
passage past the first large room until you come to a corner with a Gate on
your left and a passage on your right. Enter the Gate. Down the stairs and
you'll see a walkway across the chamber. You'll need to drop to the floor
below as you can't open the gate at the other end from here.
Drop down and take the door on your right. At the top of the stairs, next to
the door across the room, is a blue switch. Press this. Up the stairs and
step on the pressure plate to drop the gate. Turn right and head back down the
stairs and across the bridge to find the gate has dropped.
Enter the Miscarcand, Sel Vanua. At the bottom of the stairs, turn left in
this chamber and press the blue switch to raise the Varla Stone Cage.. Grab
the stone and go through the gate across the room and down. Cross the bridge
in the large chamber and make your way down, around and back in. Hit the Blue
Switch on the wall on your left before entering the chamber. Straight across
to the other side and you'll find a door to the Miscarcand, Morimath.
In the Morimath, cross the bridge and at the bottom of the stairs, turn left.
Follow this passage and it will lead you straight to the Great Welkynd Stone.
be prepared here and quicksave. When you take the stone, the Last King of
Miscarcand and his Zombie Guardians will jump you. Deal with them and use the
passage the King opened as a short cut back to the first floor.
Once outside, return to Martin with the Stone.
##If you found Miscarcand early, took the Great Welkynd stone not knowing what
it was, and are now unable to give it to Martin, Don't worry. Use these codes
to remove the stone from your inventory, talk to Martin, then add the stone
back in to your inventory. He should accept it then.
player.removeitem 000345af 1
player.additem 000345af 1
===============================================================================
17: DEFENSE OF BRUMA
-------------------------------------------------------------------------------
When you return to Cloud Ruler, Martin and Jauffre are having a bit of an
argument. When Jauffre gives up, speak to Martin, return the Armor of Tiber
Septim and you'll find out why.
Martin has discovered the final item needed to reach Mankar Cameron's Paradise,
a Great Sigil Stone. The only way to get one is to allow a Great Gate to be
opened outside Bruma, as it did at Kvatch, and you to close it. Martin intends
to lead the defense of Bruma himself and wont be dissuaded. He's tired of
watching everyone fight for him.
Your job is to go to Bruma's Countess and convince her to approve this plan and
meet Martin in the Chapel of Talos for a war council. Head down to Castle
Bruma and speak with the Countess.
She will agree and meet Martin at the Temple. When you're ready for battle,
go to the Temple and speak to the Countess, she'll tell her men to stop closing
the gates. Martin will ask you to follow him to the battlefield.
Follow Martin down to the Battlefield. Make sure you stay with him, instead of
running on ahead, or you'll be waiting by yourself for a long time. The people
of Bruma will cheer Martin as the Emporer as you leave the city. Outside the
gates, Martin and the soldiers will break into a run, making the trip quick.
At the field, Martin will give a rousing speech to the troops and the fight is
on.
Things are going to get a little hairy here. You must keep Martin alive until
the Great Gate has opened. Before that happens, three smaller gates will open.
Until then, try to keep Martin from being overwhelmed by daedra. He's good in
a fight, but even he can get outmatched. Stay close and pick off the
stragglers. Once the Great Gate opens, and you can't miss it, if Martin is
still alive, run into the gate fast as you can. Once you're inside, Martin is
safe.
===============================================================================
18: GREAT GATE
-------------------------------------------------------------------------------
It's a hell of a sight in here. The walls in front of you will part, revealing
a great, bug like machine inching it's way toward the gate. You have thirteen
minutes to reach the Great Sigil Stone before the machine reaches Bruma. It's
plenty of time. Don't bother killing the daedra unless you have to. It just
wastes your precious time.
In front of you you'll see a tower to either side. Enter the tower on your
left, World Breaker Guard. Head to the top and use the north door to the
Plane of Oblivion. Cross the bridge. If you cross over the machine, go back,
you're going the wrong way. You should be running alongside, up above.
Enter the next tower. Make your way down and take the first door back outside.
You're on level with the machine again. Cross this bridge, you'll have to jump
a small gap. Run up the hill and you'll see the Sigil Tower flanked by to
gates and two smaller towers. Enter the left tower. At the top, pull the Gate
Control and head back out the way you came in. The gate is now open.
Enter the Tower Portal to World Breaker. Enter the Vaults of End Times, head
up and take the Citadel Hall Door to your left. Reenter the World Breaker.
Follow this ramp all the way to the top. Kill the Sigil Keeper and loot the
Sigil Key from his corpse. Enter the Sigillum Sanguis.
Take the Great Sigil Stone and be returned to the battlefield to applause.
Find and speak with Martin. He will take the Great Sigil Stone and leave for
Cloud Ruler to prepare the portal to Paradise. Go to him when you're ready.
Before you leave the battlefield, check the ground in front of the siege
machine for your standard sigil stone. It dropped out of the mouth of the
machine when it died.
===============================================================================
19: PARADISE
-------------------------------------------------------------------------------
Before you speak to Martin, make sure you have everything you need to survive.
There are no shops and no armorer's in Paradise.
Once you're ready, speak to Martin. He will open the portal, telling you to
retrieve the Amulet and that you're only way back is to kill Mankar Cameron.
Time to take back the Amulet of Kings.
When the portal opens, use it like an Oblivion gate and be transported to
Mankar Cameron's Paradise. When you arrive, Cameron will speak to you as you
travel his realm. An entertaining reminder of Dagoth Ur in Morrowind.
Ascended Immortals wander the Savage Garden, those who died in Cameron's
service. Speak to them to learn the only way to reach him is through the
Forbidden Grotto and that you must be wearing the Bands of the Chosen to enter.
Daedra also abound here, tormenting the Immortals.
Follow the stone path. When it forks, take the downward path. At the next
fork, turn to your right and you'll see a Dremora named Kathutet. Don't kill
him yet, talk to him. It seems you've earned the respect of the Dremora. He
will offer you two choices; Battle or Service.
If you choose battle, kill him, take the Bands of the Chosen from his corpse
and continue on to the Flooded Grotto.
If you choose Service, Kathutet will give you the Bands of the Chosen if you
free his Xivilai, Anaxes. The Immortals have trapped Anaxes in a cave up the
left side of the path. Follow your map marker and the door to the Lair of
Anaxes is on the other side of the rock. At the back of the cave, click on the
two logs holding the boulder in place and Anaxes will be free.
Now, return to the entrance to the Flooded Grotto and enter. Follow the Tunnel
and you'll find Kathutet waiting for you by the door to the Forbidden Grotto.
Once he gives you the Bands, Cameron will give you a long winded monologue,
revealing some fascinating theories about Tamriel and her gods. Put on the
Bands of the Chosen and enter the Forbidden Grotto.
The first thing you'll notice is you can't remove the Bands. The second is the
Immortals are not having a good time in Paradise, unless you consider lava
baths refreshing? Make your way into the tunnels and try not to kill anyone
who doesn't attack you first. You have an ally in here, it would be a shame to
kill him during a killing spree.
In the next chamber, you'll meet Eldamil. Tell him you're here to kill Mankar
Cameron and he'll offer to help, anything to free the fools who followed
Mankar. Noone wearing the Bands of the Chosen can leave the Grotto. Eldamil
will remove them for you but you must play along when the overseer, Orthe,
shows up. Agree and follow Eldamil. When Orther shows up, Eldamil will order
you into the brood cage. Don't worry, you aren't getting a lava facial. Enter
the brood cage and you'll be lowered to the lava, but not into it. When Orthe
leaves, Eldamil raises the cage and tells you to meet him further on while he
distracts the Daedra. Exit the other side of the cage and take the path on
your right. Turn right again and you'll find a door to another level of the
Forbidden Grotto. Go through.
On the other side, you'll find Eldamil at the end of the passage. He will
remove the Bands of the Chosen and ask to come with you. He's not too shabby
in a fight. At this point, Cameron will monologue again. There's only one
path in here. Follow ti and it will lead you back out to Paradise.
Follow the path up and to the right to Cameron's palace. On the way, you'll
see large blue and purple Mana Blooms. They'll restore your magicka and health
and you should pick as many as you can. Once paradise is gone, this rare
ingredient is gone.
Climb the steps. At the entrance, you'll meet the children of Cameron, Raven
and Ruma. You might remember Ruma from the Dagon Shrine. Follow them into the
palace for your long awaited audience with Mankar Cameron. Once you speak to
him he will attack.
Your best strategy here is to ignore his kids, they'll just distract you.
Elmadil can keep them busy while you knock off Daddy. Don't get fancy here.
His robe absorbs spells and reflects damage. The higher your level, the more
powerful his robe will be. Hit him hard and fast to do more damage than he can
absorb or reflect. When he's dead, his children will drop dead on the spot.
Loot the Amulet of Kings from his body and Paradise will fall apart. You'll
be transported back to Cloud Ruler Temple. The Blades drop to their knees on
your return and pay homage to Martin's Champion.
-
The Elder Scrolls IV: Oblivion
Knights of the Nine Guide for the PC
Version 1.00 March 19, 2007
Written by: WhoGuru
Copyright 2007 Karen Hoyt
Table of Contents:
============================================================================
1: Hints, Tips and General Info
2: Starting the Quests
3: Pilgrimage
# Shrine Locations
4: The Shrine of the Crusader
5: Priory of the Nine
6: Stendarr's Mercy
7: Wisdom of the Ages
# Solution to Rodgar's Puzzle
8: Nature's Fury
9: The Path of the Righteous
10: The Faithful Squire
11: The Sword of the Crusader
12: The Blessing of Talos
Frequently Asked Question
Credits
Copyright
Contact Me
=========================================================
1: Hints, Tips and General Info
-------------------------------------------------------
## If your Infamy is higher than 1 you're going to have a problem. The relics
are only able to be equipped if your Infamy remains at 1 or 0. If you go over
that, you'll need to visit all the Wayshrines again to reset your infamy to 0.
Even after you complete the quests, if you gain Infamy, you'll need to do this.
You can use the Wayshrines as often as you need to restore your rating to 0.
=========================================================
2: Starting the Quests
--------------------------------------------------------
Unlike the other plug-ins, this one does not hand itself to you in a
conveniently delivered note. In any city, once you've installed KOTN, speak
to any NPC and ask about the attack on the Anvil Chapel. It may take a few
minutes for this option to appear. Priests and Priestesses in the Chapels of
each city will have this conversation option. However, this part can be a bit
buggy. If the conversation option about Anvil does NOT appear, go directly
to Anvil and ask anyone in the city. They will have the option as they're
directly involved. The Guards are a good choice. You'll be told the Chapel of
Dibella was attacked, all the Priests and Priestesses slaughtered and the altars
of the Nine defiled. Head to Anvil and the Chapel. If you talk to the
Townsfolk and the guards outside the Chapel, they'll tell you of a Prophet
who seems to know something. You'll find the Prophet across from the
Chapel in the Plaza. You can enter the chapel if you like. It's a bit macabre
and worth a look.
========================================================
3: Pilgrimage
--------------------------------------------------------
The Prophet is the man you're looking for. During the day, you'll find him
standing at the front of the plaza preaching to passers-by. At night, he
sleeps on a pallet at the back of the plaza.
He'll tell you of an ancient Sorcerer Ayleid King who was caste into the
wastes of Oblivion by a great crusader centuries ago. The king, Umaril, has
returned and he destroyed the Chapel.
You guessed it. The Nine need another champion and you're it. Well, you
will be. When the prophet asks if you are a worthy champion, reply "No, I
have no claim to fame." Humble is the way to go here.
The first thing you'll need to do is go on a pilgrimage and visit the
Wayshrines of the Nine around Cyrodiil. The Prophet will give you a
Wayshrines Map to show all their locations. Be aware, there are MORE than
nine shrines scattered throughout the land but THESE are the nine you must
visit for the quest. The Map is actually very accurate. Compare it to your
world map as you work your way down the list and you wont have a
problem.
# Shrine Locations:
1: Akatosh - Just South of Bruma off the North side of the Orange Road.
Easy to spot.
2: Arkay - Midway between Kvatch and Anvil. Due North of the "G" in Gold
Coast.
3: Dibella - South of Chorrol. Due South of the "D" in the Black Road.
4: Julianos - From the Red Ring Road, turn onto the Yellow Road. You'll
find it just off the North side as you walk East.
5: Kynareth - Look for a small lake next to the "Basin" in Nibenay Basin.
It's off the East Shore between "S" and "I" in Basin.
6: Mara - From Skingrad's Stables, Leave West along the Gold Coast Road.
At the turn, go offroad NW to find it just beyond the Cursed Mine.
7: Stendarr - Start in Leyawiin, going North on the Green Road. Past
Water's Edge a ways and the Shrine will be on your left on a rise.
8: Talos - Below the Imperial City, just West of the "NI" in Nibenay Valley.
9: Zenithar - From Bravil's Bay Roan Stables, stand on the road facing
North and you'll see the Shrine in the distance on a hill.
Upon praying at the final Wayshrine, you will recieve a vision. Pelinal
Whitestrake, the original Divine Crusader, will appear and tell you the
location of his lost Shrine. This is where you'll start your quests for the
Divine Relics of the Crusader.
========================================================
4: The Shrine of the Crusader
--------------------------------------------------------
You'll find the lost ruin of Vanua on the bottom of Lake Rumare. Don't
worry, you can hold your breath long enough to get down to it and inside.
It's South East of the Imperial City. Follow your map marker and it's very
easy to find.
Head inside and never fear, it's not as confusing as it seems. In the first
large chamber, find a Blue Switch on the left wall to open your way forward.
Take the left corridor and up the stairs as you can't go the other way. Head
through the door, down the tunnel and take the door to the Shrine of the
Crusader.
In here, turn to your right at the top of the tunnel. There's a hole in the
wall you'll have to jump through to continue on. Follow this passage
and through another hole. Drop down to the floor below.
On the center platform is the body of Sir Amiel, another crusader who
perished on this same quest centuries ago. VERY IMPORTANT!! Take
the JOURNAL, KEY and RING from his body. The Ring is especially
important, you WILL need this later. You journal will update, telling you
he was once a member of the Knights of the Nine and it will give you a
new quest, Priory of the Nine, as well as the Priory's location. But that's
for later. For now, onward we go. Take the gate in the West wall,
Sir Amiel's Key will open it for you. In the next chamber, go through
yet another hole to continue on and through the door into the Lost
Catacombs.
Head up the stairs and...you guessed it...through another hole in the wall
on your right. Follow these passages and take either door back into the
Shrine of the Crusader. Step up onto the platform and take the Helm of the
Crusader. Your journal will update and tell you your next step is the Priory
of the Nine.
To make your way back out, jump over the railing and take the passage
straight across in the South wall and then the door back into Vanua's main
floor. When you reach the second large chamber, drop down and take the
tunnel on your right. Now just retrace your steps back out to Lake Rumare.
=======================================================
5: Priory of the Nine
--------------------------------------------
Check your map and you'll find the Priory of the Nine South East of
Skingrad at the tip of the "W" in the West of the West Weald. Reading
Sir Amiel's Journal, if you haven't already, wouldn't be a bad idea. make
your way there now.
On reaching the Priory, enter the Priory House. Inside, you'll notice it
looks disturbingly familiar...yep. Same lay out as Weynon Priory. Turn to
your left around the wall and you'll see a circular seal on the floor. Click on
this and Sir Amiel's Ring will unlock it, revealing a set of stairs that lead to
the Priory Basement. You may find a couple pieces of Knights of the Nine
Armor down here but it's the door to the Undercroft we're after.
Once in the Undercroft, Stand in the middle of the Seal and wait. Shortly,
the ghost of eight of the Nine knights will appear. You must do battle with
each, one at a time, to prove your worth. They don't attack in any order, so
keep an eye on the knights behind or you'll get jumped from behind. Once
you've defeated them, take the Cuirass at the back of the chamber.
Now, speak to each of the Knights to recieve clues and quests for the
remaining relics: The Gauntlets, Mace, Shield,and Boots of the Crusader.
They'll also give you some interesting history of the order and it's missing
member, Lord Berich. For now, it's off to find the missing relics for us.
Never fear, the ghosts of the Nine will be here waiting for your triumphant
return.
=====================================================
6: Stendarr's Mercy
------------------------------------------------
Head to the Chapel of Stendarr in Chorrol and speak to Areldur, the Head
Priest. He will tell you the story of the Gauntlets of the Crusader. It
seems the last member of the cursed bloodline, Kellen, is in the Chapel Hall.
he came to try and lift the curse and failed. Head downstairs and speak with
him. Kellen is hopeless, waiting to die. He is also convinced that Areldur
knows more about the curse than he's saying. Back upstairs to Areldur
we go.
Areldur has known all along how to lift the curse from Kellen's family.
Someone else must pray at the Altar and take the curse upon themselves.
He was not brave enough to do it so you'll have to.
Click on Stendarr's Altar in the center of the church and choose to pray for
the power to lift Kellen's curse. You will be granted the ability to Lay
Hands on Kellen. Go back downstairs now to Kellen and find the spell
"Lay Hands" in your inventory. Cast the spell on him. His curse will be
lifted and transferred to you. A Damage Fatigue effect called the Curse of
the Consumed is added to your active effects.
Kellen is overjoyed and takes off running around the hall like a five year old.
Speak to him again to recieve his gratitude. You can now retrieve the
Gauntlets. Head back upstairs and take them from the back of the chapel.
======================================================
7: Wisdom of the Ages
-----------------------------------------------------
To acquire the Shield of the Crusader, head to Fort Bulwark. You'll find it
North East of Leyawiin, at the tip of the "D" in Blackwood. Watch out for
Conjurer's outside and in the ruin. Reflect or Absorb spell will come in
handy in here. Enter the fort. Follow this passage down and where it
splits, turn left. You'll find a wooden door on your right. Don't pass the
door.
Further down this passage are a series of dart traps blocking your way.
Go through the door. All you can do in this chamber right now is cross the
bridge to the other side and go through the next door. Follow this tunnel
to the Conjurer's chamber and read the note on the table by the back wall.
It will tell you how to access the lower levels. Turn the Handle under the
lamp before leaving. This will raise the gate just on your left as you leave
the conjurer's chamber. Follow this corridor to its end and turn the Handle
by the railing. Down below, you'll see a gate raise and bridges drop. Head
down to that chamber and cross the bridge into a short tunnel with a gate
blocking your way.
On the floor are a series of pressure plates. Here's where that note comes in
handy. The candles are your guides, telling you which plate in each row of
three to step on. In the first row, step on the Left plate. In the second row,
step on the Center plate. In the third row, step on the Right plate. In the
fourth row, step on the Left plate. The gate will rise. Head through to the
Old Wooden Door to Fort Bulwark.
In here, in the second cell on your right, you'll find Sir Thedret. Turn the
handle next to his cell to release him and speak to him. He, too, came
looking for the Shield and was locked up by the Conjurers. He will give
you a hint on how to reach the Shield before he leaves.
Go through the old wooden door beyond his cell and up the stairs on your
left.
Through the door, down the stairs and you'll see another set of stairs on
your right. Go through the door and right again. This passage lets you out
into another large chamber. Take the stairs on your right. The switch for
the bridge is next to it on your right. Before you cross, look UP! There are
dart traps in the ceiling along the path of the bridge. They fire in sequence
so time your run right and you wont get hurt. You'll need to turn a second
handle halfway across. If you mis-time it and get hit, watch your health.
Take the stairs down and into the next large chamber.
To get to the next door, you'll need to solve a bit of a puzzle here. Thedret
gave you the hint you need. There are four statues, each with a handle, and
a fifth on top of the platform. At the base of the platform, in the center of
the statues, is a circular seal on the floor. You'll need to turn the four
statues, using the handles until they are all facing the seal. Then stand on
the seal and a door will appear in the south wall. Head down the tunnel
and take the Old Wooden door to Fort Bulwark. Follow this tunnel and into
the next large chamber for yet another puzzle.
In this chamber, you'll see eight statues along the walls, each with a chest in
front of it. There is also a larger chest up on the platform. When you click
on the chest, you will be given one of Rodgar's relics. Each relic must
placed in the chest of the correct statue below. You wont get another relic
until you place the one you already have.
When you put a relic with the correct statue, the chest will glow and the
statue will turn to face the room. If you put the relic in the wrong chest,
don't worry. Nothing happens and statues you have already turned wont
reset.
# Solution to Rodgar's Puzzle
As you stand on the platform, facing the big chest and the back of the room
we're going to number the statues on the Left side of the room and the
Right side of the room. From the Back wall to the door they are: Left 1, 2, 3
and 4 at the door. Right 1, 2, 3 and 4 at the door.
Left 1 - Gem
Left 2 - Skull
Left 3 - Hammer
Left 4 - Book
Right 1 - Stone
Right 2 - Helm
Right 3 - Goblet
Right 4 - Sword
When you've placed all the artifacts correctly, a door will appear at
the top of the stairs. Head inside and take the Shield from the Altar.
To get out, you'll see two new doors in the north wall, either side of the
altar.
Take either of these and the Old Wooden Door to Fort Bulwark. Use the
handle to open the gate, cross the bridge and turn to your right to head
back outside.
====================================================
8: Nature's Fury
--------------------------------------------
To find the Boots of the Crusader, you need to find the Shrine of Kynareth
in the Great Forest. Check your map and you'll find the marker just West
of the Imperial City and Weye. Make your way there now.
When you arrive, speak with Avita Vesnia about the Boots to learn you
must be tested by Kynareth first. You'll have to travel to the Sacred Grove,
just West of the Shrine. Remember, all the creatures of the world are
protected by Kynareth. When you arrive at the Grove, be sure to remove
any armor you're wearing that reflects damage. A bear will soon appear
and attack. All you have to do is block and wait. After a few moments, if
you haven't attacked the bear, your journal will update and the bear will
leave peacefully.
A cave entrance has been revealed. Head inside Kynareth's Grotto. There
are a couple Spriggans standing guard. Ignore them and take the Boots of
the Crusader from the altar, completing your quest.
=====================================================
9: The Path of the Righteous
----------------------------------------------------
To find the Mace of the Crusader, head to the Chapel of Zenithar in
Leyawiin. When you enter the chapel, you'll be greeted by Carodus
Oholin who wants to know if you're the one restoring the Knights of the
Nine.
Remember...Humble. just tell him you're a servant of the Nine.
Leave him for now and head into the Undercroft. At the back of the
Undercroft, click on the tomb of Saint Kaladas and you'll be transported
to a Dark Void. You find yourself on a precipice, overlooking the void.
In the distance you can see the platform holding the Mace. Equip the
Boots of the Crusader and you'll be shown a safe path across the void.
Stray from the path and you'll fall, to be returned to the undercroft. Take
the mace from the platform and you'll be returned.
When you re-enter the chapel, minions of Umaril are attacking. Help the
chapel folk deal with them and be careful not to hit your allies. When
you've saved the Chapel from being desecrated, Carodus Oholin will ask
to join your order.
Upon returning to the Priory, having gathered all your relics, you'll find
several people you have met along the way waiting for you. They wish to
join the Knights of the Nine. The Priory House has also gotten a face lift
and is livable now. You'll also find a handy Armorer in the basement for
all your repair needs.
About your Fellow Knights: Once you accept them as Knights, they will
travel with you for the final battle. If they fall, they'll be replaced by an
anonymous 'Knight of the Nine'. If you want to keep your original
Knights safe, don't accept them as Knights until after you have
completed all the quests. They'll still be waiting.
======================================================
10: The Faithful Squire
--------------------------------------------
Easiest relic quest yet. In the priory, find and speak to Lathon, one of
your would-be Knights and the Squire of Sir Roderick. His master was
also questing for the relics and fell while trying to retrieve the Sword
of the Crusader.
Sir Roderick was able to obtain the Greaves of the Crusader. Lathon
managed to escape with these and will now give them toyou. Voila.
Quest complete.
=====================================================
11: The Sword of the Crusader
---------------------------------------------------
Lathon wants you to retrieve the Sword and help him avenge his master's
fate. If you accept Lathon as a Knight now, he WILL want to accompany
you on the quest. If you do accept him, but don't want him along for the
ride, just talk to him and ask him to "Wait". He'll stay on guard in the
priory house while you go off after the sword.
To find it, you need to get to Underpall Cave. It's North East of Skingrad,
sitting smack in the middle of the words "The Orange Road" on your map.
When you get there, the door is on the downhill side of a large boulder
set into the hill.
Once inside the cave, head through the creepy coffin chamber and into the
uber-cool graveyard. Definitely one of the coolest places in the game here.
You can't miss the keep.
Head inside and follow the passage into a large chamber. As you enter,
turn to your immediate left and you'll see a door right next to the one you
came out of. Go through there and follow the passage to an old wooden
door.
Watch out for a rockfall as you pass through the door and make your way
into the Underpall Reflecting Chamber. Follow this tunnel to find a huge
underground lake. There are a couple chests out in the lake, one on the
bottom and one floating that contain a small amount of gold.
What you're here for is the Undead Guardian of the Sword. Yes, the
undead guardian is, in fact, the twisted spirit of Sir Berich Vlindrel, the
missing Knight of the Nine. Once you've defeated him, pick up the
tainted sword from where he dropped it. Don't equip it yet or you'll get
Lord Vlindrel's curse added to your active effects until the sword has
been reconsecrated.
Beyond where you defeated Sir Berich is a wood door, you'll find his tomb
in here, the body of Sir Roderick and a back way out.
Now, you need to take the sword to the Chapel of Arkay in Cheydinhall
to have it reconsecrated to it's holy purpose and remove the curse. When
you arrive at the chapel, Umaril's minions are once again on the attack.
Dispose of them and click on the central altar. The cursed sword will be
removed from your inventory and the true sword returned.
Now that you have all eight of the Crusader's Relics, return to the Priory.
===================================================
12: The Blessing of Talos
------------------------------------------------------
As you arrive at the priory, Sir Thedret will approach and tell you the
Prophet from Anvil has arrived to see you and is in the Chapel,
preaching to your Knights. Head into the Chapel. Speak to the Prophet.
You are almost ready to fight Umaril. First, he will bestow on you the
Blessing of Talos; a Lesser Power you'll find in your spell list. You must
travel to Garlas Malatar to fight Umaril. First you'll destroy his physical
form and then use the Blessing of Talos to follow his spirit to Oblivion
and finish the job. Your knights, if you've accepted them into the order,
will go ahead to the ruin to wait for you.
The fortress of Garlas Malatar is North West of Anvil on the coast. The
easiest way to reach it, as the coastline is mostly cliffs, is to ride from
anvil along the shore. I opted to accept everyone and take my Knights
with me.
If you go alone, the Aurorans are tough. Sneak attacks will help keep you
from being ganged up on. Your knights are good at taking on the
Aurorans. Just keep an eye on their health and heal them when you need
to as some of them can't heal themselves.
The best way to keep them all alive is to take the entire ruin at a dead run.
Each time you change floors, the Knights are pulled with you whether
they're in battle or not.
This ruin is a bit big and very simple; no confusing maze of passages here.
When you enter the first chamber, down the stairs and on your left is a
Blue Switch to open the three gates in this chamber. It doesn't matter
which one you take.
All three lead the same place, a throne room of sorts. The next door is up
the stairs to the left of the throne.
Enter the Ceysel. There is a Blue Switch on the wall between the gates.
Press this to open them. In this chamber, you'll see a glowing orb above
you. That's where you need to be. Go around the chamber to the right
and take the stairs up at the back. Hit the Blue diamond switch at the top
of the stairs to raise the steps out front if you want.
Click on the Orb to destroy it and the bridge to your left will open. The
Aurorans and your knights will disappear as well. Don't worry, any
knights that were alive when you destroyed the orb will be safely
transported back to the priory.
Cross the bridge and enter the Carac Abarwa. You'll find Umaril at the
back of the chamber and a couple more Auroran's waiting for you. Deal
with them and the stairs to his pedestal will raise. Umaril likes using
shock spells and his sword is long enough to reach you before you hit
him. Dance around him, go in for a hit after he swings. Once you've
defeated him, pick up his sword if you want. It's almost as good as
yours though it weighs a bit more. There are also a couple Varla stones
in here. Now, cast the Blessing of Talos on yourself and you'll be
transported to follow Umaril's spirit into Oblivion.
You'll find yourself high in the skies above the Imperial City with Umaril.
It's a hell of a view. Try not to get killed while you're admiring the
scenery. Umaril's attacks don't change here. Once you've killed him,
don't panic.
You'll start to fall back towards Cyrodiil and a sticky end. The gods
wouldn't really do that to you. You'll reappear in the Priory Undercroft
where Sir Amiel's spirit has some words of wisdom for you before he,
and the rest of his knights, disappear forever.
You can now get temporary bonuses from clicking on the tombs of the
Knights. One effect will last until you click on another tomb.
When you leave the Undercroft Sir Thedret will greet you, shocked that
you survived after your disappearance in the ruin. Tell him "The
wonders of the nine are many". Remember, Humble. When he asks if
Umaril is destroyed say "I have severed his very soul". He'll run away
to tell the others. You'll find all your Knights outside the Priory,
listening to Thedret sing your praises.
Congratulations. You've saved all of Cyrodiil and restored the Knights
of the Nine. Like the Adoring fan and Mages Apprentices, you can now
ask one of your knights to some with you on your travels if you wish.
If they die, they'll be replaced by nameless Knights of the Nine.
Far as I can tell, the cupboard, chest and drawers in your room at the top
of the right stairs are safe for storage. Be sure to check this yourself
first.
Put something you wont mind losing into each and leave the Priory.
Wait three days in game time and then return. If your items are still
there, then the containers are probably safe.
If you don't want to use the Relics of the Crusader any more, you can
leave ithem in the Priory Undercroft. There is a stand for them at the
back. Just click on it to place the relics.
====================================================
FREQUENTLY ASKED QUESTIONS
--------------------------------------------------------
Coming Soon!
====================================================
CREDITS
------------------------------------
Many thanks to my husband for testing all my directions and
instructions. He keeps me from sending anyone off a cliff.
Many, many thanks to the Avid Alchemist's Alcove who's wonderful
Obliv-O-Map keeps me from wandering the countryside for days.
Thanks to the ElderScrolls forums. A great bunch of ES addicts
that can answer just about any question, no matter how stupid.
Thanks to Gr33n on A.A.'s Alcove for pointing out that only Chapel
folk have the Anvil attacked conversation topic.
==================================================
CONTACT ME
------------------------------------------
Please contact me at whoguru@hotmail.com with any questions,
corrections, suggestions, additions, etc... When you send an email,
please put "Knights of the Nine" or "KOTN" in the title so I'll know
it's not spam.
==================================================
COPYRIGHT NOTICE
-------------------------------------------
This may be not be reproduced under any circumstances
except for personal, private use. It may not be placed on any web
site or otherwise distributed publicly without advance written
permission. Use of this guide on any other web site or as a part of
any public display is strictly prohibited, and a violation of copyright.
-
The Elder Scrolls IV: Oblivion
Mages Guild Guide for the PC
Version 1.00 June 13,2006
Written by: WhoGuru
Copyright 2006 Karen Hoyt
TABLE OF CONTENTS
================================================================================
1: Hints, Tips and General Info
2: Joining the Guild, recommendations and the Arcane University
3: Bruma Recommendation
4: Chorrol Recommendation
5: Cheydinhal Recommendation
6: Skingrad Recommendation
7: Anvil Recommendation
8: Bravil Recommendation
9: Leyawiin Recommendation
THE ARCANE UNIVERSITY
10: A Mage's Staff
11: Ulterior Motives
12: Vahtacen's Secret
13: Necromancer's Moon
ON BLACK SOULGEMS
14: Liberation or Apprehension?
15: Information at a Price
16: A Plot Revealed
17: The Bloodworm Helm
18: Necromancer's Amulet
19: Ambush
20: Confront the King
Arch Mage's Enchanted Chest mini-guide
FREQUENTLY ASKED QUESTIONS
CREDITS
CONTACT ME
COPYRIGHT NOTICE
================================================================================
1: HINTS, TIPS AND GENERAL INFO
--------------------------------------------------------------------------------
As always, SAVE before you start each mission. It'd be a shame to start a quest
and find a bug before you complete it. ALWAYS KEEP A PREVIOUS SAVE!!
I can't stress that enough. A previous save can save your game. Better a few
too many save files than miss your chance at gaining entry to the Arcane
University alltogether.
If you want your save games easier to identify, while in game, open the console
and type this: SAVEGAME YOURTITLEHERE
This will create a save game with that name in your save/load menu.
For example: savegame whoguru -I'll now have a savegame titled "whoguru" in
my menu.
keep your armor and weapons in good repair. They afford less protection and
do less damage when in need of repair.
Keep your armor and weapons in good repair. They will not do as much damage or
offer as much protection if they're in need of fixing.
Use your journal! Sometimes, your journal may provide a hint you weren't given
in conversation. If you're stuck, your journal is a good way to figure out
where you went wrong.
================================================================================
2: JOINING THE GUILD, RECOMMENDATIONS AND THE ARCANE UNIVERSITY
--------------------------------------------------------------------------------
Joining the Mages Guild is simple. Pick a city and go to the Guildhall. All
you have to do is ask. Getting into the Arcane University, however, is not so
simple. To gain entry here, you must first complete a quest for the Head of
each Guildhall in each city. Some are very simple, others a little more
complex.
Those playing true Mages will want admittance to the University as it's the only
place you have access to altars of Spellmaking and Enchanting. Well, almost.
You can also get the Wizard's Tower mod which will give you the altars, but
first you'll have to buy the furnishings for the Tower.
You also will not gain ranks in the Mages Guild until you reach the Arcane
University. Until then, you'll remain an associate.
Don't neglect your Alchemy skill. You're a mage and Alchemy will allow you to
raise your Intelligence, which raises you Magicka pool, very quickly. It's also
a great way to make money. Once you've reached Master level and have Master
Alchemical equipment, you can make health potions that will make you near
invincible. Alchemy is your friend. You can pick up alchemical equipment in
any guild hall free of charge.
================================================================================
3: BRUMA RECOMMENDATION
--------------------------------------------------------------------------------
Jeanne Frasoric needs your help finding J'skar. He's disappeared and she wants
you to speak with the other mages to find him. She's a brown nose but we need
her. Find Volanaro. Make sure he likes you enough and ask him about J'skar.
He'll offer to tell you how to find him, but only if you help him pull a prank
on Jeanne. Well, since we're all for that, agree to help. You need to steal
Jeanne's Manual of Spellcraft from her desk.
Her room is up the stairs to the left of the entrance. Go in during the day
and you can be sure Jeanne wont wander in on you. You can either pick the lock
or use the Minor Latch Crack spell Volanaro gives you. Take the Manual and
return to Volanaro. He happily takes the book and asks you to meet him in the
Living Quarters after 10 pm.
Head downstairs at 10pm and you'll find him in one of the rooms. Speak with him
and he'll cast a spell, revealing J'skar. He's been there the whole time, just
invisible. Irritating Jeanne seems to be a hobby for these two.
Head back upstairs and tell Jeanne you found J'skar. Though distracted by the
mysterious loss of her Manual, she'll agree to send on your recommendation and
ask that you remember her when you're important. Brown nose.
================================================================================
4: CHORROL RECOMMENDATION
--------------------------------------------------------------------------------
Fingers of the Mountain - Part 1
Teekeeus has a task for you. A woman called Earana has been hanging around the
guild and he wants you to find out why. During the day, you'll find her in
the plaza outside the hall and in the evening's in the Grey Mare.
Earana is looking for a book called "Fingers of the Mountain" and she'd rather
Teekeeus didn't know about it. Since we're good little mages, head back to
Teekeeus and tell him. He'll send you to Cloud Top, giving you a map marker,
and ask you to retrieve it for him. He doesn't want Earana to get her hands on
a book that powerful.
Head up to Cloud Top, just NNW of Chorrol. Leave from the North Gate and you
can follow the dirt path all the way up. At Cloud Top, a ruined pillar, you'll
find a charred body. Loot the remains for the book and return to Chorrol.
NOW. You can give the book to Teekeus, but you'll only have to steal it back.
Since stealing from a fellow Mage gets us booted, we'll wait on him.
Fingers of the Mountain - Part 2
Find Earana and give her the book. She's ecstatic. She'll ask you to return in
a day's time after she's had a chance to study the book. Wait 24 hours and go
to her. Earana will give you a translation from the book and tell you to read
it and return to Cloud Top for your reward.
You'll need a Welkynd Stone and a Shock spell. Make sure you have a Welkynd
Stone in your inventory. Doing this without one can get you killed if you
don't have enough Hit Points.
Head back to Cloud Top, stand next to the pillar and cast your shock spell. You
will take a little damage, but not lethal. You will recieve the "Fingers of the
Mountain" spell. It's leveled and near impossible to cast at higher levels due
to the Magicka Cost. Getting in your early teens seems to be the best time.
Now, return to the Grey Mare. Head upstairs, last room on your left, and steal
the book from Earana's chest behind the door.
Return to Teekeeus. The first time you speak with him, he's angry you gave the
book to her and tells you to get it back. Speak to him again and you can give
him the book. Now he'll write your recommendation.
================================================================================
5: CHEYDINHAL RECOMMENDATION
--------------------------------------------------------------------------------
Speak with Falcar. He's a putz but we need him. He'll agree to write you a
reccomendation but you need to do something for him first. He wants you to
retrieve a ring from the well behind the guild hall. Seems he sent another
associate back there but he lost it. He'll warn you it's difficult to carry
and send you to Deetsan to get a key.
Deetsan, upon hearing what Falcar has asked, worries. She's uncomfortable
talking while Falcar's around though. You'll have to wait until he goes down
to bed around 8 pm. Speak to her again and she'll worry for you. Vidkun, the
other sucker, I mean associate, never returned from Falcar's task. She'll give
you the key, a bouyancy spell and ask you to tell her if you find out anything
about Vidkun.
Head to the well behind the hall. There is no air down here, it's a well. You
have plenty of time and air if you move fast enough. Once inside, go to your
right. You'll see the body of poor Vidkun floating near the ceiling. Loot his
corpse for the Ring of Burden. You're now over-encumbered. Don't panic. Just
drop the ring, you don't need to bring it back once you've gotten the journal
update. On you're way out, check the other short passage for a Nirnroot.
Head back into the hall and find Deetsan as Falcar is nowhere to be found.
Deetsan, overcome with worry for you, confronted Falcar while you were gone. He
flew into a rage and left, it seems without ever writing your recommendation.
She asks you to search his room for it and anything of interest you find bring
to her.
Head down to the Mages Guild Basement. Falcar's room is at the back. In the
Drawers, next to his bed, you'll find two black soul gems. Take these and
return to Deetsan.
She's shocked and takes the gems, promising to send them and your recommendation
to the Arcane University.
##If you left the well before getting the ring and Vidkun's body is now gone,
use this code to add the ring to your inventory, giving you the journal update.
PLAYER.ADDITEM 0002E5AC 1
You can drop it on the ground once your journal updates.
================================================================================
6: SKINGRAD RECOMMENDATION
--------------------------------------------------------------------------------
Speak with Adrienne Berene. She needs you to find another mage, Erthor, so she
can speak with him. He's gone missing. Mage's seem to make a habit of this.
Ask Druja about Erthor and she'll tell you Adrienne sent Erthor to Bleak Flats
Cave and has obviously forgotten. Ask about the cave to receive a map marker.
Druja also asks you to remind Adrienne that she's the one who sent him there in
the first place. Talk to her before you leave so she knows it's her fault he's
missing.
Bleak Flats Cave is just NW of the city. Inside, you'll find the Undead
patrolling the tunnels. Erthor is in the farthest chamber. Make sure to kill
all the zombies in the caves, Erthor wont move until you do. Once you've
cleaned the place out, ask Erthor to follow you. At the back of his living
cavern is a short passage leading to a rock wall. Pull the lever and the wall
will drop, giving you a short cut back to the entrance.
You can fast travel back to Skingrad with Erthor. Once he and Adrienne have had
thier little reunion, speak to her and she'll agree to send on your
recommendation.
================================================================================
7: ANVIL RECOMMENDATION
--------------------------------------------------------------------------------
Talk to Carahil. It seems merchant's are being attacked by a rogue mage on the
Gold Road. She needs you to go to Brina Cross Inn and meet one of her mages
there, Arielle Jurard.
Follow the Gold Road north and east and you'll find Brina Cross Inn. Arielle
is inside. She'll tell you to get a room and if anyone asks, you're to say
you're a merchant. Get a room from the innkeeper. As you head upstairs,
Caminalda will stop you and ask if you're a merchant. Say yes. She'll praise
your bravery at travelling the roads when they're this dangerous and you wish
you luck. Uh huh. Head up stairs and wait for Arielle. She'll instruct you
wait for morning, then head out east along the Gold Road, toward Kvatch. She'll
be following with a couple battlemages to watch your back.
Head to bed and sleep until morning. Leave the Inn and follow the road east.
You wont have long to wait. Just down the road from the Inn, surprise!
Caminalda is waiting for you. She's the rogue mage and jumps you. Deal with
her yourself or let the battlemages do it for you.
Once she's dead, return to the Anvil Mages Guild and Carahil for your
recommendation.
================================================================================
8: BRAVIL RECOMMENDATION
--------------------------------------------------------------------------------
Find Kud-ei and ask about your recommendation. She, of course, has a task for
you. Varon Varmori has been pestering one of her mages, Ardaline, and stolen
her staff. Kud-ei gives you a charm scroll and asks that you convince him to
return it.
Follow your map marker to Varon. I found him at Silverhome on the Water in the
evening. Cast your charm spell and ask about Ardaline. Varon has a crush on
her and stole her staff to get her attention. Typical boy. When it didn't
work, he was too embarrassed to give it back and sold it to a friend in the
Imperial City. Head back to Kud-ei and let her know.
Time for a trip to the Imperial City. Kud-ei sends you to see Soris Arenim and
try to convince him to give you the staff. She'll give you three more charm
scrolls. Even with his disposition maxed at a hundred, you're still going to
have to pay to get the staff back. Cough up the two hundred gold and he'll
give it to you.
Now back to Bravil and Kud-ei. She'll take the staff, write your recommendation
and teach you a new spell, Captivate.
================================================================================
9: LEYAWIIN RECOMMENDATION
--------------------------------------------------------------------------------
Dagail has problems tuning out the voices in her head. She had an amulet that
allowed her to control her visions but it has gone missing. She's pretty loopy
at this point and asks you to speak with Agata to find out more.
Agata has been caring for her since it's loss and is afraid the University will
find out and fire Dagail. SHe asks that you speak to the other Mages to see if
any of them have a clue where to look for it. Talking with the others will
reveal that Kalthar knows quite a bit about it's disappearance. Time to talk
to him.
He doesn't like Dagail and doesn't think she should be in charge. He thinks her
father was better than she was even though he had visions too. He wants Dagail
out of the picture.
Head back to Agata and tell her what he said. She'll send you to Dagail to ask
about her father. Back to the looney lady. She rattle off some crazy prose and
ask that you find where her father is buried and retrieve his amulet. You'll
receive a map marker for Fort Blueblood at this point. It's South East of
Leyawiin.
Inside Fort Blueblood, you'll find bandits and marauders. Keep your eyes on the
floor for booby traps, there are a couple in here. Mostly mace balls dropping
from the ceiling. Follow these halls back and enter the Fort Blueblood Halls.
In the Halls, in the second large chamber, cross the bridge and kill the Orc.
Be sure to loot the Fort Blueblood key from his corpse. Now go through the
Old Wooden Door at the back of the room. You'll find Dagail's dad's coffin in
here, Manduin's Coffin. Take the Amulet from the coffin and head back up the
stairs.
As you round the corner, Kalthar will jump out at you. He stole the amulet
from Dagail and isn't about to let you ruin his plans. Be sure to let him hit
you first, you wouldn't want to get booted from the guild for attacking a fellow
mage. Now that he's thrown the first punch, return to Leyawiin and give Dagail
her father's amulet. The passage on your left is actually a short cut back to
the entrance, remember that gate you couldn't open?
Back in Leyawiin, Dagail will gladly send on your recommendation now that you
have helped her silence the voices.
================================================================================
THE ARCANE UNIVERSITY
--------------------------------------------------------------------------------
Now that you have all your hard earned recommendations, you now have full access
to the Arcane University. You'll find the mages here sell powerful spells.
You'll also find two of the more useful items here: The Altar of Enchanting in
the Chironasium and the altar of Spellmaking in the Praxographical Center.
You'll find a wealth of Alchemical Ingredients growing around the University
grounds and you can sleep in almost any bed. In the Lustratorium you'll find
the resident Alchemist. She carries some rare ingredients you can't buy
anywhere else.
First thing, you must remember to ask for advancement after each task. If you
don't, you'll stay a lowly associate.
Go the Arch Mage's Lobby at the Arcane University and speak with Raminus Polus.
He will be giving you all your tasks and advancement for now. He can always be
found in the lobby during the day.
================================================================================
10: A MAGE'S STAFF
--------------------------------------------------------------------------------
As your first task, Raminus Polus will send you to acquire your very own Mage's
staff. The Arcane University has a Grove on an island in Lake Rumare where they
grow the trees used to make the staffs.
To get there, you'll first have to find Wellspring Cave. It's tunnels lead out
beneath the lake and up into the Grove. When you arrive, Elette and Zahrasha
will help you choose your staff.
You'll find Wellspring Cave East of the Arcane University across Lake Rumare.
Inside, Necromancers have taken over and the body of Zahrasha lies in the first
chamber. Loot her body for the Wellspring Cave Key. You'll need it to reach
the grove.
Make your way through the caves, whooping necromancer's on your way to the exit.
As you enter the Grove, you'll arrive just in time to watch the necromancers
kill Elette and then ambush you. Ignore the summoned creatures and kill the
necromancers instead.
In the center of the Grove, you'll find a stone chest. Take the Unifinished
Staff from inside and return to the Arcane University.
Once you've told Raminus about the Grove, he'll send you to Delmar in the
Chironasium to finish your staff. The Chironasium is the second to last
building on your right outside. Delmar will ask you to choose which school of
magic and which of three spells you'd like your staff enchanted with. The
strength of the enchantment is leveled to match you. Here are your choices:
DESTRUCTION - Fire / Frost / Shock
ILLUSION - Charm / Paralyze / Silence
MYSTICISM - Soul Trap / Telekinesis / Dispel
Once you've made your choice, he'll need twenty-four hours to complete it.
Return the following day to pick up your new toy.
Now return to the Lobby and Raminus. Ask about Advancement and you'll be
promoted to Journeyman.
================================================================================
11: ULTERIOR MOTIVES
--------------------------------------------------------------------------------
Raminus Polus needs you to retrieve a book from Janus Hassildor, Count of
Skingrad. It will help the guild learn more about Necromancers and he feels the
Count may receive you well where he'd be angry if someone of higher rank were
to ask.
Head to Skingrad and the County Hall in the Castle. Speak with Mercator Hosidus
about seeing the Count. Seems he's in no mood to receive guests and Mercator
asks you to return tomorrow, when you may have better luck. Wait 24 hours and
speak with Mercator again. The Count has now agreed to see you but, oddly, only
outside the city and not until Two in the morning. Go prepared since we're the
suspicious sort.
Head outside the city's West Gate and make your way over to the Cursed Mine.
Don't go in, you're meeting outside. Wait until two am. Mercator, not the
Count, will arrive at two with a couple robed and hooded friends. Mercator
never told the Count of your arrival and wants to make sure noone from the
Mage's Guild interferes with his plans to kill the Count. He and his
Necromancer buddies will jump you. Just do your best to hold your own for a
couple minutes and Count Hassildor himself will come to your rescue.
He knew Mercator was up to something when he tried to hide your arrival. He
also enlightens you as to Raminus's real motives in sending you out. Janus
Hassildor is a Vampire. Though he has coexisted peacefully with the Guild for
some time, they were obviously worried about his motives and used you to suss
out his loyalties. He assures you he's loyal to the council and sends you
packing. There never was any book.
Return to Raminus at the University and give him the news. Thanks to you,
they're no longer worried the Count is allied with the necromancers.
At this point, if you ask, Raminus will advance you to the rank of Evoker and
reward you with the Spelldrinker Amulet.
================================================================================
12: VAHTACEN'S SECRET
--------------------------------------------------------------------------------
Raminus is going to give you a break from Necromancer's for a while and tells
you to speak with Irlav Jarol about exploring an Ayleid Ruin. Irlav's team is
exploring the ruin of Vahtacen and have come upon a puzzle they can't solve.
He'd like you to head over and see Skaleel about figuring it out.
The entrance to Vahtacen is actually a cave. You'll find it SSE of Cheydinhal
on the shore of the Reed River.
Inside, head through the tunnel to your left and you'll enter the first chamber
of the ruin. Skaleel is in here. She's a bit antisocial but will grudgingly
accept your help. In the room below, a pillar is blocking the way deeper into
the ruin. It reacts to magic and she suggests asking Denel about it if you
want to know more. Head through the gate on the other side of the room and down
the stairs. You'll find Denel just outside the pillar chamber. Ask him about
the pillar. He thinks the four tablets in the room are directions to move it
but he can't read them. Skaleel has a book which might help but you'll have to
ask her for it. Head back upstairs and get the book from her. She'll whine but
hand over the Ayleid Reference Text. Now back down to Denel but first, go into
the pillar room and click on each of the four tablets. Now go give him the book
and he'll offer to translate the writing for you.
The spells you'll need are Fire, Frost, Damage Magicka and Fortify Magicka.
Behind Denel is a chest containing scrolls for all the spells you need. Take
them and go to the pillar. Now, SAVE before you cast anything. The pillar is
tempermental. Saving first will keep you from having to track down more
scrolls, not to mention each time you get it wrong, the pillar zaps you for a
hefty amount of damage. Don't bother casting from the corners of the room, it
doesn't really matter. Get right up next to the pillar and cast your spells in
this order: FIRE - FROST - SEVER MAGICKA - ELEVATE MAGICKA
The pillar will open and reveal a door into the Vahtacen Lorsel.
Head into the Lorsel. In the first room, avoid the center of the floor as it
drops onto spikes and get through the opposite door quickly. There are four
Ayleid Magic Traps in here that shoot at you every few seconds. They look like
black crystals until they shoot at you, they're Dark Welkynd Stones. Keeping
your distance keeps them from firing.
Through the gate, step on the pressure plate to drop the wall in front of you.
Go through into the next chamber. In here you'll find four more Dark Welkynd
Stones and the center of the room raises up to a spiked ceiling.
Step carefully through the swinging blades, follow this passage around and down
into the largest chamber yet.
Cross to the other side and up the stairs. You'll find a blue switch on your
right as you reach the top. This will raise the stairs on either side of the
central platform. As you reach the top, ghosts will spawn below. Hit the Blue
switch to raise the cage and reveal an Ancient Elven Helm.
Once you pick up the helm, a wall will drop up the stairs at the South end of
the chamber, where the first switch was. Head up there and follow the stairs.
Step on the pressure plate at the top and the wall will drop, letting you out
next to the door back into Vahtacen's main floor. OR, if you were able to pick
the lock, go through the gate on north side of the chamber. This passage will
take you straight back to Denel, revealing a hidden area with a few Ayleid casks
and coffers.
Now that you have your prize, go find Skaleel so she can tell you to go back to
Irlav at the Arcane University.
He'll praise you for solving the riddle, take the helmet and send you back to
Raminus.
================================================================================
13: NECROMANCER'S MOON
--------------------------------------------------------------------------------
Ask Raminus for advancement and you'll be promoted to Conjurer and receive the
Robes of the Conjurer.
Raminus wants you to further their knowledge of Necromancers. Head over to the
Mystic Archives and speak with Tar-Meena.
Tar-Meena, overworked and cranky, can't tell you anything until you've read the
library's copy of Necromancer's Moon. The book is on a table next to the door.
Grab it and talk to her again. She says the one thing worth note in the book is
a reference to the Shade of the Revenant and sends you packing. Head back to
the lobby and Raminus. He thanks you for bringing the book and tells you to ask
Bothiel about the Shade of the Revenant. She should be in the lobby as well.
She remembers that Falcar, you remember the bad tempered head of the Cheydinhal
mages guild, was here asking about the same thing not long ago. On his way out
he dropped a hastily scrawled note. Read it and you'll find locations of four
Necromancer Altars. Take the note to Raminus. He knows the location of Dark
Fissure and will give you a map marker, SE of Cheydinhal. He wants you to go
and see if you can find out anything about the Shade of the Revenant. He'll
also warn you not to put yourself in danger is possible.
Head to the cave. Just inside, you'll find two necromancers. One of them, the
Worm Anchorite, has a handwritten note. Kill him and take it. This is the
evidence you'll need. Return to Raminus at the Arcane University and give this
to him. He will thank you for your hard work and promote you again to the
rank of Magician.
ON BLACK SOUL GEMS: For my fellow enchanters, the Altar outside this cave is
your best friend. Once each week, for an entire day (24 hours) a light will
shine down upon these altars. You will need EMPTY Grand soul gems and a soul
trap spell. When the light is shining, place your empty Grand gem inside the
altar and cast soul trap on it. When you open the altar, you'll have a black
soul gem. Why do we want these? They are the only gems capable of trapping the
souls of NPC's and they afford you the highest charge when enchanting.
The light appears as a pale, pink spotlight, shining down from the sky and is
easier to see at night. I suggest standing a few feet away from the altar and
looking up. Just wait 24 hours at a time until you find the right day.
Remember, it shines ONCE each week from Midnight to Midnight.
================================================================================
14: LIBERATION OR APPREHENSION?
--------------------------------------------------------------------------------
Speak with Raminus again and he'll send you to meet with Hanibal Traven, the
Arch Mage. Your tasks will now come from him. Use the floor portal to the Arch
Mage's Tower council chambers.
Hannibal needs you to find Mucianus Alius and return him safely. Mucianus
infiltrated the Necromancers in Nenyond Twyll and was sending regular reports.
Hannibal's not heard from him in awhile. The Council has sent a group of
Battlemages to track him down, thinking he's changed sides, and they'll kill him
on sight. Traven needs you to find him first and bring him safely back to the
University.
You'll find Nenyond Twyll, an Ayleid Ruin, SW of the Imperial City. When you
enter, you'll find Fithragaer, a battlemage. He's the only survivor as the rest
of his force were wiped out by the Necromancers. He'll take off into the ruin,
telling you to follow. Keep your distance. If you're lucky, he'll get himself
smushed in the first chamber. Yes, another one of those pesky floor traps will
shoot up, turning Fithragaer into Wood Elf Pizza. Make your way across this
room and down the hall to the next large chamber. You'll run into a couple
Necromancers here. Deal with them and use the door on the other side to enter
the Nenyond Twyll Riellesel.
Cross the Riellesel. At the opposite side of the chamber, on your left, is a
blue switch. Press this to drop the section of wall to your right. In this
room, you'll find what's left of Mucianus Alius. He's been turned into a Zombie
and is obviously beyond your aid. Click on him to recieve a journal update or
you can 'free' him.
Now, if you'd like to get those two Varla stones, take a swim. You'll see there
is a set of stairs to either side of the platform. Go down each stair and swim
to your left. You'll find a blue switch just around the corner, below the water
line. Press these and the Varla stone cages will rise.
Once you have your stones, use the door to the left of Mucianus's cell. It will
take you back to the Main Floor through a hidden area. At the top of the stairs
step on the pressure plate to drop the wall and the door back out to the Great
Forest is just on your right.
Head back to Traven and tell him of Mucianus's fate.
Before moving on to your next task, head back downstairs and ask Raminus Polus
about advancement. He'll promote you to Warlock.
================================================================================
15: INFORMATION AT A PRICE
--------------------------------------------------------------------------------
Count Hassildor has contacted Traven and wants to speak with you. He claims to
have important information about the necromancers and he'll only speak with you.
Head over to Skingrad and the Castle's County Hall and speak with Hal-Liurz.
Before he'll give you the info, he wants you to do him a favor. There are
Vampire Hunters in town looking for a group of vamps in Bloodcrust Cavern. The
Count wants you to deal with the hunters and the vampires, then he'll talk to
you.
There are three ways you can handle this:
1: Kill all the Hunters yourself. Show off those assassin skills and get them
while they're sleeping. Find Eridur walking the streets and tell him you're a
worried citizen. Ask him where he's looking and you'll get map markers for him
and his men. Once you've disposed of them, go to Bloodcrust cavern and take
care of the vampires.
2: Go to Bloodcrust Cavern and waste the vampires. Make sure to take the
vampire dust from their corpses. Once they're all dead, return to town and show
the dusts to Eridur, the wood elf leader of the hunters. He'll mutter about
ameteurs and he, and his hunters, will leave town.
3: Visit Bloodcrust Cavern to recieve the map marker for it. Now go back to
town and tell Eridur where the vamps are hiding. He and his hunters will take
off for the cavern and most likely get wasted inside. Kill any stragglers, vamp
or hunter.
Now that you've dealt with the hunters and vampires, return to the castle and
ask Hal-Liurz to get the Count for you.
Count Hassildor has heard that Mannimarco, the Worm King, has returned to
Cyrodiil. He's why the necromancer's have come out in force and he believes
there will soon be a war.
Head back to the Arcane University and give Traven the bad news. He has no need
of you for the moment. Go do something else or wait for two days and speak to
Traven again.
#At this point, if there are any spells you want from the Bruma Mages Guild, go
get them now, before taking your next quest. This is your last opportunity.
================================================================================
16: A PLOT REVEALED
--------------------------------------------------------------------------------
Traven needs you to check on the Bruma Guild Hall. He hasn't heard fom Jeanne
Frasoric in a while and it's very unlike her. While he enjoys the respite from
her constant nagging, he has a feeling something is wrong.
Make your way to the Bruma Mages Guild. When you enter, you'll find the hall
has been destroyed. You need to search for survivors. Head right and go down
the stairs to the living quarters. Watch out for mobs of the undead variety
down here. Cross the living quarters and exit the other side. Now head up the
stairs to Jeanne's room, you should remember where it is.
As you open the door, you'll be greeted by a necromancer. She says you missed
the guest of honor and attacks you. Kill her and J'Skarr will appear. He made
himself invisible when the Worm King appeared. Mannimarco slew everyone and,
knowing J'Skarr was there, left him alive to send a message to Traven, something
about Echo cave. J'Skarr will leave for the Arcane University. Make your way
back there as well and tell Traven what has happened. He'll keep an eye out for
J'Skarr and needs a few days to digest this information.
Head downstairs and ask Raminus Polus for advancement. You'll be promoted to
Wizard and receive the Wizard's Fury spell: Fire, Frost and Shock damage
leveled to match you.
Wait a day, then return to Traven. At this point, the council has fractured,
unable to agree on a course of action. Several mages have left and taken
valuable artifacts with them. Traven needs you to recover these objects.
Irlave Jarol has made off with the Bloodworm helm to study it further and unlock it's
power for the guild. Caranya has taken the Necromancer's Amulet, to keep it safe she says.
Be sure to ask Traven specifically about the Helm and Amulet here to recieve Map Markers
for their locations.
We'll go after the helm first.
================================================================================
17: The Bloodworm Helm
----------------------------------------------------------------------------------------------------------------
Irlave Jarol has taken the Bloodworm Helm deep into the wilderness to Fort Teleman. Check
your map and you'll find the marker for the fort Due South East of Bravil, in the middle of
nowhere. I started at Leyawiin and walked North along the East bank of the Lower Niben
to Nocturnal's Shrine and then followed my Map Marker ENE to the Fort.
You'll find the door into Fort Teleman just to the right of the stairs. Once inside, you'll find
the place has been overrun by Necromancers. They're conveniently spaced out for sneak
attacks in here.
Make your way through the chambers to a door marked Fort Teleman Order of the Black
Rose. In here, the Necromancer's are duking it out with various Daedra. In the first large
chamber, take the hole in the East wall. Follow these tunnels and you will find Irlav Jarol's
corpse. Take the Bloodworm Helm from his body to recieve a journal update.
Return to the large chamber though the hole in the wall and this time walk straight across
and take the Western Door. Through the wooden door is another leading back into Fort
Teleman. Before you drop down, look to your right to find a treasure chest on a ledge.
Once you drop down, you're right back by the entrance.
As you exit the Fort, walk straight ahead between the pillars to find a Nirnroot growing
next to the wall.
Now return to Traven and tell him of Irlav's fate.
================================================================================
18: Necromancer's Amulet
----------------------------------------------------------------------------------------------------------------
You'll find Caranya and the Amulet at Fort Ontus, Duw West of the Imperial City and North
West of Skingrad. It's another cross country trek so go prepared. Start at Skingrad and travel
NW throught the foothills. You'll eventually find Brotch Camp. From the Camp, if you look
up the mountain, you'll see a winding path. Follow this up the mountain, cross the bridge
and turn back to the East and you'll find the Fort at the top.
Head inside to find Caranya.
There are Mages wandering the halls here. When asked they'll tell you to see Caranya. Cross
the bridge and take the first passage on your left. Follow this around and enter the Fort Ontus
Understreet.
Unless you can pick the locks on these small gates, follow the hall around and pull the lever to
raise the large gate. Caranya is here in the main chamber.
Carany it seems, has gone over to the dark side and serves Mannimarco. Knowing you are
Traven's, she plans to kill you and send your corpse on to him. She likes to fire off a spell and
run so you may have to chase her down. Once she's dead, remove the Necromancer's
Amulet from her corpse.
You'll find your fellow Mages are no longer so freindly as you make your way out. You'll
have to kill them. Head back outside and return to Traven with the bad news.
The ArchMage is stunned by her betrayal and takes back the amulet for safe keeping.
Before we continue, go back downstairs and speak to Raminus Polus about Advancement.
He will promote you to Evoker and reward you with the Spelldrinker Amulet.
Spell Absorption 15 pts. on Self - Constant Effect.
Now head back upstairs to Traven.
================================================================================
19: Ambush
----------------------------------------------------------------------------------------------------------------
Traven has heard of a Colossal Black Soul Gem being held in the ruins of Silorn by the
Necromancer's. A contingent of Battle Mages has already been sent and you are to join them
and recover the Soul Gem at all costs.
You'll find the Ayleid Ruin of Silorn on your map, just South East of Skingrad. To get there
easily, first head to Skingrad Castle. Follow the road that runs under the Castle Bridge East.
You'll see a path leading off to your right just before the road turns North. Follow this path
and down the rough stairs cut into the hillside and you'll come out above Silorn. It's one of
the more lovely views in the game. Enjoy.
At the bottom of the hill, cross the bridge on your left and you'll find the Battle Mages on the
North side of the ruin. You'll need to speak to Thalfin first. She's the one off by herself.
Follow her toward the ruin and speak to her again. The Necromancers have sealed the
entrance and you'll have to wait for them to come out. Now to plan your ambush. You'll
need to position the Battle Mages according to their abilities. Tell Thalfin and Iver to go near
the entrance, up close. Send Merete back to keep her distance. Now you wait. It wont take
long.
When the Necromancers come out, you can join the melee, but you risk hitting one of your
allies, and they're good at cleaning up on their own. If you want to draw off one or two of
the bad guys, just walk over to the fight and wait for one to attack, then back off and kill him.
Once the fight is over, your journal will update telling you the guy with the gem, Falcar, has
escaped back into the ruin. Time to hunt him down. Head over to the entrance.
The first floor looks confusing as you expose the map, but there's really only one way you
can go right now. Follow the available passages to the entrance to the Silorn Sedorseli, in the
bottom left corner of the map.
In the Sedorseli, follow the passages to the second large chamber. If you can't, or don't want
to get through the Hard locked gate, don't worry about. There's another way in. On of the
four pillars in this chamber, you'll find a Blue Switch. Press this to drop a section of wall
behind you and head downstairs.
There are a couple Varla Stones down here, be sure to grab them and refill your weapons
enchantments if you need to. There's not much in the water here except for a single Ayleid
Chest. You'll find a set of stairs leading up on the other side of the chamber. At the end of the
hall, step on the pressure plate to drop the wall in front of you and head through. Follow
this passage to the right and down the stairs.
At the bottom, step on the next pressure plate to drop the gates and cross the bridge. If you
fall in the water, there's a tunnel on the East side of the chamber leading out to the other side
of the bridge. Head up the stairs and take the door back into Silorn's Main level.
Press the Blue switch at the railing in front of you and see a gate drop away down below.
Jump the railing, cross the now open bridge and enter the Silorn Buroseli.
In the second chamber is a Varla Stone Cage. Press the Blue switch to raise it and collect the
stone. Through the door beyond and in the hallway, you'll find Falcar. Kill him and take
the Colossal Black Soul Gem and his key from his corpse. Now to make your way back out.
In the chamber beyond, watch out for a Dark Welkynd Stone shooting from the upper tier.
Go up the stairs and to your right, yes near the irritating stone, you'll find a Blue Switch.
Press this and go through the gate.
At the top of the stairs, take the door back into Silorn's main level. There are a couple Ayleid
casks on the other side of this bridge. When you've cleared them, drop down off the bridge
and you're back at the entrance.
Time to take our ill booten gottie back to Hannibal Traven.
================================================================================
20: Confront the King
----------------------------------------------------------------------------------------------------------------
Once Traven has the Colossal Gem, he will give you your final task; Confront the King of
Worms. He will promote you to Arch Mage and then trap his own soul in the Colossal Gem
to protect you from Mannimarco's magic. Take the gem and the Arch Mage's key from his
body. A map marker for Mannimarco's location has also been added to your map.
You'll find Echo Cave almost Due West of Cloud Ruler Temple. I reccomend leaving from
Bruma's North Gate. Follow the Western Path and take the left fork. This path will lead
you around the base of the mountains. This path has several forks, you'll need to use your
map to stay on course. You know you're going in the right direction if you pass Applewatch
and Boreal Stone Cave. Once you pass the cave, stick to the right hand paths and they'll lead
around the base of the mountains and straight to the door of Echo Cave.
When you arrive, a Worm Thrall will greet you, vowing to die before allowing you entry.
Oblige him and take the Echo Cave Key from his corpse.
The main floor of Echo Cave is huge but straight-forward. Follow the tunnels and they'll
bring you to a door to the Echo Passages. Once again, there's only one way to go down here.
In the last chamber, there are two doors. The one back into Echo cave is pointless right now,
we'll use it later. You want the other door to Echo cave's Necromancer's Chamber.
In the first chamber, there are two ways to go once again. The tunnel on the left will take on
a useless swim in the water around Mannimarco's perch. I would skip the swim until after
you beat the Worm King. Getting too close to his little island could trigger the barriers to
raise around his island and you wont be able to get in to him.
The wooden door on the left leads directly to him. Cross the bridge and confront the King
of Worms. When you get close enough, bars like giant teeth will rise out of the ground and
close you in with him.
He'll monologue for a bit and give you two options. If you choose to join him or
not makes no difference. Either way he refuses and promises to raise your corpse as a zombie
and study you for eternity.
TIme to commit a little regicide. Traven's soul in the Colossal gem will protect you from
being paralyzed. Stay moblie, dodge his spells where you can. A fire enchanted weapon
seems to work well. A Glass sword with 25 points of fire damage on strike took him down in
two hits for me at level 17.
Once he's dead, be sure to grab the Staff of Worms from his body. Lots of bad natured fun
there. Now, head back to the Echo Passages and take that previously useless trap door to
the main level of Echo Cave. Drop down and to your right is the tunnel leading out.
Return to the University and speak with Raminus Polus. He greets you as the Arch Mage and
congratulates you on your victory against Mannimarco. He'll reward you with the Arch
Mages robes
You'll also recieve a journal update about speaking with Julienne Fanis about collecting
Alchemical Ingredients for you. You'll find her in the Lustratorium at the University. As
Arch Mage, you can ask her to collect rare ingredients for you. She also has a limited supply
of Refined Frost Salts for sale. You'll need these for a side quest out of the Leyawiin Mages
Guild, called Tears of the Savior.
Arch Mage's Enchanted Chest mini-guide:
---------------------------------------------------
In the Arch Mage's quarters, you'll also find an Enchanted chest. Here's how it works: Place
a single ingredient in the chest. Wait 24 hours and it will have magically multiplied to 10!
**DO NOT put anything but ingredients in this chest. You WILL lose them and NO!! You can
not use the chest to multiply Nirnroots. That would be too easy.
*If you wait more than 7 days to recover your ingredients from the chest, they will vanish.
*You must wait 7 days between each use to use it again.
*You may be able to multiply more than one ingredient at a time. It varies from game to
game. Give it a try.
*Placing too many ingredients in the chest may cause them all to disappear.
*Not all ingredients are compatible with the chest.
*Here is a URL to a list of the Compatible and Incompatible ingredients for the Enchanted
Chest. Enjoy. http://www.uesp.net/wiki/Oblivion:Enchanted_Chest
================================================================================
FREQUENTLY ASKED QUESTIONS
================================================================================
Coming Soon!
================================================================================
CREDITS
================================================================================
Many thanks to my husband for testing all my directions and instructions. He
keeps me from sending anyone off a cliff.
Many, many thanks to the Avid Alchemist's Alcove, who's wonderful Obliv-O-Map
keeps me from wandering the countryside for days.
Thanks to the ElderScrolls forums. A great bunch of ES addicts that can answer
just about any question, no matter how stupid.
Thank You NinjaMonkie for telling me what Dark Welkynd Stones are called! I had
no idea, though I still like Magickal Traps. =)
================================================================================
>CONTACT ME
================================================================================
Please contact me at whoguru@hotmail.com with any questions, corrections,
suggestions, additions, etc... When you send an email, please put "Mages Guide"
in the heading so I'll know it's not spam.
================================================================================
COPYRIGHT NOTICE
================================================================================
This may be not be reproduced under any circumstances except for personal,
private use. It may not be placed on any web site or otherwise distributed
publicly without advance written permission. Use of this guide on any other web
site or as a part of any public display is strictly prohibited, and a violation
of copyright.
-
--------------------------------------------------------------------------------
REWARD: Leveled amount of gold - at Level 10 I recieved 1200.
In the Mages Guild, speak with the Khajiit, S'Drassa. He's looking for crystals
called Garridan's Tears and will pay in gold for each tear you recover. He'll
send you to the Arcane University to speak with Julienne Fanis. She has studied
the legend and should know where to find them.
You'll find Julienne in the Arcane University's lobby. She'll refer you to the
First Edition in the Imperial City Market District to find a copy of the book
"Knightfall", the story of Garridan. You'll have to buy a copy from Phintias
as he doesn't appear to have one out on the shelves, it's not expensive. You'll
get a map marker for Frostfire Glade, in the mountains near Bruma. You'll also
need refined frost salts to get in. Head back to the Arcane University and talk
to Julienne. She has five of them for sale. Buy these and head out for Bruma.
Follow your map marker to the glade, south east of Bruma.
##Save at this point. There is a potential glitch here. You'll need to reload
if this happens.
If you have any armor or items that protect from frost damage, bring them and be
prepared to heal often. Enter Frostfire Cave. Follow the tunnels to the
entrance to Frostfire Glade. Straight ahead of you is the Glade. You can't
miss it. It's covered in snow and ice. BEWARE: Every moment you spend on the
snow, your health is being drained by frost damage. Watch your health, heal
often, run back up on the grass if you need a minute to let your magicka
regenerate.
There is a Frostfire Atronach Glade Warden here. My advice, lob an arrow or
spell at him and run back up to the grass. Let him follow you up there, away
from the center of the glade. You wont take damage while you fight him and
you wont risk blowing away the tears across the glade with magical damage.
They're hard enough to find.
Once he's dead, begin your search for the tears. You'll need five. The first
four can be found on the ground around the statues. Look carefully as they're
small and difficult to spot. They appear as bluish-white and tear shaped.
The fifth tear is actually on the ice statues. You'll need to cross the log
to get up to the statues.
## I, and many others, had an issue with the last tear. Instead of being on top
of the ice, it was actually inside and unreachable. If this happens to you,
reload and try again. If you're on pc, you can use the console code to give
yourself the fifth tear, but reloading works just as well.
Garridan's Tear - player.additem 00025B33 1
Return to S'Drassa in Leyawiin for your reward and maybe a nice cup of hot
chocolate.
------------------------------------------
REWARD: See Knights of the White Stallion Below.
Speak to Leyawiin's Count, Marius Caro. There's an Orc, Mazoga, hanging around
the County Hall claiming to be a knight. He wants to know what it is she wants
in Leyawiin.
Mazoga is standing just outside the throne room. Play along with her to find
out why she's there. She'll send you to find Weebam-Na and bring him to her.
His house is just around the corner from the castle.
If Weebam-na likes you enough, he'll agree to meet Mazoga at the castle. Before
you go, ask him about Leyawiin for a hysterical review of a failed local
resteraunt. Follow him back to the castle and listen in on the conversation.
Mazoga wants him to lead her to Fisherman's Rock. She wont say why and he
refuses to take her and leaves. Speak with Mazoga again. She now wants you to
take her to Fisherman's Rock so she can talk to someone called Mogens
Wind-Shifter. You're not to interfere until she's had a chance to talk to him.
Fisherman's Rock is just north of Leyawiin on the other side of the river.
Follow your map marker. When you reach the camp, Mazoga accuses Mogens of
murdering her freind, swears revenge and jumps him. Take out the other members
of Mogens' gang so Mazoga doesn't get wasted. Afterward, Mazoga tell you how
Mogens murdered her freind Ra'vindra to keep her from turning him in. Mazoga
then swore a Knight's oath to avenge her freind's death. She thanks you and
will return to the castle. Loot the bodies and head back to the Count to give
him the news.
The Count appreciates Mazoga's noble intentions and your assistance. He offers
to make both you and Mazoga Knights-Errant of the White Stallion
PART II: KNIGHTS OF THE WHITE STALLION
REWARD: Knights Commission, Key to Lodge, Leyawiin Shield,
Bounty of 100 Gold for each Black Bow returned.
The Count's proposition is simple: If you and Mazoga will find and eliminate
Black Brugo and his Black Bow Bandits, he will make you both Knight's-Errant
of the White Stallion.
Mazoga should be back in the County Hall by now. Go tell her the Count's offer
and ask about Black Brugo. She's had dealings with him in the past and knows
he hides out in the ruins of Telepe. It's just NW of Leyawiin. You can find
him there between midnight and six am when he comes to pick up his take.
Take Mazoga and head to the ruin. Follow your map marker.
Telepe is a single floor. At or after midnight, enter the ruin and you'll find
Black Brugo in the room to your left at the bottom of the stairs. Kill him and
his bandits. Make sure to loot the black bows from their bodies. In the room
where you killed Black Brugo is a blue switch. Hit this to open the gate at the
back of the hall. Inside you'll find a coffer containing 300 gold, Brugo's take
for the month.
Once you're done, head back to Leyawiin and the Count for your reward. He
thanks you for your service, rewarding you and Mazoga with the titles of Knights
Errant of the White Stallion, Keys to White Stallion Lodge, a shield bearing
the arms of Leyawiin and a bounty of 100 gold for each Black Bow you turn in.
Head back to Mazoga and give her the good news. She thanks you and leaves,
saying she's off to find some more Black Bows and you're welcome to tag along.
I wouldn't unless you're in the mood to be led in a giant circle out of
Leyawiin, across the river, up past Nocturnal's Shrine, back across the river
then south all the way back to the ruin of Telepe. You can walk there in two
minutes on your own. Skip the cross country trek.
White Stallion Lodge is North of Leyawiin, west side of the river on the road,
just NE of Telepe.
--------------------------------------------------------------------------------
REWARD: Leveled amount of gold.
Outside the West Gate of Leyawiin, at any time of day or night, you'll find
Lerexus Callidus loitering by the stables. He's been trying to cut off the
Skooma trade into Leyawiin. He's found a dealer at the Greyland settlement and
has gone after him several times. Each time he gets close, a lookout spots him
and the dealer, Kylius Lonavo, escapes before he can reach him.
Lerexus needs you to find him and deal with him, permanently. The Greyland
Settlement is just SW of the stables, a very short walk. Sneak and head over.
Feel free to do away with the lookout quietly if you come across him. In the
large house, you'll find Kylius Lonavo. Don't bother trying to speak with him
as he's not the type for conversation. Bring back his ring as proof he's been
dealt with and Lenexus rewards you for your service to Leyawiin in gold.
--------------------------------------------------------------------------------
In Castle Leyawiin, speak with Count Marius Caro. Raise his disposition and
he'll agree to sell you a home in the center of town, small but tidy, for the
price of 7,000 gold.
You'll find your new luxury shack devoid of furnishings. Head over to Gundalas
at Best Goods and Guarantees to furnish your home.
Total cost of all Furnishings: 11,158 gold
##Average price based on a disposition of 100 with no haggling. You can of
course get the prices to go lower.
================================================================================
--------------------------------------------------------------------------------
Speak with Countess Ariana Valga. She has a lovely home for sale for the
bargain price of 20,000 gold. Your new home is just across from the Main Gate.
Head over to Northern Goods and Trade. Seed-neeus has everything you need.
Total cost of all Furnishings: 28,347 gold
##Average price based on a disposition of 73 with no haggling. You can of
course get the prices to go lower.
#The furnishings for this house include a servant's quarters. I haven't yet
discovered if there actually is a servant to go with them.
--------------------------------------------------------------------------------
REWARD: Leveled amount of gold ##A portrait for your home
Speak to the Countess. Her prized painting of her husband has been stolen from
her locked bedchamber. She needs you to speak with the suspects and
witnesses, gather clues, and discover what has happened to her painting. There
are three witnesses and two suspects. You'll receive a map marker for each.
They are: Captain Bittneld, Laythe Wavrick, Orok gro-Ghoth, Orgnulf Hairy-legs,
and the resident Mage, Chanel.
We'll start with the witnesses.
Captain Bittneld: He wasn't in the castle that night. He has noticed Chanel
spending time in the West tower. When asked, she said she was performing magic
research.
Herald Laythe Wavrick: He has observed Orgnulf having a drinking problem and
asking people for money to support his new habit.
Steward Orok gro-Ghoth: He saw nothing as he stayed in his room all night due
to the heavy rains that evening. He has recently caught Orgnulf drinking in the
West tower. Orgnulf apparently stopped when Orok confronted him about it.
Now for the Suspects.
Porter Orgnulf Hairy-Legs: Orgnulf says he argued with a delivery boy that
night in the dining hall about a shipment of wine that had been damaged during
the heavy rains, then spent the rest of the evening in his room, reading.
Resident Mage, Chanel: She says she spent the evening in the courtyard taking
star readings, then drank some wine in the dining room off the great hall before
going straight to bed.
You should have an idea by now. Now for the evidence.
First, head to the West tower as both suspects have been seen there. Go through
the hatch in the floor behind the crates. Below, you'll find an unusual
painting, suggesting someone in the castle is an artist. Click on it to get the
journal update.
Now head to the dining room off the Great hall as again, both suspects have
claimed to be there. There is a rug beneath the table. On the far left corner
as you entered, you'll find paint stains and a footprint. Click on these for
another update.
Head back upstairs to the private quarters. A search of Orgnulf's room yields
nothing.
Head back over to Chanel's room. On a table in her room is a lectern. Inside
the lectern you'll find painting supplies suspiciously hidden. This is your
last piece of evidence and you should know who it is by now.
Confront Chanel with the evidence. You'll need to raise her disposition before
she'll confide in you.She had a great love for the Count and she was the artist
responsible for the painting. When he died, she became jealous of the time the
Countess spent with the painting and stole it back. She gives you the painting
at this point and will wait for the Countess's judgement.
Now you have two choices when you speak to the Countess.
1: Accuse Chanel. The Countess strips her of her duties and banishes her from
Chorrol. In gratitude for returning the painting of her husband, she rewards
you with gold and gems.
2: Accuse Neither suspect. The Countess is crushed and dismayed to have
suspected anyone in her household. She rewards a small sum of gold. Now, head
back up to the Private Quarters and speak with Chanel.
She is overjoyed that you didn't turn her in. She vows to keep the painting
with her for the rest of her days and asks you to return in three weeks, at
which time, she'll have painted a portrait for you. Chanel is also an
Apprentice Level Destruction Trainer.
#Keep in mind, the gold reward from the countess is substantially larger if you
turn in Chanel but you wont get the painting.
--------------------------------------------------------------------------------
REWARD: 50 gold
Speak with Reynald Jemane. You can find him at the Grey Mare in the evenings.
It seems someone in Cheydinhall is impersonating him and besmirching him and
his good name. As he says, drunkenly, he can besmirch his own good name without
help. He'll give you fifty gold to go to Cheydinhall and find the impersonater.
Make your way to Cheydinhall. Speak with Guilbert Jemane. He's staying at the
Newland's Lodge and you'll most likely find him wandering the hall upstairs. My
he does look familiar, only more sober. Guilbert thought his twin brother was
dead. Upon hearing your news, he'll immediately leave for Chorrol, asking you
to meet him there.
Head back to Chorrol and the Grey Mare. Listen in on the conversation, then
speak with Guilbert. This will complete this phase of the quests. There's a
total of three.
--------------------------------------------------------------------------------
REWARD: Leveled Gold.
Guilbert and Reynald want the family estate back. It was over-run by Ogres when
they were children and they aren't sure where it's located now, except south of
Chorrol. You're job is to find Weatherleah.
Before you leave the Grey Mare, stop and ask one of the patrons about
Weatherleah. They'll refer you to Sabine Laul at the Fighter's Guild. She's
explored the area surrounding Chorrol and will give you a map marker.
Make your way south to Weatherleah where you'll find the place infested by
Redvalley Ogres. Head back to the brothers and give Guilbert this information.
He will, of course, send you back out to cleanse the Ogres from their home,
making it safe for them to return.
Back to Weatherleah we go. Find and kill the Three Ogres wandering the area
around the house and return to Guilbert.
Now that Weatherleah is safe, Guilbert wants you to escort him and his brother
back to their home. Either walk the long away or fast travel. They'll follow.
Once you've led them to the house, Guilbert will reward you in a leveled amount
of gold.
Now go do something else for a few days before heading back to Chorrol.
--------------------------------------------------------------------------------
REWARD: Mercantile Training
Speak to the townspeople about rumors and eventually you'll hear about the
missing daughter of a local merchant. Head over to Northern Trade and Goods to
speak with Seed-neeus about her daughter.
##If you go to the shop and Dar-Ma is still there, talk to her about her mother
and then give it a couple days before going back, at which time you'll find her
missing.
Dar-Ma has gone missing while delivering goods to the village of Hackdirt. She
needs you to find her daughter.
Hackdirt is just south of the city. When you arrive, head over to Moslin's Dry
Goods and speak with Etira Moslin. She says Dar-Ma never arrived with the
delivery. As she's obviously lying, search around the derelict buildings on the
edge of town. You'll find Dar-Ma's horse, Blossom. Go back to Etira and
confront her with her lie. She still denies having seen Dar-Ma and claims the
horse as her own. More town searching for clues.
Head over to Moslin's Inn. Vlanhonder Moslin is as helpful, and evasive, as
Etira. Sneak upstairs and search the lavishly appointed guest rooms. In the
right hand room, in a chest of drawers, you'll find Dar-Ma's diary. Seems she
found the inhabitants of Hackdirt as warm and fuzzy as we have. Confront
Vlanhonder with this and his amnesia breaks. He does remember Dar-Ma. He says
she must have gone crazy and run off into the woods. Since we don't believe
him, head over to Jir Hiriel's house on the edge of town.
Raise his disposition enough and he'll agree to talk to you, but not until after
dark. Wait until after ten pm and go back into his house. Jiv tells you
Dar-Ma is being held in the caves beneath Hackdirt to be used as a sacrifice to
to bring back, what he calls, the Deep Ones. Don't get excited, you don't get
to see them. He'll give you a key and suggest you use the trap door in Moslin's
Inn as it's closest to where she's being held. Go in now, as the entire town
is at the chapel for evening sermons, makes your job a lot easier.
The trap door in Moslin's Inn will put you right next to her cell. Deal with
the Brethren in the cave and free Dar-Ma. Don't worry, she knows how to sneak.
Take her back up through Moslin's Inn.
Doing all this between ten pm and one am will assure the villagers aren't
around to attack Dar-Ma on your way out. Lead her to her horse and take her
back to Chorrol. She will fast travel back with you if she's on her horse.
Make sure Dar-Ma is actually in the house, then talk to Seed-neeus. She has no
money but should raise your mercantile skill to the next level of mastery.
Atleast mine did, so I'm making an educated guess.
--------------------------------------------------------------------------------
REWARD: Chillrend - Frost Damage/weakness to Frost: leveled.
In the Grey Mare, speak with Valus Odriil. Creatures have overrun his farm and
his two sons have gone to find the source of the creatures in the Great Forest.
He needs you to meet his sons at Weynon Priory and help them in the fight.
Head over to Weynon Priory. You'll find Antus and Rallus waiting for you.
Rallus seems capable enough but Antus is spoiling for a fight and jeapordy
freindly. Head out, following Rallus and try not to let them get dead. If one
or both of the sons dies, you'll get no reward.
When you reach Odiil Farm, the creatures attack. Hope you like Goblins, they're
out in force. Try to get as many as you can before they reach the boys. But
more important, keep an eye on Antus's health. He's not much of a fighter and
will go down quickly if you don't heal him often.
Once the goblins are dealt with, and hopefully you've kept the sons alive, head
back to the Grey Mare where Valus thanks you for keeping his sons alive. He
rewards you with a sword, the Chillrend.
--------------------------------------------------------------------------------
REWARD: Escutcheon of Chorrol - Fortify Endurance/Reflect Damage: Leveled
Four Grand Soul Gems with Common Souls
OR
1,500 Gold
Several days after completing the Legacy Lost quest, Fathis Ules will approach
you in Chorrol with an offer. The twins father was actually a master thief
and stole something from Castle Chorrol he was supposed to turn over to Fathis.
He didn't, instead hiding it away and dying shortly after. Fathis offers to
pay you well if you'll find and return it to him. He believes it can be found
in Redguard Valley Cave, which he gives you a map marker for. It's just East of
Weatherleah.
Head out to Redguard Valley Cave. Inside, at the very back of the cave system,
you'll find the Redguard Valley Ogre Chieftan. Kill him and loot his body to
find the Honorblade of Chorrol. This is the item you were sent for. You have
two choices now. You can return the sword to Fathis Ules or return the sword
to Chorrol Castle.
FATHIS ULES: Return the blade to Fathis and he'll reward you 1,500 gold.
## Fathis Ules is the top Fence for the Thieve's Guild. If you finish this
quest, with either outcome, you WILL NOT be able to fence anything after
this point with him. Call it a programmer's fubar.
CASTLE CHORROL: To return the Honorblade to Chorrol, speak to Laythe Wavrick
in the castle. He will reward you with the Escutcheon of Chorrol Shield.
Return to the twins at Weatherleah and speak with Guilbert. If you gave the
blade to Fathis, leaving no evidence of his father's life as a thief, Guilbert
wants nothing more to do with you.
If you gave the blade back to Chorrol Castle, Guilbert happily accepts his
father's past and rewards you with four grand soul gems.
================================================================================
--------------------------------------------------------------------------------
Make your way to Castle Skingrad and speak to the Orc Butler, Shum gro-Yarug.
You'll need to have a fame rating of atleast 20 to get this house. He will
offer to sell you Rosethorn Hall for the paltry sum of 25,000 gold. The current
owner, Vandorallen Trebatius will be turned out with all his belongings. Don't
worry, you can find him wandering the street or staying at one of the Inns. He
didn't have anything to say about it when I found him.
Head over to your your new house and recieve a journal update. Now head over to
Colovian Traders, just down the street, and talk to Gundar. He has everything
you need. Also in this shop is a servant for your house. Speak to Eyja and she
will agree to work for you for 150 gold.
Total cost of all Furnishings: 39,860 gold
##Average price based on a disposition of 70 with no haggling. You can of
course get the prices to go lower.
##Shum gro-Yarug has a nasty habit of falling off the bridge behind the castle
and dying. If this happens to you, as it happened to me, and you're on PC, it
can be fixed. First, make sure he's actually dead and not just wandered off.
Talking to the Argonian in the castle about buying a house will give you a map
marker for Shum. Follow this. If you reach the marker and find his body or
find nothing at all, he's probably dead.
##If his body is there, open the console, click on his body and type: RESURRECT
##If his body is gone, open the console and type: PLAYER.PLACEATME 00028FB6
This will drop him right in front of you.
THE ROSETHORN CACHE:
REWARD: Ring of the Gray - Fortify Sneak, Security, Marksman, Acrobatics 5 pts.
Detect Life 50 feet
Resist Poison 50%
2 Flawless Emeralds
2 Flawless Saphires
2 Flawless Diamonds
Now that you have your palatial home in Skingrad, head up to your bedroom. As
you enter, walk around to the other side of the door. Jump onto the chest and
then on top of the bookshelves. Now, look toward the door. You'll see a Long
Forgotten Note on the lintel. In the note, written by an escaped prisoner, is a
riddle that will lead you to Rosethorn Hall's secret treasure. The answer, of
course, is an hourglass. If you want to keep the note, pick it up now. You
wont be able to read it again if you don't.
Now head down to the basement. You'll see one of the pillars is hung with
garlic. Look in the rafters of this pillar and you'll find an hourglass. Pick
this up and recieve your prize, several flawless gems and the Ring of the Gray.
--------------------------------------------------------------------------------
REWARD: Leveled amount of Gold
While wandering the streets of Skingrad, you'll find a woodelf named Glarthir.
If you don't find him, he WILL find you and follow you until you talk to him.
He has a proposition and wants you to meet him behind the Chapel of Julianos
after midnight. He promises to make it worth your while.
Wait until midnight and and meet Glarthir bahind the chapel. He believes
several people are following him and he wants you to follow them. You're first
mark is a woman named Bernadette Peneles who lives across the street from
Glarthir.
When you leave Glarthir one of the guards, Dion, will stop you. You can tell
him what Glarthir is up to. He wont do anything about it yet. He'll just ask
you to tell him if Glarthir asks you to do anything strange.
Find a spot across the street from Bernadette's house and wait until 6am. Now
begins the first of several boring daily routines.
Bernadette's Routine: Chapel 6am-7am, working in the vinyard 9am-11am, lunch
11:30am-1pm, working behind Tamika's house 2pm-7pm, dinner 7pm-9pm then home.
Notice the distinct lack of spying.
Now fast forward to midnight and meet Glarthir to give him your report. He'll
reward you in gold. There are three conversation options. If you tell him you
have nothing to report he'll yell, tell you to do your job and come back the
next night.
The other two options, telling him he is or is not being followed, you'll get
paid either way. Be aware, telling him he's right each time will lead to that
something strange Dion was talking about, a request for murder.
You're next target is Toutius Sextius. Find his house and wait until 9am.
Toutius' Routine: Wandering Castle Skingrad County Hall 10:30am-1pm then back
home by 3:30pm. Later in the evening around 7pm he goes riding.
Again, a distinct lack of sneakiness here.
Return to Glarthir at midnight and recieve your reward and your next job. He
believes he has identified the ringleader of those spying on him, Davide
Surilie. His house is just behind Glarthir's. Be there at 6am.
Davide's Routine: Working in the vinyard 7am-noon, home by 1pm. Notice the
so called ringleader isn't very ringleaderish.
Now back to Glarthir at midnight behind the chapel. Now, there are two outcomes
of this converation:
A: If you lied and told Glarthir they were all following him, he'll reward you
with gold and a List of Death. That's right, he wants to kill everyone you
followed and return to him the following night for your final reward.
#You can, if you wish, show the List of Death to Captain Dion. He'll thank you
and the guards will promptly kill Glarthir; Or, you can enjoy a little
killing spree. This makes a great way to get into the Dark Brotherhood by the
way.
As it's midnight, all your targets are in their homes and most likely asleep.
Go kick their buckets for them and return to Glarthir the next night. He's
overjoyed to be free of the spies and gratefully rewards you 1,000 gold.
B: If you correctly inform Glarthir none of suspects were watching him, he
suddenly decides you are in on the plot and attacks. Kill him yourself or let
the guards whack him for you.
##On a side note, you don't actually have to follow any of the suspects.
Glarthir will never know the difference. I'm just thorough.
--------------------------------------------------------------------------------
REWARD: Elixir of Exploration - see below for details.
Go to the West Weald Inn. You'll find Sinderion in his room in the cellar, the
door to your right as you come in. He needs you to bring him Nirnroots so he
can create the rare Elixir of Exploration. He will give you a missive with
important information about where to find Nirnroots and a map marker for
Shadeleaf Copse, a good place to start your hunt.
Your first task is to collect ten of the Nirnroots. Each time you return he
will up the ante, requiring more to make the next level of the potion. Twenty
four hours after you give him the required amount, he will have a sample of
that level of the potion to give you and you'll be able to buy more from him.
Nirnroot will always be found near water. While you're wandering the country
on quests, keep your eyes on the shores of lakes and rivers. You'll be
over loaded with Nirnroot in no time. You'll also, on occasion, notice them in
pots in houses and shops. If you're sneak skill is decent, feel free to make
off with these too.
Sinderion will buy any further Nirnroots you collect, ten at a time, for the
bargain price of 250 gold.
Raiden says - "By following the shore of Niben Bay and the rivers that start
from it, basically going around the whole of Niben Bay and rivers, you can find
more than enough Nirnroot."
================================================================================
--------------------------------------------------------------------------------
REWARD: Free Bed at the Aleswell Inn
You're looking for the village of Aleswell. You'll find it North of the I.C.
on the Red River Road, directly between the words "Red" and "River" on your map.
You're going to want a detect life spell or enchantment for this one as all the
inhabitants of the village have been rendered invisible.
Speak with Diram at the Aleswell Inn. A wizard named Ancotar has been playing
pranks on the villagers for years, this is just the latest insult. They've
been invisible for weeks and need you to find the wizard. He's hiding out in
Fort Carctacus just SE of the Village.
At the Fort, you'll find the cranky wizard outside on the second level. If you
answer him correctly, this is very simple. He claims he was unaware the village
had been affected by his experiment. When prompted, reply "Not at all. Tell me
more." Happy to find a fellow mage, he gladly offers up a Reverse Invisibilty
scroll. If you ask him about the reverse invisibility spell, he'll also give
you his Ring of Protection which he warns you to wear when youcast it. Just in
case of any side effects, not that he thinks there will be any. Uh huh. If you
don't wear it, your Luck attribute will take a 45 point hit. Wear the ring.
You'll need to cast the spell in the center of the village to hit everyone.
Stand in the middle of the garden, wearing your ring, and free the villagers.
Once the spell is reversed, speak to Diram again. He gratefully offers you free
lodging at the Aleswell Inn whenever you need it.
--------------------------------------------------------------------------------
REWARD: 3 Potions of Insight (Restore Intelligence)
You'll need to find the Imperial Bridge Inn. The best way to do this is to
start at Bravil. Jump into Niben Bay and swim East up the Silverfish River.
The Inn is on the North shore of the river, just past the second bridge.
Speak to Lithnilian, an Altmer Sorcerer. While researching Welkynd stones in
Bramblepoint Cave, he was attacked and ran, leaving his notes behind. He wants
you to get them back and warns you that all manner of creatures now infest the
cave.
Bramblepoint Cave is WNW of the Inn, back near the mouth of the Silverfish.
Inside, follow the passages to your left and you'll find a trap door to Inner
Bramblepoint Cave.
Once again, bear left through these tunnels and you'll come to a large chamber.
Down below is a door to Deep Bramblepoint Cave. Enter and turn right. Head
through the first cavern and into the next. You'll find Lithnilian's notes in
a chest at the back of this cave, to the right of the Welkynd formation. Grab
the notes and return to Imperial Bridge Inn.
Lithnilian is overjoyed and rewards you with a few potions.
--------------------------------------------------------------------------------
REWARD: 2 of S'jirra's Famous Potato Breads
Find the Faregyl Inn. Leave Bravil on the Green Road and follow it North. The
Inn is on a small side road, due North of the word "THE" in The Green Road.
A Khajiit named S'jirra has had her Jumbo Potatos stolen. She set them to give
them a little sun and something huge made off with them. She saw it heading
west. You should have a map marker for it now.
Head outside and follow this to the NW. It will lead you to an Ogre with a
fondness for spuds. Kill him and take the six Jumbo Potatos from his corpse.
Return to S'jirra for your reward, two loaves of her famous Potato Bread.
Mmm. Trail munchies.
--------------------------------------------------------------------------------
REWARD: The Argonian Account, Book 1
You'll find the small sheepfarm of Shardrock NE of Kvatch and WNW of Skingrad,
dead center between the two.
Thorley Aethelred, the Sheep herder, is having a problem with a group of West
Weald bears. They've gotten a taste for Mutton and he needs you to thin out
the herd so they'll leave. You'll need to find and kill six of the bears and
bring back their teeth as proof.
Detect Life will make this easy as the bears are spread out around the farm and
hard to see in the brush. Remember to take the teeth from each one you kill.
Bring all six back to Thorley and he'll reward you a skill book that raises
your Athletics Skill.
--------------------------------------------------------------------------------
REWARD: A Goblin Totem, basically.
South East of the Imperial City, where the Yellow Road meets the Cerbele River,
you'll find Crestbridge Camp on the West side of the River.
At the camp, speak with Barthel Gernand. He and his family are trying to build
a settlement, but it was overrun by goblins. Ask him about Cropsford and you'll
recieve a map marker just North west of the camp.
Speak to Mirisa for more detailed information about the Goblins. There are two
rival tribes of Goblins. Their lairs are on either side of the settlement so
their raiding parties pass right through it. One clan has stolen the other
clan's Totem. There are two ways to stop the war.
1: The direct approach. Go to Cracked Wood Cave and find and kill the Shaman
of their tribe. The clan will fall apart and the war will be over.
2: The Stealthy approach. Sneak inside Timberscar Hollow and find the Cracked
Hollow Totem. Steal it and escape. So long as the rival clan doesn't have
their totem, the Cracked Wood mob wont care anymore.
I reccomend the stealthy approach, unless you're battle hardened and tough to
kill. Both Caves are crawling with goblins. I counted around twenty-five in
each cave and they tend to mill around together.
We're going to steal back the totem. Head to Timberscar Hollow. Inside, check
your map every few seconds. The Goblin currently in posession of the Totem will
be heading for the door shortly after you enter. Wait by the door, where there
are no Goblins and he'll come right to you. Easy kill.
Try to leave the Shamans alive for Fun with Totems later.
Now, head back to Crestbridge Camp and give Barthel the good news. He'll thank
you and ask that you return to Cropsford in a few weeks when they've had a
chance to finish the settlement. There is no reward, unless you count the
Goblin Totem.
In theory, if the Shaman that owns a Totem is still alive, you can drop that
Totem anywhere and Goblins should 'eventually' show up to recover it. That's
the theory. Mirisa will give you this information if you ask her.
================================================================================
--------------------------------------------------------------------------------
Q: Where is the Ayleid Collectors quest for the Imperial City.
A: The collectors quests are extensive so I made a guide just for them. You
should see it as "Ayleid Statues Guide". However, you can start them by
getting the Ayleid statue from the lowest floor in Vilverin and then
taking it to Umbacano manor in the Talos Plaza District, IC. For more
detailed info, see the statues guide.
Q: Is there an easier way to find Nirnroots?
A: Well, I don't know about easier but you can try this. Nirnroots actually
have a sound signature. If you go into controls and turn off both the
music and footsteps sounds, you'll be able to hear the hum of the roots
when you get near them.
================================================================================
--------------------------------------------------------------------------------
Many thanks to my husband for testing all my directions and instructions. He
keeps me from sending anyone off a cliff.
Many, many thanks to the Avid Alchemist's Alcove, who's wonderful Obliv-O-Map
keeps me from wandering the countryside for days.
Thank you to Tones12 and Kaidian from the A.A.'s Alcove forums for helping me
find some side quests I missed.
Thanks to the ElderScrolls forums. A great bunch of ES addicts that can answer
just about any question, no matter how stupid.
Thank you to Dougjevon. There are two codes for Garridan's Tears. I had the
wrong one. Thanks for catching it.
Thanks to Raiden for his thoughts on Nirnroot hunting and for finding the "No
Stone Unturned" quest.
================================================================================
--------------------------------------------------------------------------------
Please contact me at whoguru@hotmail.com with any questions, corrections,
suggestions, additions, etc... When you send an email, please put "Misc Quests"
or "Side Quests" in the heading so I'll know it's not spam.
================================================================================
--------------------------------------------------------------------------------
This may be not be reproduced under any circumstances except for personal,
private use. It may not be placed on any web site or otherwise distributed
publicly without advance written permission. Use of this guide on any other web
site or as a part of any public display is strictly prohibited, and a violation
of copyright.
-
The Elder Scrolls IV: Oblivion
Misc. Quest Guide for the PC
Version .80 May 27, 2006
Written by: WhoGuru
Copyright 2006 Karen Hoyt
INTRO: This guide will cover all the misc. side quests throughout Cyrodiil, or
at least all the ones I've come across. I'll add to it as I find them. If you
find one I've missed, please post here and let me know.
===============================================================================
TABLE OF CONTENTS
-------------------------------------------------------------------------------
1: Hints, Tips and General Info
2.3 Order of the Virtuous Blood
3.3 Through a Nightmare, Darkly
6.4 Not a Quest, of interest to dungeon divers
Knights of the White Stallion
The Rosethorn Cache
===============================================================================
1: HINTS, TIPS and GENERAL INFO
-------------------------------------------------------------------------------
SAVE, SAVE OFTEN, and SAVE SAVES. Always keep a save from before you take a quest.
Many are the tales of woe I've been told by those who will not listen. But
seriously, you never know when your game may hiccup and leave you up a creek.
I suggest keeping a standard save at the beginning of the quest and using the
Quicksave feature during if you are a compulsive saver, like me.
If you're not sure you're in the right place or doing the right thing, check
your journal. If you need a direction, make sure the quest you're working on
is your active quest. This usually provides a map marker.
Talk to everyone, you never know who will give you a hint or a new quest.
##Most rewards are leveled. So, the higher your level the more gold you will
receive and the more powerful enchanted items will be.
##ALWAYS FOLLOW YOUR JOURNAL. If it tells you to speak to someone, speak to
that person. If it tells you to go somewhere, go there. Skipping actions
specified in your journal can preclude certain things from happening and quest
items and events from appearing. The only exception to this is the
"Imperial Corruption" quest which is bugged, see the quest entry for details.
Your map markers are your best friends. Always make sure the quest you're
working on is your active quest and you'll generally have a map marker to lead
you on your merry way. Repeated because people often forget this. =)
Keep your armor and weapons in good repair. They will not do as much damage or
offer as much protection if they're in need of fixing.
===============================================================================
-------------------------------------------------------------------------------
REWARD: None, except the knowledge you have done a good deed.
At 8pm in the Market District by the entrance to Green Emporer Way, look for
an Orc named Luronk gro-Glurzog. He may also be found wandering the Market
during the day, this was simply when I came across him. Talk to Luronk. Seems
there's a corrupt Imperial watchman in the city shaking down the local shop
owners. While Luronk and his wife were in Jensine's, the watchman accused him
of theft and took all his money. The Orc doesn't have his name but Jensine
might. Head over to Good As New Merchandise and see what she has to say.
Jensine is less than happy to tell you about this. She believes in keeping her
head down, avoiding trouble. Butter her up enough and you'll get the guard's
name, Audens Avidius, the Watch Captain for the Market. He extorts money
from all the shopkeepers in return for 'allowing' them to do business.
Head back outside and find one of the guards. Ask about Corrupt Imperial
Watchmen. He wont help you but he will tell you to see Heironymus Lex. Now,
VERY IMPORTANT, you'll see Audens Avidius in the Market, I wouldn't ask him
about Imperial Corruption. He tells you you're stupid, decides you've just
'attacked' him and promptly arrests you. Avoid him and follow your map marker
to Heironymus Lex. He's usually hanging out in the waterfront indulging his
obsession with the Gray Fox.
Lex doesn't have time for you, he's too busy tracking his arch nemesis, the
Gray Fox. He suggests you try another Guard Captain, Itius Hayn. Follow your
map marker again.
Captain Hayn is willing to arrest Audens Avidius, but only if you can find two
witnesses willing to testify against him. Head back to Jensine's in the Market
District. She's unwilling to testify. She doesn't want to cause trouble and
can't be persuaded. On to your next witness.
Luronk lives in the Temple District. You'll find him at home in the mornings.
He will agree to testify, once you raise his disposition enough. If you were
lucky, you found a redguard named Ruslan with Luronk. He's your second
witness. If he wasn't there, never fear, his house is right around the corner
from Luronk's. Ruslan will also agree if he likes you enough.
Your journal will now update, telling you to keep an eye on the witnesses thru
the night to make sure they reach Itius Hayn in the morning. Ignore it. Your
journal is wrong. You'll notice that, though it tells you to watch them, you
have a map marker in a different district. The marker is for Captain Hayn.
Follow this.
To get the completion, follow Captain Hayn when he leaves the guard tower
around 9am. Sometime around 11am, the map marker for him will disappear. Talk
to him and he'll tell you he got the testimony from the witnesses, even though
he never saw them. He'll now lead you to the Market District where you'll get
to watch him arrest Audens Avidius. Don't lose him after the map marker
vanishes, don't fast travel to the Market thinking to beat him there, you wont
see him if you do. Be patient and follow him.
Shortly after you witness the arrest, your journal will update and the quest
will complete.
There is no reward for this quest. There is a surprise. Sometime in the two
weeks following the arrest, you'll receive a surprise visit from one of the
interested parties, wherever you happen to be: In a city, in a dungeon,
dueling daedra in Oblivion. Enjoy.
-------------------------------------------------------------------------------
REWARD: Weatherward Circlet - Resist Fire 15%, Resist Frost 15%
Constant Effect
200 gold
Some of the shop owners in the Market District want you to go see Jensine at
Good as New Merchandise. They're having a problem with a fellow merchant.
Jensine wants you to investigate a new shop, The Copius Coinpurse. The owner,
Thoronir, is undercutting the other shops and Jensine is convinced his goods
are stolen.
Head over to the Copius Coinpurse and ask about his inventory. He'll refuse
to tell you where it comes from, citing mysterious sources. Now for a little
private eye work.
Find yourself a comfy spot outside his shop. At 8pm, Thoronir will close down
for the day and head over to the Merchant's Inn for an evening drink. Nothing
to do here but watch him knock back a few tasty ales after a hard day's
standing around. He'll be here until 11pm.
When he leaves the Inn, follow him to the garden behind his shop where he meets
up with an unsavory fellow named Agarmir. Go ahead and sneak right up to them.
Their conversation wont activate until you're close enough. I know, I stood
behind the well all night thinking I was being sneaky and nothing happened. =)
You'll overhear Thoronir wanting to know when the next shipment will arrive.
Agarmir is his supplier and very secretive about where he's getting his goods
from. He tells Thoronir he has another shipment coming in tomorrow.
Your new mark is Agarmir. When they're done talking, follow Agarmir back to
his home in the Talos Plaza District. Now get comfy. You need to get into his
house but you can't do that when he's home. He should leave the house around
4pm. Make sure the guards aren't looking when you pick the lock.
Inside, head for the basement. Here you'll find evidence that the merchandise
he sells Thoronir is looted from the graves of the dead. On a table at the
back is a book titled "Macabre Manifest". Take this and confront Thoronir with
it. Be sure to give it a read before you hand it over, the second to last
entry is an easter egg of sorts. Any good with anagrams?
Thoronir is shocked, in disbelief that all his goods were robbed from the dead.
Once you show him the manifest, he's willing to help you catch Agarmir in the
act and tells you where to find him.
Head over to Green Emporer Way. In the graveyard, Agarmir and a friend are
in the act of robbing yet another grave. Enter the Trentius Family Mausoleum.
Agarmir has been waiting for you. Kill them at your leisure as the penalty for
grave robbing is death. When you're done, BE SURE to pick up Agarmir's shovel
before you leave. Once you leave the mausoleum, you wont be able to get back
in, so don't leave without the shovel.
Once you show Thoronir the shovel, he is crushed. He vows to turn all his
profits over to the temple and to join the merchants society, having buried the
hatchett with Jensine while you were gone. He will reward you with the
Weatherward Circlet. Head over to Jensine's and she too will reward you a
a small sum of gold for your help.
--------------------------------------------------------------------------------
2.3 ORDER OF THE VIRTUOUS BLOOD
REWARD: Ring of Sunfire - Resist disease 15%
Reflect Spell 11%
Go to the Temple District and wander around at various times until you find a
Dunmer woman named Ralsa Norvalo. She should initiate conversation with you.
Her husband has sent her to look for you and wants you to meet him at the home
of a man named Seridur. Seridur's house is here in the Temple District, just
follow your map marker or find it on the map.
Seridur will greet you as you enter and have you follow him to the basement.
He reveals that he and Ralsa's husband are members of a secret society, the
Order of the Virtuous Blood, dedicated to ridding Tamriel of Vampires. But,
they're old and no longer able to fight vampires. They need you to track down
a vampire they've discovered operating in the city, Roland Jenseric. Seridur
himself says he saw Roland murder an innocent woman and then escaped. Your job
is to hunt him down and kill him.
Head over to Roland Jenseric's house. It's on the other side of the garden
from Seridur's house. Time for a little breaking and entering to hunt for
clues. As you enter his home, you'll see a dinner table. On the table is a
book, on top of the book is a letter from Roland's lover, the woman who was
killed. It's kind of hard to see. Read it and you'll find they were planning
on going out to his cabin. You should have a new map marker now. His cabin
is due East of the sewers where you exited at the beginning of the game.
Make your way to the cabin during the day and confront Roland. He pleads with
you not to kill him and tells you you're after the wrong guy. It was he who saw
his lover murdered, by Seridur in the garden that night. Seridur allowed him
to escape so he could cast the blame away from himself, hiding the fact that he
is the true vampire.
Roland doesn't know where to find him, but tells you to visit the First Edition
bookshop in the Market District. The owner might know more about Seridur's
whereabouts. Now, you can kill Roland if you want, however, you'll be missing
out on a steady source of gold later.
At the First Edition, the owner, Phintias, has some information about Seridur
he'll share if he likes you enough. It seems Seridur makes regular trips to a
place called Memorial Cave, to supposedly pay his respects to an ancestor.
Phintias will give you a map marker if you ask him. The cave is SW of the city
on the shore, just across the lake. Go prepared to heal and a detect life spell
can save you some headaches in there.
Memorial Cave is a vampire den. There are nine or ten of them in here,
including Seridur. He's at the very back of the cave system. Make sure to grab
the Vampire dust from each one you kill. It will come in handy later, if you
left Roland alive. You can easily tackle the vampires one at a time as they're
spread out. Take your time and be sure to check your status menu when you
leave to see if you've been infected with Porphyrric Hemophilia. If so, just go
to a chapel and get a blessing from an altar to remove it.
Return to Roland at the cabin and tell him of your success. He's relieved to
know Seridur wont be coming for him in the night and asks you to meet him at
Seridur's house later. Head on over and you'll find Roland in the cellar with
the other members of the Order.
In gratitude for killing Seridur, they make you a member of the order and will
pay you 250 gold for every vampire dust you turn in. They also reward you with
the Ring of Sunfire to help you in your fight against the undead.
--------------------------------------------------------------------------------
REWARD: Blackwater Blade - Absorb Fatigue 20 pts. for 5 sec. on strike
Gold - leveled reward (the higher your level, the more gold you make)
The Bloated Float is located on the Imperial City Waterfront. Don't confuse it
with the Pirate ship also moored there. If you step on the pirate's deck, they
will attack you. The Bloated Float is on the other side. Talk to Ormil, the
owner, get a bed and sleep for atleast twelve hours. When you wake, you'll find
the boat has mysteriously put out to sea with you aboard.
Open the door to your room and you'll find a brigand, Lynch, standing guard in
the hall. He's a little surprised to see you there. They've hijacked the
Bloated Float. The bouncer has been locked in the storage room down the hall.
After you've dealt with Lynch, take his orders and the key from his corpse.
Head down the hall and free the bouncer, an Orc named Graman gro-Marad. Graman
tells you the Blackwater Brigands stormed the boat, taking him and the owner,
Ormil, hostage. He needs you to clear a path to the helm for him so he can
steer the ship home. There seem to be four brigands.
On the Tavern deck, you'll find Minx. After dealing with her, take the key from
her corpse and head to the top deck, the door above the bar. Wrath awaits you,
wanting to know if his cohorts have found something called the Golden Galleon
yet. End his pirating days and remove the key from his body.
Back on the Tavern Deck, let Graman know the coast is clear. He'll head up to
the wheel, but not before refusing to move the ship until Ormil is safe.
The Captain's cabin is the door behind the bar. Use the key you got from Wrath
to get in.
Here you'll find Selene, the Blackwater Brigands leader. You have two choices
here.
A: Tell her to Free Ormil or that you took the key from Lynch and you're the
ship's cook. She'll attack and you can kill her.
B: Tell her you took the key from Wrath and you're here to join the gang.
Use these conversation choices: Three months ago, to find the Golden
Galleon, You mean in Bravil.
Realising you know everything and have killed the rest of her gang, she will
surrender and give you her blade.
Speak to Ormil again and he'll tell you to lock her up. Lead Selene back
to the Inn Deck and the locked room you can't enter. She'll go into the
room, updating your journal.
Speak to Ormil after Selene is dealt with, one way or the other. He'll tell
you he created the myth of the Golden Galleon to give his business a boost. He
never imagined anyone would hijack his ship to find it. He's very grateful and
tells you to go back to your room and rest while they return to port.
Head on back to your room and take another twelve hour nap.
When you wake, go back to the Tavern Deck and talk to Ormil. He thanks you
again for your help and offers you a share of the reward for Selene's capture
or death. The amount of gold is leveled. You'll receive more at a higher
level. The ship is now moored in the Imperial City again.
--------------------------------------------------------------------------------
This quest isn't actually in the game. You'll notice you get a topic update for
this at some point. There is no quest. It doesn't appear to have made it into
the finished version of the game. Just ignore it. Maybe we'll get it in the
next update. ...or not.
--------------------------------------------------------------------------------
REWARD: Jewel of the Rumare - Water Breathing on Self
Fortify Athletics 4 pts.
In the village of Weye, outside the Imperial City, across the bridge from the
Chestnut Handy Stables, talk to a man named Aelwin Merowald. You'll find him in
his house, on your left as you come off the bridge or wandering the street or
his garden.
Don't laugh. He needs the scales from twelve Rumare Slaughterfish for a well
paying alchemist. He's looking to retire after almost losing a leg to the
slaughterfish. You're going to do the legwork for him. Lake Rumare, of course,
is the Lake the Imperial City sits in the middle of.
You're going to be doing a lot of swimming on this one. Lake Rumare is big and
the fish spawn all over the place. Remember to take the scales from each one
as you kill them. That is the point after all.
Each time you kill one, it takes a few seconds for the next to spawn. Just
follow your map markers to the next fish. A decent Life Detection spell or
enchantment makes spotting them in the water ridiculously easy.
##Keep a save from before you took this quest. Some people have had issues with
one of the slaughterfish spawning inside a rock out in the lake, making it
impossible to kill and glitching the quest. If this happens to you, reload and
start again.
When you have all twelve, your journal will update, telling you to return to
Aelwin with the scales. He's very grateful and rewards you with a ring, the
Jewel of the Rumare.
--------------------------------------------------------------------------------
REWARD: Gray Prince's Training - Permanent +3 Blade, Block and Athletics
Go to the Arena and speak with the Gray Prince, Agronak gro-Malog. He needs you
to help him find proof of his noble birthright. His training regimen doesn't
allow him the time to do it himself. His mother died recently and gave him a
key, telling him it would unlock the secret of his birth. He gives this key
to you, wanting to know the truth about his father, Lord Lovidicus.
You'll be travelling to Fort Crowhaven.
The ruin of this Fort is NW of Anvil, located almost directly above the "A" in
Anvil on your map. You should have a map marker.
In Crowhaven, follow the corridors to the very back of the first floor. You'll
find Lord Lovidicus walking the halls of his bedchamber. The key will gain you
entry. Speaking with him is impossible. He's gone mad. You'll have to kill
him. On a table in the alcove to the right of his bed, you'll find his
journal, detailing his love of Agronak's mother and how she became pregnant
with his child. After telling her he was a vampire, she fled with her unborn
son, sealing Lovidicus in his chamber. Lack of blood has driven him mad.
The journal is the evidence you need to bring back to Agronak. After you
return, Agronak bestows his training on you and then has a bit of a breakdown
after reading his Father's journal and discovering he's half vampire.
##NOTE: If you do this quest and later challenge the Gray Prince for the title
of Grand Champion of the Arena, he will accept but he WILL NOT FIGHT. The
knowledge of his birth has broken him and he only wants to die now, believing
himself to be the spawn of evil.
You'll have to murder him, as he'll just stand there and take whatever you
throw at him. You wont get a bounty, but you will get a murder added to your
statistics. Some people use this to enter the Dark Brotherhood. It's a great
way to rack up a murder without a bounty.
--------------------------------------------------------------------------------
2.8 BUYING A HOUSE IN THE IMPERIAL CITY
Go to the Office of Imperial Commerce in the Market District. Talk to Vinicia
Melissaeia. She'll offer you a shack on the waterfront for 2,000 gold. It's
small but very handy and relatively inexpensive when you're low on cash and
need a place to safely stash your goodies.
Go visit your new house. When you enter, your journal will update telling you
to go to Three Brother's Trade Goods in the Market to furnish your house.
Talk to Sergius Verus. He has all your furnishings.
Total cost of all Furnishings: 3,630 gold
##Average price based on a disposition of 64 with no haggling. You can of
course get the prices to go lower.
--------------------------------------------------------------------------------
REWARD: 1,000 Gold
In Weye, across the bridge from the stables, go to Wawnet Inn and speak with
Nerussa. She is a collector of rare wines and is looking for six bottles of
Shadowbanish Wine. It was created by an Alchemist for soldiers and only in a
very small quantity. The Wine can usually be found in the ruins of old Forts.
LOCATIONS:
Fort Carmala: Due South of Chorrol's North Country Stables. 2 bottles in a
chest next to the Vampire Matriarch.
Fort Magia: East of the Imperial City Arboretum, across Lake Rumare. 2 bottles
in a chest in the Fort Magia Garrison Blocks.
Fort Irony: SE of Bravil, directly across from the Mouth of the Panther River.
2 bottles in a chest on the first floor.
Fort Grief: East of Bravil, across Niben Bay. 2 bottles in a chest within the
outer wall of the Fort. ##You'll need to do the "Caught in the Hunt" quest in
Bravil to gain entry to this Fort.
Take your spoils back to Nerussa and she'll reward you with a 1,000 gold. She
also offers to pay you for any additional bottles you come across in your
travels at 100 gold each.
================================================================================
--------------------------------------------------------------------------------
REWARD: Grantham's Treasure map - random, leveled loot.
In Bravil, ask the locals about Rumors. They'll mention a ghost near Bravil and
refer you to Gilgonderin at Silver Home on the Water for more information about
the Forlorn Watchman.
Gilgonderin tells you the Watchman's ghost appears every night at 8pm on the
shore of Niben Bay at Bawnwatch Camp. he'll even give you a map marker for it.
Make your way to the camp, just outside and SE of the city, on the shore of the
bay. I suggest being there on time, at 8pm. You need time to complete this
portion of the quest before the ghost disappears at dawn.
When the Watchman arrives, keep your distance and sneak. If he's aware of your
presence, he'll just stand there and stare out at the lake all night. After a
minute or so, he'll begin walking south along the coast. Follow him discreetly.
When he stops, at a point across from where the Panther River empties into Niben
Bay, then approach and speak to him. He names himself Grantham Blakeley and
asks you to look for him in the Mouth of the Panther. He'll tell you of a
mutiny aboard his ship and that he needs you to release him. This is all he has
to say at this point.
Return to Gilgonderin and ask him about the apparition. He'll tell you the
Mouth of the Panther is an old nautical term for where the Panther River meets
Niben Bay and give you a map marker.
Make your way there to discover the wreck of an aged ship, beached on the rocks.
The Emma May. The entrance is a hole in the hull of the ship on the landward
side. You'll find ghosts and wraiths in here. Come prepared with magic, silver
or enchanted weapons.
In the Cabin across from you as you enter, you'll find a log book detailing
the mutiny aboard ship and the subsequent jailing of two of the officers below
decks. Make your way to the lowest deck. You'll run into the wraith of Gable,
the traitor who began the mutiny. Kill him and take the key from his body.
Use it to open the locked door and release the skeleton inside. Grantham's
ghost will appear and thank you for freeing his spirit. As payment, you're
given a map to Grantham's treasure chest and a map marker for Black Dog Camp.
The map is on the floor behind the skeleton.
Black Dog Camp is NE of the Mouth of the Panther. Grantham's chest is in the
water just off the pier. Hopefully, you find better loot than I did.
--------------------------------------------------------------------------------
REWARD: A copy of the Wolf Queen - reading this raises your speechcraft.
Either wander the town or find the home of Ursanne Loche. Her husband, Aleron,
is missing. Aleron has a gambling problem and owes about 500 septims to a
userer, Kurdan gro-Dragol. Kurdan sent for Aleron yesterday at the Lonely
Suitor Lodge. He hasn't been seen since.
In the Lonely Suitor Lodge, you'll find Kurdan on the second floor, get his
disposition above 80 and he'll talk to you. Kurdan knows where Aleron is but
wont tell you unless you retrieve a family heirloom for him, a battleaxe that
belonged to his father. It was lost on Fort Grief Island. Speak to him again
when you're ready to go looking for it. He has a boat waiting at the dock
behind the magic shop. You'll see it as you cross the bridge.
Click on the boat and it will take you across the bay to Fort Grief. At the
Fort, the switch to open the main gate is too the right of the gate. Inside,
you'll find Aleron. Like you, Dragol tricked him into coming to the fort.
There never was an axe to find.
Kurdan doesn't just make money as a userer, he supplies victims for hunters who
prefer human prey. The main gate has closed behind you. The only way out of
Fort Grief now is to beat the Hunters at their own game. Kill them and take
the keys from their bodies. Aleron, not being a warrior, will wait for you
outside.
Enter the Hunter's Run. You'll find the first Hunter just inside the door.
Kill him and take his key. Follow the passage to a bridge over a flooded
chamber. Watch out, three spiked barrels will drop down to try and knock you
off into the water. If you fall, just follow the underwater passage back out.
This fort is a maze of dart traps, tripwires and gas vents. Watch your step.
The second hunter can be found at the very back of this floor. Once you've
killed him and taken his key, enter the Hunter's Abyss. You'll find the final
hunter in the large chamber. Get his key and your journal will update. Return
to Aleron.
As you come out, you'll see Kurdan murder Aleron, while you're unable to stop
him. Kurdan laughs at you. The key you found is a fake and he has no plans
of letting you leave and ruin his operation. After you've dealt with him, and
the Khajiit archer he brought with him, take the real gate key from his corpse.
Go back inside the fort and turn the switch in the room to the left as you
entered, opening the gate. Time to give Ursanne the bad news.
Ursanne thanks you for trying to save her husband and gifts you with a copy of
the Wolf Queen. Reading this will raise your speechcraft a point.
--------------------------------------------------------------------------------
3.3 THROUGH A NIGHTMARE, DARKLY
REWARD: Scroll of Commanding Touch - Command creature to level 3/30sec.on touch
To get this quest, go to the Bravil Mages Guild and speak to the Argonian woman,
Kud-Ei, about her freind Henentier. He's a fellow mage who, against guild rules
has been experimenting in his own home without supervision. Henentier has been
trapped somewhere. Speak to Kud-Ei again and she'll lead you to his house, just
down the street. He's asleep upstairs, trapped in a dreamworld of his own
making.
He has created a dreamworld amulet, used to enter one's own mind and experience
dreams. He has somehow become trapped and you must go into his dream and rescue
him. When you're ready, speak to Kud-Ei again and she'll give you the amulet
and your instructions. Put on the amulet and go to sleep in the bed next to
Henentiers.
When you arrive in the dreamworld, you arrive naked and unable to use any of
your magic. Your inventory is empty except for the amulet. Don't panic. It is
just a dream after all.
Henentier is beside you and wholly confused about what's going on. Pieces of
his mind seem to have gone missing. There are four and you will need to collect
them. You'll find four doors or portals in his little dream house, each leading
to a different test. If at any point you need healing, there are various foods
scattered throughout the house and a cabinet on the lower floor labeled "Heal
Yourself" with four or five heal potions inside. Use them sparingly, it's all
you get. On to the tests.
TEST OF PATIENCE: There are three pressure switch mazes in here. Step wrong
and die. As you enter, you'll see an Ayleid cask. Inside is a scroll, take
this, it's your map, showing you the safe paths through each maze.
Look carefully and you'll see a path of similar symbols on each map. This is
your safe path. Check it often and you'll reach the other side safely.
Once through, you'll find the Element of Patience. Take it and you'll be
returned to Henentier's room. Next.
TEST OF PERCEPTION: In here is a path of traps. Watch your step. On the first
path which begins to your right, run to avoid the rockfalls and reach the
swinging blades. Jump carefully to land on the stone ring under the blades
without falling through. Avoid the blades and make another quick dash across
the second area, dotted with gas vents.
Always watch your feet for pressure plates. Stepping on these will trigger a
rockfall that will kill you.
On the third path, carefully avoid the blades dropping from the cieling. At the
end you'll find the Element of Perception. Take it and again be returned to
Henentier's room.
TEST OF COURAGE: As you enter, there's an Ayleid cask on your right. Take the
weak potion of the sea inside. You'll need it. Time for a swim. Follow the
twisting tunnel. You'll find a second cask with another weak potion of the sea
inside. Take that and continue on. You'll come to a door. Go through and
you'll find the Element of Courage.
TEST OF RESOLVE: In the Ayleid cask in front of you is a set of heavy armor,
light armor, a sword, warhammer and a staff. Take whatever you're most
comfortable with, equip yourself and head into the Arena. You'll find two or
three dreamworld minotaurs, depending on your level.
Defeat them and a set of stairs will raise up allowing you to reach the Element
of Resolve.
Return to Henentier and give all four elements to him. He will remember where
he is and return you both to the real world. He is very grateful for your
rescue and rewards you with the Scroll of Commanding Touch. Yay.
--------------------------------------------------------------------------------
Go to the Castle and talk to the Count. If he likes you enough, he'll offer you
a house. Actually it's a shack but we're not picky. The cost is 4,000 gold.
Hand over your hard earned wealth and you have purchased your own rickety
little castle. Head over to your new palatial residence and get a journal
update letting you know where to go to get your furnishings.
Head over to the Fair Deal and talk to Nilawen to buy your furnishings.
Total cost of all Furnishings: 6,528 gold
##Average price based on a disposition of 67 with no haggling. You can of
course get the prices to go lower.
================================================================================
--------------------------------------------------------------------------------
REWARD: Redwave - Drain Health 15 pts for 6 sec. on strike
Go to the Anvil docks. Aboard the Serpent's wake, speak to a high elf named
Varulae. The ship was bringing her a crystal ball. Shortly after arriving at
port, the crew was mysteriously murdered. Their ghosts now haunt the ship.
Varulae was unable to retrieve the crystal ball herself. She needs you to
retrieve it for her. The crystal ball is located in the ship's hold. Take the
key she gives you and head on in.
Inside, the door across from you is the Captain's cabin. Grab the keys from his
corpse and deal with his ghost if you wish. Head back out to the entry hall
and take the hatch to the mid deck. Two more ghosts wait for you here. Deal
with them and head for the cargo hatch on your right.
In the hold, the last two ghosts are floating around waiting for you to send
them on their way. Do so and grab Varulae's crystal ball from the chest. Head
back out and return it to her.
She's ecstatic to finally have it and rewards you with the Captain's enchanted
cutlass.
--------------------------------------------------------------------------------
REWARD: A leveled amount of Gold.
To start this quest, ask anyone in Anvil about rumors and they'll tell you about
am all female gang of thieves preying on the men of Anvil. Ask about the gang
and you'll be told to speak to Maelona and Gogan, who is a recent victim. You
should have a map marker for them now. Head over to their house.
Talk to Maelona. She'll ask you to help get her husband out of hot water. The
all female gang lure men out to a remote location and rob them. She offers her
savings, 100 gold, to find and get back the family heirloom wedding ring her
husband lost during his little misadventure. The Flowing Bowl seems to be the
best place to make contact with these women.
After talking to Gogan, you'll find two of the gangs members are a Nord and an
Imperial. The women lure men out to their farmhouse, convince them to strip and
while they're helpless, rob them blind.
Head over to the waterfront and the Flowing Bowl.
There are two possible conversations here, depending on your sex.
MALE: Signy Home-Wrecker will approach you and entice you into coming out to
their farmhouse for "A night of fun you wont soon forget."
FEMALE: Faustina Cartia approaches you and offers you a job in the gang. With
your pretty face, you could make good money luring fools in.
Either way, you'll be asked to meet them at the farmhouse at 11pm. You should
have a map marker now. Gweden Farm is SE of Anvil. It's a short hike.
Wait until 11pm and then enter the farmhouse. Again, your sex determines the
conversation to a degree.
MALE: Faustina will try to entice you to remove your clothes, armor and weapons
when you refuse, the girls get feisty.
FEMALE: Faustina tries to convince you to join the scheme. When you tell her
no, she calls the rest of the gang down on you.
Once they're dead, Gogan and Maelona arrive, suprisingly dressed as guards.
The ring they sent you after is a fake. They needed a stranger, one the gang
wouldn't recognize as a guard, to infiltrate them and give them the opportunity
to take them all down at once. Congratulations on your short career as a patsy.
Maelona rewards you in gold.
#If you go into the cellar, you'll find the stolen belongings of the victims.
Other than a good chuckle, taking them is pointless. You can't return them.
--------------------------------------------------------------------------------
REWARD: Your House in Anvil
Find and speak with Velwyn Benirus. He's usually in the castle or at The
Count's Arms Tavern. He'll offer to sell you his grandfather's house, Benirus
Manor, for 5,000 gold. Take him up on the offer and head over to your new
home.
The place is a bit run down but it's furnished. Okay, the furnishings look like
the homeless special. In the cellar you'll find a Sealed Portal. Ignore it for
now. Head up to your bedroom and take a nap. When you wake, you'll find a few
ghosts have invaded the house. Deal with them carefully as you may find two
and three of them at a time waiting to ambush you. Head downstairs where you
heard a crash, the main floor, not the cellar. In front of one of the cupboards
on the floor, you'll see a broken vase. Next to it is a skeletal hand and
Velwyn's Grandfather's journal. Pick up both of these as you'll have need of
them. Seems Lorgren Benirus was a very bad boy, dabbling in necromancy in the
hope of discovering immortality and a means to wipe out his fellow citizens.
The Mages Guild put a stop to him, permanently, but his body was never found.
The journal tells you you'll need a true-blooded Benirus to open the sealed
portal. Time to find Velwyn and have a little chat about lemons.
Outside, ask one of the townspeople about Velwyn. He's skipped town for the
Imperial City, just after selling you the family home. You can find him at the
King and Queen Tavern in the Elven Gardens District. Make sure to bring the
skeletal hand and the journal with you. Raise Velwyn's disposition a bit and
he'll apologize for tricking you and volunteer to open the door for you. Meet
him back in Anvil at the Counts Arms Tavern. Head back to Anvil and look him
up.
In the Counts Arms, if you have the same trouble I did, the map marker for
Velwyn is there but he is nowhere to be seen. Wait for 24 hours and then look
for him on the first floor. I found him up the stairs 30 feet from where the
marker said he should be. Once you've found him, follow him back to Benirus
Manor.
Inside, the ghosts are in high spirits. Ahem. They've respawned. Though
Velwyn carries a blade, he wont help. Make your way to the sealed portal in the
cellar. Watch your swings, Velwyn follows very close. Once you've cleared out
all the ghosts, Velwyn will open the portal, it takes a minute. After, he
bravely runs away, leaving you to deal with what's inside on your own. You've
found Lorgren's necromancy altar, complete with his corpse lying atop it. Click
on the altar and Lorgren will speak to you. He claims a need to atone for his
past and make peace with the nine. All you have to do is return his hand,
completing his remains and you'll put an end to his madness. Right. Click on
the skeleton.
Lorgren's spirit will rise from the remains, praising your gullibility. Put him
down to end the curse on Benirus Manor.
Return to the Counts Arms and Velwyn is grateful you've cleared the family
name. The Manor is yours. You'll find it was given a major face lift, inside
and out, while you were gone. It's one of the nicer homes and certainly the
most affordable as there are no furnishings for you to buy.
--------------------------------------------------------------------------------
REWARD: Leveled amount of gold.
Speak to Maeva the Buxom at Whitmond Farm. It's just outside the Anvil Main
Gate. Her husband, Bjalfi the Contemptible, has stolen her family heirloom and
run off to join a band of marauders living at Fort Strand. Maeva wants you to
recover it, the Rockshatter Mace, and return it to her. Fort Strand is just
East of the Anvil Castle Main Gate. You should have a map marker.
Inside Fort Strand, you'll have to deal with several marauders on your way to
Bjalfi. The least complicated way to reach him: When you enter, turn right at
the T junction. Follow these corridors until you find a door the Fort Strand
Great Dome. Enter the Dome and you should find Bjalfi in the first large
chamber.
Kill him and take the mace.
##If you kill him and find two maces, RE-LOAD YOUR LAST SAVE. Maeva wont accept
the mace if you found two. Even if you only pick one of them up, you still wont
be able to complete the quest.
Return to Maeva at Whitmond Farm and give her the Mace. Though she's sorry her
husband had to die, she rewards you with her dowry.
================================================================================
--------------------------------------------------------------------------------
REWARD: Phylactery of Litheness - Fortify Speed 7 pts. on self
To start this quest, ask one of the townsfolk about Raynil Draylas. He blew
into town claiming to be a vampire hunter and slew Bradon Lirrian as a vampire.
As something smells fishy about this, head to Bradon Lirrian's home to
investigate the crime scene.
In Bradon's house you'll find several guards, Bradon's body and his wife. Speak
to Carius Runellius as he seems to be the one in charge. He'll tell you the
events leading up to Bradon's death: How they found the corpses of two beggars
outside town with puncture wounds in their necks, Raynil showing up to save the
day. He tracked down and killed Bradon, alone, later telling the guards Bradon
was their vampire.
Speak with Erline, Bradon's wife. She's very upset and doesn't believe her
husband was a vampire. She needs you to find Raynil and prove he was lying and
murdered her husband.
Best place to start looking is Olav's Tap and Tack. Speak to Olav. Make sure
his disposition is atleast 80 or he'll tell you nothing. Olav doesn't believe
Bradon was a vampire either. Now that you're there, he hopes you can find the
truth. He gives you the key to Raynil's room, last door at the end of the hall.
As Raynil is nowhere to be seen, search the room. Behind the drawers as you
came in, you'll find a book called "Gelebourne's Journal". Take this and talk
to Olav again. Raynil mentioned Gelebourne as being the last vampire he killed,
over in Skingrad. Head back to Bradon's house and tell Carius what you've found
out. When he sees the journal, he's shocked and rouses the city guard to search
for Raynil. You're to meet him in Olav's in one hour.
Back at Olav's, Carius tells you Raynil was seen leaving Bruma, headed west
toward Boreal Stone Cave. You must get there before he flees for good. Deal
with him in whatever manner you see fit. Follow your map marker to the cave.
When you enter, Raynil will see you even if you're sneaking. What's a bad guy
without a final monologue after all? He refuses to surrender, forcing you to
kill him. Take the keys from his corpse and use them to open the water-logged
chest at the back of the chamber. Inside, you'll find a seemingly ordinary
ring. Bring it back to Erline and see what she wants to do with it.
Erline comes clean. She knew Raynil and Gelebourne years ago as friends of her
husband. The ring was a treasure they found. Bradon had a strong enchantment
put on it to hide it's true nature. Erline speaks the secret word to release
the rings true nature and gifts you with the Phylactery of Litheness. She wants
you to keep it as a token of her thanks.
--------------------------------------------------------------------------------
REWARD: Ring of the Vipereye - Fortify Agility/Resist Magic % - Leveled
If the Countess' Herald has sought you out, you already have this quest. If not
go to the castle and speak to Countess Carvain.
The Countess collects Akaviri Artifacts and is after a particular item, the
Draconian Madstone, an amulet said to protect the wearer from poisons and magic.
It's last known location was the Akaviri Stronghold of Pale Pass. The Countess
provides you with a rough map, a key and a translated diary written by an
Akaviri messenger. Ask her about the Diary and she'll provide you with a map
marker for the first landmark, Dragonclaw Rock.
You're headed due NE of Bruma. There is a vague road, follow this to your first
landmark. Your journal will update when you reach Dragonclaw Rock. Check the
messengers diary for the next landmark. Turn west at the rock and follow the
cave icon in your compass until you find the Serpent's Trail. It's very close.
The Serpent's Trail is an underground passage that will lead you to Pale Pass.
Beware of Ogres, you're going to see alot of them. In the tunnels, you'll find
the skeletal remains of the messenger who penned the diary. Near his hand is
a clay tablet with Akaviri writing. Take this, you'll need it later. Follow
the tunnel through to the entrance to Pale Pass.
Once again, watch out for Ogres. They're all over the place here. Follow the
trail to the fort. It leads you right to the front door.
At the fort, enter the Mouth of the Serpent. The ruins are infested with Dead
Akaviri Soldiers. You need to locate the Commander of the Fort who should have
the Draconian Madstone.
Head straight back to the Fangs of the Serpent. This is a maze of dart traps.
You can dodge through them or take your time and find the safe path. Make your
way to the bridge and pull the lever to the left of it, dropping it so you can
cross. On the other side, enter the Venom of the Serpent.
In here, you'll find the Akaviri Commander. Don't kill him, talk to him.
Remember the tablet you took off the Messengers corpse? Give this to the
Commander. It contains the orders the dead soldiers have been waiting all this
time to receive. He thanks you for finally laying their spirits to rest and
opens a door as he leaves. The Madstone is on a pedestal in this room. Pick
it up and return to the Countess.
On your way out, you'll only have to worry about traps. Giving the orders to
the Commander has laid all the soldiers to rest.
The countess is excited to finally have the prize of her collection and rewards
you with the Ring of the Vipereye.
--------------------------------------------------------------------------------
REWARD: Jorundr's Loot - 2 Skill Books and various leveled loot.
Ask one of the townspeople about Jorundr. He's a thief who stole his wife's
life savings, stashed it somewhere and was about to leave town when the guards
arrested him for murder. Go talk to his wife, Arnora. You'll need to raise her
disposition before she'll talk to you.
She and Jorundr are thieves. After robbing a tax shipment, where Jorundr killed
a guard, he was caught, but not before moving the loot where Arnora couldn't
find it. She needs you to find the location from Jorundr. Head over to the
castle dungeon.
The guard will let you in where Jorundr wont talk, convinced you're working for
a corrupt guard. If you want to find the location, you're going to have to get
yourself thrown in jail. I nicked the inkwell off the guard's desk and went to
jail.
Once inside, Jorundr is much more friendly. Ask him about the stolen gold and
he'll give you a much different story than Arnora. Robbing the shipment was her
idea. She killed the guard and, when they were onto them, turned in Jorundr
to save herself. Not before Jourundr was able to hide the gold however.
Jorundr wants Arnora dead. As proof, you're to bring him the amulet she always
wears. You can handle this two ways:
1: Tell Arnora Jorundr's plan. She'll give you a key to the chest containing
her true amulet to convince Jorundr she's dead. The amulet she actually wears
is a fake.
2: Kill Arnora. Loot the keys from her body, take the amulet she's wearing and
the true amulet in the chest by her bed to Jorundr.
Either way he will tell you the location of the treasure once he believes she's
gone. The treasure is just outside the city walls, by the North Gate, in a
chest marked "Jorundr's Loot".
#If you killed Arnora yourself, simply go take the loot.
#If you left her alive, you'll find a corrupt guard, Tyrellius Logellus, is
already there waiting for you. He heard Jorundr telling you the location and
wants the gold for himself. He says he's already dealt with Arnora and you're
the last loose end to deal with. Kill him and take the loot for yourself.
Return to Arnora's cabin to see that she is truly dead and the quest will
complete in your journal.
--------------------------------------------------------------------------------
At the Castle, speak to the Countess. She has a quaint little house just off
the Main Gate she's willing to sell for the paltry sum of 10,000 gold. Now that
you've parted with all those shiny coins, go visit your new home where your
journal will tell you to part with even more.
You'll find everything you need at Novaroma, talk to Suurootan.
Total cost of all Furnishings: 16,857 gold
##Average price based on a disposition of 70 with no haggling. You can of
course get the prices to go lower.
================================================================================
--------------------------------------------------------------------------------
REWARD: Apron of Adroitness - Fortify Agility and Intelligence
Strength leveled to match you.
Ask a townsperson about rumors and you'll be told about Tivaela. Her husband,
Rythe Lythandas, is a famous painter and he's missing.
Head over to Tivaela's house. Her husband had been in his studio all day. When
she got worried and checked on him, she found him gone with the door locked.
She'll give you the key to his studio and ask you to please find him.
Inside, you'll find the painting Rythe was working on when he vanished. Click
on the painting and you'll be transported into it. Rythe is waiting for you,
happy someone finally showed up to help him. A Bosmer thief broke into his
studio, attacked him and stole his Brush of Truepaint. The thief then escaped
into the painting. Once inside he created trolls to protect him, which turned
on him and killed him. Rythe, not being a fighter, is unable to retrieve the
brush. You need to kill the trolls and get back the brush so Rythe can paint
a door out for you both. He'll give you six bottles of Turpentine to help you
fight the Trolls. Click on the bottle and you'll get one hit with the effect
active on your weapon: Damage Troll +100.
As you set off on your troll hunt, be sure to enjoy the scenery. This is one
of the more beautiful and original realms in Oblivion.
The trolls are tough, as trolls are. The Turpentine makes them easy kills. Be
sure to loot the Painted Troll Fat from them as this is the only place you're
going to find that ingredient.
Once you've dealt with all the trolls, get the Brush of Truepaint from the body
of the Bosmer thief and return to Rythe. Quicksave here just in case. Rythe
will paint a doorway back to the real world. Click on it to leave after your
journal updates.
I had a bit of a glitch with the door. The first time he painted it, the door
didn't actually appear. If this happens to you, just reload and try again.
Once back in the real world, Rythe gratefully rewards you with the Apron of
Adroitness. It fortifies your Agility and Intelligence. The amount that is
fortified depends on your level. At level 9, mine was fortified 9 pts. each.
--------------------------------------------------------------------------------
REWARD: 350 gold
To get this quest, speak to one of the beggars in town and ask about Fines. The
guards of Cheydinhal have been imposing outrageous fines for even the smallest
infractions since they got a new Captain, Ulrich Leland.
The beggars will send you to speak with Llevana Nedaren. She's the most
outspoken against the guards. Llevana's house is on the south side of town.
Llevana's good freind, Aldos Othran, was rendered homeless by Captain Ulrich
after being fined six times for being drunk. She believes that Ulrich's second
in command, Garrus Darelliun, may be sympathetic. He can usually be found in
the castle or the guard barracks.
You can track down Aldos if you want, but he's too drunk to talk. Head over to
the castle.
Garrus believes Ulrich is on the take and would love to take him down. He can't
go before the Count without a witness however. You need to bring him Aldos
Othran, that is if you can sober him up for five minutes. With Aldos'
testimony, the Count will have no choice but to relieve Ulrich. Garrus cautions
you not to speak to Ulrich as he'll surely arrest you on the spot.
You can find Aldos boozing it up at his campsite by the south wall. Aldos is
drunk and mad, never a good combo. He wants you to follow him and leads you
back to his house where he picks a fight with the guard outside the door. There
isn't anything you can do to stop this. The guard kills him when Aldos attacks
him. Return to Llevana and give her the bad news.
Like Aldos, she too flies into a rage and asks you to convince Ulrich to follow
you back to her house so she can deal with him. Instead, go talk to Garrus who
may have a less bloodthirsty way out of this.
Garrus is fed up with Ulrich after the death of Aldos and has a plan to take
him down. With the key he gives you, sneak into Ulrich's quarters in the guard
tower. On top of his dresser, there's a book. Look carefully on top of the
book and you'll see a suspicious letter. Take this and bring it back to Garrus.
After he takes the letter, leave and meet him at the Cheydinhal Bridge Inn in
two hours.
Garrus, the newly appointed Captain of the guard, informs you Ulrich has been
stripped of his rank and thrown in the dungeons where he will spend the next
several years. Garrus rewards you with gold for risking your life and jail
time to take down Ulrich without bloodshed.
--------------------------------------------------------------------------------
Speak Count Andel Indarys at Castle Cheydinhal. He's a bit of a self-important
fop but if he likes you enough, he will gladly sell you a house for meager
price of 15,000 gold. You can find everything you need to fill your new,
small but tidy home at Borba's Goods and Stores.
Total cost of all Furnishings: 23,760 gold
##Average price based on a disposition of 88 with no haggling. You can of
course get the prices to go lower.
--------------------------------------------------------------------------------
6.4 Not really a quest. If you ask Borba gra-Uzgash about Cheydinahll, she
will update your map with three new map markers: Quickwater Cave, Rickety Mine
and the Ayleid ruin of Kemen.
Just for all you treasure hunting dungeon divers out there.
================================================================================
--------------------------------------------------------------------------------
REWARD: Ring of Eidolon's Edge - Fortify Block/Fortify Blade (Leveled)
Find ROsentia Gallenus' house in the center of town. You'll have to pick the
lock to get in as she's locked the door and wont come out. Inside, you'll find
her in the company of four Scamps, consider them daedric versions of the Adoring
Fan.
She bought a daedric staff off a traveling merchant. When she spoke the word
carved into the staff, the Scamps appeared and now, as it seems to be cursed,
she can't drop it, sell it or get rid of it. She needs you to speak to her
friend, Alves Uvenim, at the Mages Guild. ALves may know how to break the
curse.
Head over the the Mages Guild where ALves does indeed have information for you.
It's called the Staff of Everscamp. The only way to be rid of it is for someone
to willingly accept the staff. The only way to fully break the curse is to take
the staff to DarkFathom Cave and drop it by the statue of Sheogorath you'll
find inside. Yes, another amusing moment of madness brought to you by our
favorite mad hatter. Head back to Rosentia's and tell her the good news. She
will gladly hand over the staff. You and your entourage must now make your
way to Darkfathom Cave. Don't worry, the guards will ignore your vertically
challenged companions.
The cave is just East of Leyawiin, across the river. Inside you'll find Scamps.
Lots of Scamps. Make your way to the chamber containing Sheogorath's statue.
Drop the staff near the altar. When you drop it, your journal will update,
telling you the scamps are happy in their new home. Return to Rosentia for
your reward.
Unfortunately, you can't pick the staff back up. That would have been too much
fun.
-
This is a price list for all the books in Oblivion. They are listed by Category.
1: Skill Books - raises a skill.
2: Marker Books - adds one or more map markers
3: Normal Books - Don't teach or add anything but some are great reads.
I used the Wiki Book list to generate this. The Wiki List is complete with prices but you have to click on each individual book one at a time in order to see the prices. A little labor intensive if you're looking for the expensive ones. Again, all this information comes from Wiki, it's just a bit simplified and reorganized to make it easier on collectors.
"Remember that floors are given using the American style; thus "first floor" in the list means "ground floor" if you're British."
===1: Skill Books===
ID# ---------Book Name ------------Skill---------------Price-----------------Location
000243CD The Black Arrow, v 1 Acrobatics 150 Gold
* Torbal the Sufficient's House in Brindle Home, in a chest
* Duke's Quarters in the Shivering Isles, on a bookshelf (mod-specific)
000243CB A Dance in Fire, v1 Acrobatics 75 Gold
* Ganredhel's House in Cheydinhal, on a table upstairs
000243CC A Dance in Fire, v4 Acrobatics 75 Gold
* Kvatch castle, on a table on your right as you enter the second section of the Great Hall (only accessible after The Battle for Castle Kvatch)
000243CE Mystery of Talara, v 1 Acrobatics 25 Gold
* Only found in random loot
* In Shivering Isles it's located on a chest on top of a mountain north of the letter "T" in The Laughing Coast
000243CA Thief Acrobatics 25 Gold
* S'Krivva's House in Bravil, on a second-floor shelf
00073A5F A Treatise on Proper Calcinator Use Alchemy 25 Gold
* Imperial Bridge Inn, under Lithnilian's bed
* May also be found in random loot
000243D2 De Rerum Dirennis Alchemy 25 Gold
* All Things Alchemical in Skingrad, on a second-floor shelf
000243CF A Game at Dinner Alchemy 200 Gold
* Chorrol Mages Guild, on a first-floor bookcase
* Frostcrag Spire after buying the alchemy lab area upgrade (mod-specific)
000243D0 Mannimarco, King of Worms Alchemy 25 Gold
* Arcane University's Mystic Archives, in a first-floor display case (look for a brown book)
000243D1 Ancient Tales of the Dwemer, Part V: The Song of the Alchemists Alchemy 25 Gold
* Arcane University's Lustratorium, in a first-floor bookshelf against the west wall (look for an off-white book)
000243D4 Bravil: Daughter of the Niben Alteration 25 Gold
* Skingrad Mages Guild, in the living quarters, on a bookshelf in the northeast room (look for a little brown book)
000243D5 The Dragon Break Re-Examined Alteration 25 Gold
* Dovyn Aren's House in Elven Gardens District, in the bedroom
000243D8 The Lunar Lorkhan Alteration 25 Gold
* Henantier's Dream World, only available during the quest Through A Nightmare, Darkly
* May also be found in random loot
00073A69 Reality & Other Falsehoods Alteration 25 Gold
* Southern Books in Leyawiin, on a second-floor shelf
000243D6 Sithis Alteration 25 Gold
* Leyawiin Chapel Hall, on a desk in the office
* Deepscorn Hollow after buying the study area upgrade (mod-specific)
000243D9 The Armorer's Challenge Armorer 25 Gold
* For sale in The First Edition, Imperial City Market District
* Can be pickpocketed from Phintias, owner of The First Edition
* Fighters Guild in Cheydinhal, on top of second-floor bookcase to the right of the stairs, you have to jump up to see the book, it is colored like the shelf, on the right side
000243DC Cherim's Heart of Anequina Armorer 25 Gold
* The First Edition, Imperial City Market District, on a desk in the second-floor bedroom
00073A68 Heavy Armor Repair Armorer 25 Gold
* Battlehorn Castle after buying the library area upgrade (mod-specific)
* May also be found in random loot
000243DA Last Scabbard of Akrash Armorer 25 Gold
* A Fighting Chance in Imperial City Market District, in the bedroom
00073A67 Light Armor Repair Armorer 25 Gold
* Bravil Castle Barracks, on a shelf
000243E2 The Argonian Account, Book 1 Athletics 25 Gold
* Only found in random loot
000243E1 Beggar Athletics 25 Gold
* Cloud Ruler Temple, on a shelf in the great hall
000243DF A Dance in Fire, v3 Athletics 75 Gold
* Uuras the Shepherd's house in Skingrad, on a third-floor (attic) bookcase
000243DE The Ransom of Zarek Athletics 25 Gold
* Arena Bloodworks, in a cupboard to Owyn's right
000243E0 The Red Kitchen Reader Athletics 25 Gold
* Anvil Castle Private Quarters, on a desk
000243E4 2920, Morning Star (v1) Blade 100 Gold
* Cheydinhal Castle Private Quarters
* Leyawiin Castle Steward's and Healer's Private Quarters
* Reward for the Fighters Guild quest The Wandering Scholar
* Battlehorn Castle after buying the bedroom area upgrade (mod-specific)
00073A61 Battle of Sancre Tor Blade 25 Gold
* Bravil Castle Great Hall, in a locked display case
* May also be found in random loot
000243E5 Fire and Darkness: The Brotherhoods of Death Blade 25 Gold
* The Hall of Epochs during The Ultimate Heist, in a chest
000243E6 Song Of Hrormir Blade 25 Gold
* Imperial City Arena District, in Branwen and Saliith's chest; Branwen has the key
* Bravil Castle Private Quarters East Wing
000243E3 Words and Philosophy Blade 25 Gold
* Modryn Oreyn's House in Chorrol, on a shelf
000243EA A Dance in Fire, v2 Block 75 Gold
* Guard House in Elven Gardens District, on a ground floor end-table
000243E8 Death Blow of Abernanit Block 25 Gold
* Anvil Fighters Guild Dining Hall, in a chest
000243E9 The Mirror Block 25 Gold
* Leyawiin City Watch Barracks, on a shelf in a downstairs storage room
000243EC The Warp in the West Block 25 Gold
* Cloud Ruler Temple, on a desk in the great hall (only accessible after Dagon Shrine)
* Brother Piner at Weynon Priory has a copy; he will give it to you if you ask him for "Assistance" during Deliver the Amulet in the Main Quest
* May also be found in random loot
000243EB Warrior Block 25 Gold
* Countess Alessia Caro's chamber in Leyawiin Castle, in a cupboard on the right hand side of the room
* Battlehorn Castle after buying the bedroom area upgrade (mod-specific)
000243EE The Importance of Where Blunt 25 Gold
* Bravil Castle Dungeon, on a table
000243F0 King Blunt 25 Gold
* Anvil Castle Royal Quarters, on a shelf
* Battlehorn Castle after buying the bedroom area upgrade (mod-specific)
00073A62 The Legendary Sancre Tor Blunt 25 Gold
* Vilena Donton's house in Chorrol, on the third floor (take the stairs going up to the left, not the locked door to the right)
00073A66 Mace Etiquette Blunt 25 Gold
* Only found in random loot
000243EF Night Falls on Sentinel Blunt 25 Gold
* Goblin Jim's Cave
000243F5 2920, Frostfall (v10) Conjuration 100 Gold
* Anvil Chapel Hall, on a desk
000243F4 2920, Hearth Fire (v9) Conjuration 100 Gold
* Bruma Chapel Hall, on a shelf
000243F2 The Doors of Oblivion Conjuration 25 Gold
* Fort Caractacus, under a desk in Ancotar's "alchemy lab"
* Anvil Mages Guild, on a second-floor bookshelf (near the bottom)
* Cloud Ruler Temple, on a desk in the great hall (only accessible after Blood of the Divines)
00073A60 Liminal Bridges Conjuration 25 Gold
* Arcane University Mystic Archive, in a second-floor display case against the west wall (look for a brown book)
00022B04 Mythic Dawn Commentaries 1 Conjuration 40 Gold
* Acquired during The Path of Dawn in the Main Quest
* Can also be found on many Mythic Dawn agents or in their houses
000243F6 The Warrior's Charge Conjuration 25 Gold
* Only found in random loot
000243FA The Art of War Magic Destruction 25 Gold
* Leafrot Cave (along the Panther River), on a shelf
000243F7 The Horrors of Castle Xyr Destruction 200 Gold
* Bravil Mages Guild, on a third-floor shelf
000243F9 A Hypothetical Treachery Destruction 25 Gold
* Skingrad Castle Lords Manor, on a shelf in the northwest corner of Hassildor's room
000243FB Mystery of Talara, v 3 Destruction 50 Gold
* Only found in random loot
00022B05 Mythic Dawn Commentaries 2 Destruction 60 Gold
* Given to you by Tar-Meena during The Path of Dawn in the Main Quest
* Can also be found on many Mythic Dawn agents or in their houses
000243F8 Response to Bero's Speech Destruction 25 Gold
* Arcane University Mystic Archives, on a first-floor bookshelf against the east wall (look for a blue book)
000243FE Ahzirr Traajijazeri Hand to Hand 25 Gold
* Cheydinhal Dark Brotherhood sanctuary, on a barrel next to M'raaj-Dar's usual chair in the training room
* J'Ghasta's house in Bruma on a table in the back of the secret training room accessible via a trap door located behind the stairs
000243FC Immortal Blood Hand to Hand 25 Gold
* The bandit camp outside Vilverin
* Seridur's house in the Imperial City Temple District, on a basement bookshelf (available by doing the The Order of the Virtuous Blood quest)
* J'Ghasta's house in Bruma
* Deepscorn Hollow after buying the study area upgrade (mod-specific)
00024400 Master Zoaraym's Tale Hand to Hand 25 Gold
* Only found in random loot
00073A6A Way of the Exposed Palm Hand to Hand 25 Gold
* Black Balconies of Fieldhouse in Fieldhouse Cave, on the ground (hiding under a Cairn Bolete)
000243FD The Wolf Queen, v 2 Hand to Hand 50 Gold
* Skingrad Castle, inside the Lord's Manor on a shelf against the south wall of Hassildor's room
00024402 2920, MidYear (v6) Heavy Armor 100 Gold
* Fire and Steel in Chorrol, on a shelf
00024403 Chimarvamidium Heavy Armor 25 Gold
* Imperial City Prison District Barracks, on a second-floor shelf
000A915C Fighters Guild History, 1st Ed. Heavy Armor 75 Gold
* Chorrol Fighters Guild, in a locked first-floor display case
* Arcane University Mystic Archives, in a first-floor display case
* Anvil Fighters Guild, in a third-floor display case
00024401 Hallgerd's Tale Heavy Armor 25 Gold
* Chorrol Fighters Guild, in a chest in the tower
00024405 History of the Fighters Guild Heavy Armor 25 Gold
(Note that this the standard edition of this book; there is also a more expensive first edition, see above)
* Battlehorn Castle after buying the library area upgrade (mod-specific)
* May also be found in random loot
00024404 How Orsinium Passed to Orcs Heavy Armor 25 Gold
* Bruma Castle Lords Manor, on a desk
00024407 The Argonian Account, Book 3 Illusion 25 Gold
* Arcane University Mystic Archives, upstairs, south wall, right bookshelf, above the Novice Alembic
00024408 Incident in Necrom Illusion 25 Gold
* Willow Bank in Cheydinhal, on a second floor chest of drawers
0002440A Mystery of Talara, v 4 Illusion 50 Gold
* Fort Caractacus, under the desk in Ancotar's "alchemy lab"
* May also be found in random loot
00022B06 Mythic Dawn Commentaries 3 Illusion 80 Gold
* Acquired from Gwinas (or Phintias) during The Path of Dawn in the Main Quest
* More copies will be found afterwards, in the Sunken Sewers during The Path of Dawn and in Lake Arrius Caverns during Dagon Shrine
00024409 Palla, volume 1 Illusion 25 Gold
* Arkved's Tower, on a table next to Vaermina's Orb in the final room (available during Vaermina's daedric quest)
00024406 The Wolf Queen, v 3 Illusion 25 Gold
* Bruma Mages Guild, on a desk in the southeast basement room (look for an orange book)
0002440C Ice and Chitin Light Armor 25 Gold
* Ahdarji's house in Leyawiin, in a second-floor chest
0002440D Lord Jornibret's Last Dance Light Armor 25 Gold
* Bleak Flats Cave, on a table
0002440B The Rear Guard Light Armor 25 Gold
* Cheydinhal Dark Brotherhood sanctuary, in a chest in the training room
0002440E The Refugees Light Armor 25 Gold
* The First Edition book store in the Imperial City Market District, on the first bookshelf to the left of the door
* Cloud Ruler Temple, on a desk in the great hall (only accessible after Blood of the Divines)
0002440F Rislav The Righteous Light Armor 25 Gold
* Deepscorn Hollow after buying the study area upgrade (mod-specific)
* May also be found in random loot
00024531 The Black Arrow, v 2 Marksman 150 Gold
* Cheydinhal Dark Brotherhood Living Quarters, in Teinaava's chest
* May also be found in random loot
00024411 A Dance in Fire, v5 Marksman 75 Gold
* Regner's house in Bruma, on a table downstairs
00024530 Father Of The Niben Marksman 25 Gold
* Bravil Castle Lord's Manor North Wing, on a shelf in the room opposite the entrance
00024410 The Gold Ribbon of Merit Marksman 25 Gold
* Cheydinhal Dark Brotherhood sanctuary, in a chest in the training room
* Deepscorn Hollow after buying the study area upgrade (mod-specific)
0002452F Vernaccus and Bourlor Marksman 25 Gold
* For sale at Renoit's Books in Chorrol, in plain sight on a shelf
00024534 2920, Sun's Height (v7) Mercantile 100 Gold
* Black Horse Courier office, Imperial City Market District
00024532 The Buying Game Mercantile 25 Gold
* Fathis Ules' house in the Elven Gardens District
00024535 A Dance in Fire, v6 Mercantile 75 Gold
* Casta Scribonia's house in Chorrol, on an upstairs shelf
00024536 A Dance in Fire, v 7 Mercantile 75 Gold
* Only found in random loot
00024533 The Wolf Queen, v 4 Mercantile 50 Gold
* The Office of Imperial Commerce in the Imperial City Market District
00024538 2920, Sun's Dawn (v2) Mysticism 100 Gold
* Skingrad Chapel Hall, on a desk in a side room (look for a purple book)
00073A63 Before the Ages of Man Mysticism 25 Gold
* Arcane University's Chironasium, on a first floor Altar of Enchanting, against the southwest wall
00024539 The Black Arts On Trial Mysticism 25 Gold
* Mystic Emporium in the Imperial City Market District, on the desk (also for sale)
00024537 The Firsthold Revolt Mysticism 25 Gold
* Cheydinhal Mages Guild, on a basement bookshelf, one above the bottom shelf, next to the crystal ball
00022B07 Mythic Dawn Commentaries 4 Mysticism 100 Gold
* Acquired from Raven Camoran during The Path of Dawn
00073A6B Souls, Black and White Mysticism 40 Gold
* Fort Cuptor Battlemains, on the stone slab next to a bed, slightly under a coffin leaning against the slab
* May also be found in random loot
0002453F 2920, Rain's Hand (v4) Restoration 100 Gold
* Bravil Chapel Hall, on a shelf
0002453E The Exodus Restoration 25 Gold
* Skingrad Chapel Hall, on a bookshelf in the southwest room (look for a brown book)
00024540 Mystery of Talara, v 2 Restoration 50 Gold
* Only found in random loot
0002453D Notes on Racial Phylogeny Restoration 25 Gold
* Chorrol Chapel Hall, in a chest
0002453C Withershins Restoration 200 Gold
* Leyawiin Mages Guild, on a second-floor bookshelf (east room), top shelf (look for a green book)
00073A65 Advances in Lock Picking Security 50 Gold
* For sale at Mach-Na's Books in Cheydinhal
* Can be pickpocketed from Mach-Na
* Fingerbowl Cave, on a necromancer's altar
00024541 The Locked Room Security 25 Gold
* Smuggler's Cave under Anvil Castle, in a chest
00073A64 Proper Lock Design Security 50 Gold
* Dareloth's house in the Waterfront District, on a desk (available once you become Guildmaster of the Thieves Guild)
00024545 Surfeit of Thieves Security 25 Gold
* Only found in random loot
00024542 The Wolf Queen, v 1 Security 50 Gold
* Dro'shanji's house in Bravil, on a second-floor shelf
00024547 2920, Last Seed (v8) Sneak 100 Gold
* City-Swimmer's house in Bravil, on a dresser
00024549 Legend of Krately House Sneak 25 Gold
* Cloud Ruler Temple, on the rightmost bookcase in the east wing, top shelf
0002454A Purloined Shadows Sneak 25 Gold
* Only found in random loot
00024548 Sacred Witness Sneak 25 Gold
* Lake Arrius Caverns Shrine Living Quarters, in a chest (only available after starting the Dagon Shrine quest)
* Deepscorn Hollow after buying the study area upgrade (mod-specific)
* Duke's Quarters in Shivering Isles, on a bookshelf (mod-specific)
00024546 The Wolf Queen, v 6 Sneak 50 Gold
* Cheydinhal Dark Brotherhood sanctuary, on a bookshelf in the main room
0002454D 2920, Second Seed (v5) Speechcraft 100 Gold
* Imperial Palace, on a bookshelf in the Imperial Battlemage's quarters, top shelf (only available during The Ultimate Heist)
0002454B Biography of the Wolf Queen Speechcraft 50 Gold
* Armand Christophe's house in Waterfront District, in a chest
* Reward for completing the Caught in the Hunt quest
0002454C The Wolf Queen, v 5 Speechcraft 50 Gold
* Hastrel Ottus' house in the Imperial City Temple District
0002454E The Wolf Queen, v 7 Speechcraft 50 Gold
* Cheydinhal Castle, in the Lord's Quarters, on the bookshelf to the right
=====2: Marker Books=====
Item ID ------------ Book Name ---------------Markers Added -------Price ---------- Location
000C55DF Agnar's Journal � � � � Fanacas, Kingscrest Cavern, Quickwater Cave 1 Gold
Dive Rock. Note: This does not work in the same way as the other marker books. Merely approaching the lookout point is enough to get the markers. You don't need to read the book or even look at it. (However, the script that adds the marker points IS on the book, though it's not obvious that this is the case.)
0002C8DD Cleansing of the Fane Malada 50 Gold
Found in Mach-na's bookstore in Cheydinhal, The First Edition in Imperial City, or purple book found in the bookshelf on the east wall of the 1st floor of the Mystic Archives.
00022E65 Knightfall Frostfire Glade 25 Gold
The First Edition in Imperial City during the quest Tears of the Savior
00026B1D Modern Heretics Azura's Shrine 30 Gold
Cloud Ruler Temple, or the Mystic Archives in Arcane University
=====3: Normal Books=====
Item ID -- Book -- Name -- Price -- Location
000243D7 2920, First Seed (v3) 10 Gold
Heinrich Oaken-Hull's house in Anvil and the 2nd floor of Southern Books in Leyawiin
000243D3 2920, Sun's Dusk (v11) 10 Gold
Leyawiin Mages Guild Library
000243DB 2920, Evening Star (v12) 10 Gold
Anvil Castle Royal Quarters and Bravil Castle Barracks
xx000ED3 The Adabal-a 30 Gold
Anvil Chapel Hall and Southern Books in Leyawiin
00024543 Aevar Stone-Singer 10 Gold
Herminia Cinna's House, on an upstairs bookshelf
000355ED Amantius Allectus' Diary 100 Gold
Amantius Allectus' house in the Temple District of the Imperial City
00024578 The Amulet of Kings 1 Gold
The First Edition bookstore in the Imperial City Market District
00185934 Ancotar's Journal 0 Gold
Fort Caractacus, on a table located outside of the fort in one of the rooms on the second floor
00024584 Arcana Restored 50 Gold
Southern Books in Leyawiin
00024559 The Argonian Account, Book 2 25 Gold
Renoit's Books in Chorrol
0002455A The Argonian Account, Book 4 25 Gold
Mach-Na's Books in Cheydinhal
0003353B Ayleid Reference Text 10 Gold
Vahtacen, only avaliable during the Mages Guild Quest Vahtacen's Secret, obtained from Skaleel
0002453B Azura and the Box 10 Gold
Mystic Emporium in the Imperial City, Cheydinhal Mages Guild
0001FB53 Beggar Prince 4 Gold
The First Edition bookstore in the Imperial City Market District
000C7B33 Bible of the Deep Ones 90 Gold
Located in the church at Hackdirt, on the altar
00024550 Biography of Barenziah, v 1 1 Gold
The First Edition bookstore in the Imperial City Market District
00024551 Biography of Barenziah, v 2 1 Gold
The First Edition bookstore in the Imperial City Market District
00024552 Biography of Barenziah, v 3 1 Gold
The First Edition bookstore in the Imperial City Market District
0002FF32 A Bloody Journal 0 Gold
Located along side the body of Viranus Donton
00024563 The Book of Daedra 4 Gold
The First Edition bookstore in the Imperial City Market District
0002A577 Brenus Astis' Journal 0 Gold
Fallen Rock Cave
00024554 Brief History of the Empire, v 1 1 Gold
The First Edition bookstore in the Imperial City Market District
00024555 Brief History of the Empire, v 2 1 Gold
The First Edition bookstore in the Imperial City Market District
00024556 Brief History of the Empire, v 3 1 Gold
The First Edition bookstore in the Imperial City Market District
00024557 Brief History of the Empire, v 4 1 Gold
The First Edition bookstore in the Imperial City Market District
00024586 The Brothers of Darkness 35 Gold
J'Ghasta's training room in Bruma and Glarthir's house in Skingrad
xx013DC3 Cap'n Dugal's Journal, Part 1 4 Gold
Captain's Cabin, Dunbarrow Cove (mod-specific)
xx013DC4 Cap'n Dugal's Journal, Part 2 4 Gold
Captain's Cabin, Dunbarrow Cove (mod-specific)
xx013DC5 Cap'n Dugal's Journal, Part 3 4 Gold
Captain's Cabin, Dunbarrow Cove (mod-specific)
xx013DC6 Cap'n Dugal's Journal, Part 4 4 Gold
Captain's Cabin, Dunbarrow Cove (mod-specific)
00024587 Children of the Sky 65 Gold
The Mystic Archives or Arch-Mage's Quarters of Arcane University or Colovian Traders in Skingrad
00024576 A Children's Anuad 2 Gold
The First Edition bookstore in the Imperial City Market District
000280A9 Dar-Ma's Diary 0 Gold
Inn in Hackdirt
00024564 Darkest Darkness 10 Gold
The First Edition bookstore in the Imperial City Market District
000152FC Diary of Springheel Jak 0 Gold
Found in the basement of Jakben, Earl of Imbel.
xx001A76 Drothan's Field Journal 25 Gold
(Mehrunes Razor specific)
xx00148A Drothan's Journal 1 Gold
(Mehrunes Razor specific)
00022B17 Dwemer History and Culture 25 Gold
The First Edition bookstore in the Imperial City Market District
00024565 The Eastern Provinces 5 Gold
The First Edition bookstore in the Imperial City Market District
00024544 Fall of the Snow Prince 10 Gold
Mach-Na's Books in Cheydinhal or the Captain's Cabin in the Marie Elena in the Waterfront District
000243E7 Feyfolken I 10 Gold
Herminia Cinna's House, on an upstairs bookshelf
000243ED Feyfolken II 10 Gold
Vilena Donton's House, on a bookshelf on the first floor. Also in the First Edition bookstore in the Imperial City Market District (basement in an overturned box)
000243F1 Feyfolken III 10 Gold
The Imperial Palace, only available during The Ultimate Heist
0002457B The Firmament 25 Gold
The Chorrol Mages Guild on a first floor bookshelf
00024588 Five Songs of King Wulfharth 100 Gold
The Mystic Archives of the Arcane University
00024596 The Five Tenets 50 Gold
Fort Farragut or the Dark Brotherhood Sanctuary
00024595 Followers of the Gray Fox 3 Gold
Smuggler's Cave, on a box. Also in Dareloth's House in the Imperial City Waterfront, on a shelf (only available after The Ultimate Heist)
00024589 Fragment: On Artaeum 45 Gold
Cloud Ruler Temple East Wing
00024566 Frontier, Conquest 7 Gold
The First Edition bookstore in the Imperial City Market District
xx000D56 Frostcrag Spire Memoirs 25 Gold
Set in the frozen hand of a Frost Atronach located directly in front of the main door to the Frostcrag Spire
00024567 Fundaments of Alchemy 5 Gold
The First Edition bookstore in the Imperial City Market District
00024568 Galerion The Mystic 8 Gold
The First Edition bookstore in the Imperial City Market District
00038447 Gelebourne's Journal 0 Gold
Olav's Tap and Tack in Bruma - found during the quest A Brotherhood Betrayed
0000A2B3 Glories and Laments 45 Gold
Umbacano Manor, Talos Plaza District, Imperial City and Cloud Ruler Temple Great Hall
0002456F Gods and Worship 6 Gold
The First Edition bookstore in the Imperial City Market District
xx0046ac Greywyn's Journal 10 Gold
Towards the entrance of Deepscorn Hollow (mod-specific)
0002455B Guide to Anvil 1 Gold
The First Edition bookstore in the Imperial City Market District (basement, in an overturned box)
002455F Guide to Bravil 1 Gold
The First Edition bookstore in the Imperial City Market District
0002455E Guide to Bruma 1 Gold
The First Edition bookstore in the Imperial City Market District
00024561 Guide to Cheydinhal 1 Gold
The First Edition bookstore in the Imperial City Market District
0002455D Guide to Chorrol 1 Gold
Mach-Na's Books in Cheydinhal
00024562 Guide to the Imperial City 1 Gold
The First Edition bookstore in the Imperial City Market District
00024560 Guide to Leyawiin 1 Gold
The First Edition bookstore in the Imperial City Market District
0002455C Guide to Skingrad 1 Gold
The First Edition bookstore in the Imperial City Market District
0002458A Hanging Gardens 30 Gold
The Mystic Archives of the Arcane University, inside a display case on the second floor
0001FB52 Hiding with the Shadow 0 Gold
Lake Arrius Caverns
0001FB51 History of Lock Picking 20 Gold
Dareloth's House in the Imperial City Waterfront, on a shelf (only available after The Ultimate Heist)
000152FD Imbel Genealogy 5 Gold
Desk in Jakben, Earl of Imbel's Private Quarters
00038B2F Journal of the Lord Lovidicus 35 Gold
Crowhaven, in the chambers of the Lord Lovidicus
xx000ED2 The Knights of the Nine 25 Gold
(Knights of the Nine specific)
00058EEE The Last King of the Ayleids 25 Gold
The First Edition bookstore in the Imperial City Market District
00024583 The Legendary Scourge 60 Gold
Cloud Ruler Temple East Wing
00024569 A Less Rude Song 6 Gold
Mach-Na's Books in Cheydinhal
000AA07D A Life of Uriel Septim VII 8 Gold
TheChorrol Mages Guild, in the library
00185377 Lithnilian's Research Notes 0 Gold
Bramblepoint Cave, as part of the quest No Stone Unturned
000366B1 Log of the Emma May 5 Gold
Located on the wrecked ship Emma May
xx0142ef Lord Jaren's Journal 0 Gold
Secret room in Battlehorn Castle Master Bedroom
0000BF8C Lost Histories of Tamriel 50 Gold
Under a bush in Skingrad / Bookcase in Dareloth's house
00078562 The Lusty Argonian Maid 10 Gold
Heinrich Oaken-Hull's house in Anvil and Southern Books in Leyawiin
0001D046 Macabre Manifest 0 Gold
The basement of Agarmir, as part of the quest Unfriendly Competition
0002457D The Madness of Pelagius 12 Gold
The Mystic Archives of the Arcane University
00026D8B Mages Guild Charter 1 Gold
Generally all Mages Guild branches
00078563 Magic from the Sky 10 Gold
The Mystic Archives of the Arcane University
xx005093 Manifesto Cyrodiil Vampyrum 1 Gold
Deepscorn Hollow study area (mod-specific)
000AA288 Manual of Armor 6 Gold
The Mystic Archives of the Arcane University, on a second floor bookshelf
0002456A Manual of Arms 3 Gold
The First Edition bookstore in the Imperial City Market District
0002456B Manual of Spellcraft 3 Gold
The First Edition bookstore in the Imperial City Market District
0001C16C Messenger's Diary 750 Gold
Display case in Bruma Castle Great Hall
0002456C Mixed Unit Tactics 5 Gold
Mach-Na's Books in Cheydinhal
0002453A More Than Mortal 10 Gold
Arch-Mage's Quarters in Arcane University and Leyawiin Mages Guild Library
0003456E Mysterious Akavir 10 Gold
Mach-Na's Books in Cheydinhal
00005599 Mysterium Xarxes 0 Gold
On a table in Cloud Ruler Temple / On an altar in Lake Arrius Caverns
00024580 Mystery of Talara, v 5 25 Gold
Renoit's Books in Chorrol
0002458B Mysticism 40 Gold
The Chorrol Mages Guild, in a display case near the front door
0001F113 Myth or Menace? 10 Gold
The First Edition bookstore in the Imperial City Market District
00002DD1 Necromancer's Moon 5 Gold
The Mystic Archives of the Arcane University
0002458C Nerevar Moon and Star 75 Gold
Chorrol Castle Private Quarters
0002458D N'Gasta! Kvata! Kvakis! 90 Gold
Carried by some monks at the Temple of the Ancestor Moths and Occasionally sold by book vendors
0002458E The Old Ways 45 Gold
Chorrol Fighters Guild, on a bookshelf on the third floor
0002456D On Morrowind 8 Gold
Mach-Na's Books in Cheydinhal
0002457E On Oblivion 15 Gold
Renoit's Books in Chorrol
xx005095 Opusculus Lamae Bal ta Mezzamortie 25 Gold
Deepscorn Hollow study area (mod-specific)
0002458F Origin of the Mages Guild 70 Gold
Anvil Mages Guild Living Quarters or Leyawiin Mages Guild Private Quarters
000243DD Palla, volume 2 10 Gold
Atatar Loria and Leyawiin Mages Guild Library
0003647E The Path of Transcendence 0 Gold
Leafrot Cave, on a table (only available during or after the quest Affairs of a Wizard)
000982F0 Pension of the Ancestor Moth 40 Gold
Temple of the Ancestor Moths, inside the church on the altar
00024590 The Pig Children 40 Gold
Anvil Castle Royal Quarters and Occasionally sold by book vendors
00024585 The Posting of the Hunt 85 Gold
Vilena Donton's House, third floor, on her desk; or, Deepscorn Hollow study area (mod-specific)
0002457F Provinces of Tamriel 25 Gold
Renoit's Books in Chorrol
00024570 The Real Barenziah, v 1 5 Gold
The First Edition bookstore in the Imperial City Market District
00024571 The Real Barenziah, v 2 5 Gold
The First Edition bookstore in the Imperial City Market District
00024572 The Real Barenziah, v 3 5 Gold
The First Edition bookstore in the Imperial City Market District
00024573 The Real Barenziah, v 4 5 Gold
The First Edition bookstore in the Imperial City Market District
00024574 The Real Barenziah, v 5 5 Gold
The First Edition bookstore in the Imperial City Market District
00024591 The Red Book of Riddles 35 Gold
Lord Rugdumph's Estate and The Sea Tub Clarabella in Anvil
000BF1CF Remanada 80 Gold
Cloud Ruler Temple East Wing
00024558 Report: Disaster at Ionith 1 Gold
Renoit's Books in Chorrol
00024575 Ruins of Kemel-Ze 10 Gold
Mach-Na's Books in Cheydinhal
000243FF The Seed 10 Gold
Arch-Mage's Quarters in Arcane University and Cheydinhal Mages Guild
xx000ED4 Shezarr and the Divines 25 Gold
(Knights of the Nine specific)
xx000EDE Sir Amiel's Journal 0 Gold
(Knights of the Nine specific)
xx000EDC The Song of Pelinal, v 1 80 Gold
Anvil Chapel Hall, Southern Books, Leyawiin (Knights of the Nine-specific)
xx000EDB The Song of Pelinal, v 2 80 Gold
Anvil Chapel Hall, Southern Books, Leyawiin (Knights of the Nine-specific)
xx000EDA The Song of Pelinal, v 3 80 Gold
Anvil Chapel Hall, Southern Books, Leyawiin (Knights of the Nine-specific)
xx000ED9 The Song of Pelinal, v 4 150 Gold
Anvil Chapel Hall, Southern Books, Leyawiin (Knights of the Nine-specific)
xx000ED8 The Song of Pelinal, v 5 150 Gold
Anvil Chapel Hall, Southern Books, Leyawiin (Knights of the Nine-specific)
xx000ED7 The Song of Pelinal, v 6 150 Gold
Anvil Chapel Hall, Southern Books, Leyawiin (Knights of the Nine-specific)
xx000ED6 The Song of Pelinal, v 7 150 Gold
Anvil Chapel Hall, Southern Books, Leyawiin (Knights of the Nine-specific)
xx000ED5 The Song of Pelinal, v 8 150 Gold
Anvil Chapel Hall, Southern Books, Leyawiin (Knights of the Nine-specific)
00024582 Spirit of the Daedra 35 Gold
The Mystic Archives of the Arcane University
0002457A Tamrielic Lore 15 Gold
The First Edition bookstore in the Imperial City Market District
00024577 Ten Commands: Nine Divines 1 Gold
The First Edition bookstore in the Imperial City Market District
0001F112 Thief of Virtue 10 Gold
The First Edition bookstore in the Imperial City Market District
000243F3 The Third Door 10 Gold
The Mystic Archives of the Arcane University
00003AA3 Tome of Unlife 350 Gold
Located in the secret chamber of Benirus Manor as part of the quest Where Spirits Have Lease
00003968 Traitor's Diary 0 Gold
In the basement of the Anvil Lighthouse, as part of the quest Following a Lead
xx0014a2 Treatise on Ayleidic Cities 5 Gold
(Unearthing Mehrunes Razor specific)
00024579 Trials of St. Alessia 1 Gold
The First Edition bookstore in the Imperial City Market District
00024592 The True Nature of Orcs 45 Gold
Glarthir's house in Skingrad and occasionally sold by book vendors
0002457C Varieties of Daedra 10 Gold
Renoit's Books in Chorrol
00024593 The Waters of Oblivion 75 Gold
Cloud Ruler Temple East Wing and upstairs in the Abandoned House, Cheydinhal
00024594 The Wild Elves 80 Gold
The Mystic Archives of the Arcane University
00024581 The Wolf Queen, v 8 25 Gold
Renoit's Books in Chorrol
-
WhoGuru laughs and shakes her head. "Sometimes I can not restrain myself, the urge to ply one's trade is simply too great!" She signals the barkeep for another round, this time dipping into her own purse. "To show no hard feelings. How about a song?" She ***** her head at the bar and nods as they cheer. "Not so long ago, I stumbled into a gate to Oblivion, no friendly place I can tell you. Heat and fire and all manner of hell spawned creatures. I, in search of liberating whatever wealth may have resided there, stumbled upon a Knight...well, he was dressed as a Knight. His manner was more that of the pampered fop. Boundless windbag with delusions of grandeur." She paused for the laughter. "And who was this, you ask? Why none other than the son of the Count of Cheydinhal!" More hoots and hollers answered, punctuated by the pounding of mugs on the tables.
"And now, for a song I wrote in his honor. I call it 'Ode to Farwil'
What wandering knight was this I saw
lost in Oblivion's heart
In armor bright and gleaming new
he looked the hero's part
When Daedra saw he on the bridge
with a mighty cry he charged
his sword held high in victory
into the lava he barged
In shock I watched, he fell and burned
what kind of Knight is this?
with a muttered oath I to reload
this useless sack of piss.
It couldn't happen twice says I
no Knight could be that lame.
how wrong was I when once again
he dove into the flames.
On try the third, my patience gone
'Brave' Farwil tried again
This time led to the bridges edge
and shoved off to meet his end.
With teary eyes and sorrow great
to tell the Count his fate
The sad news I delivered him
the urge to smile was great.
If you should find this useless turd
wandering in a gate
take my advice and leave him there
or help him meet his fate.
-
Quote
Look! ^^ We made him happy!
-
"Ah, Vereta! Just in time! I was just trying to persuade my lively companions here to part with a few septims...they don't seem to be willing." She smiles and raises her mug. "Perhaps I just don't have a trusting face?"
-
Sounds awesome. I hope it turns out that way to.

So far so good.
Playing through the very alpha version was great. The sword is amazing...perhaps a bit too amazing. I got pasted by the end boss first time around! lol � That hasn't happened in a while!
The biggest bug our scripter is working on right now is the clues. �After the third, they aren't spawning as they should which effectively kills the quest, since the next clue is supposed to be spawned when you read the previous one. I had to use the console to force the next stage each time.
That and getting the unique enchantment we want on the sword to actually work properly! He's nearly there.
I'm fairly sure he's throwing darts at my picture right now as I deluged him with typos I found in the journal updates while going through.
EDIT: �Thanks Darkrider! I'll see about pumping up the thread a bit! You get used to how things work on the official forums after so many years! lol
-
Quote
If you need anymore help with writing don't hesitate to call me. Oh, if you feel like it we can collaborate ideas for there dialogue, WhoGuru.
Sounds fantastic to me! I love working with others. Having someone to bounce ideas off of is priceless really. -
"To the future of the Alliance it is! May we be prosperous and our Allies never to light of coin!" With a hearty laugh she takes the seat beside Darkrider, raises her mug to the assassin across the room in thanks for the diversion and drinks deeply, satisfied smile on her face.
"Anyone up for a game of chance?" She asks with a smirk. As Darkrider and the assassin study her face, they realise she's always smirking, a curious quirk caused by her barely noticeable crooked jaw. Darkrider thinks a person could go mad wondering when she's serious.
-
No problem! Sounds like a great storyline to me. Lots of possibilities.
-
Okay that's good. To write the dialogue, I'd need to know specifically how many NPC's are there when the player 'arrives'? Don't want to write responses for 6 and there only be 4.
You have given me enough to write some preliminary stuff with. Let me diddle with a while and we'll see what I get.
This will be perfect to distract me from waiting for the other guys to finish up the mod we've worked on. That's the only problem with being the writer, your work is done long before everyone else is even close! LOL
-
Here is our current and active thread - http://www.tesalliance.org/modules.php?name=Forums&file=viewtopic&p=9023#
Please post all questions/comments there. Thank you!
An-Arane Cey: Lost Sword of the Ayleids: (The King's Shadow)
<<Click. -Courtesy of StryderOfOblivionCenturies ago, in the time of Alessia, an Ayleid Prince commissioned a weapon to destroy his enemies. �An-Arane Cey, the King's Shadow. �He fell before the swords completion and it was hidden away until one of his successors would come to claim her. You are that successor and will have to follow a treasure hunt of clues across Cyrodiil to claim your well earned prize.
Details:
Lost Sword of the Ayleids is a treasure hunt mod.
There are no map markers.
You will have to rely on your own ingenuity and knowledge of Cyrodiil's landscape to find each location. �
The clues, in combination with the journal hints, should give you ample information to point you in the right direction.
The reward is a custom made sword that has a recharge ability along with other
useful enchantments. We haven't timed the quest, but it should take you awhile
to do it as there are a number of dungeons you have to raid in order to do the quest.
Lost Sword is designed to begin once you've had a good night's sleep. �
Find a bed and get horizontal for at least eight hours.
The quest will begin with a short video clip.
The sword is crafted from Welkynd Stone, for those who ask why the blade is blue. It was initially based on an Elven Longsword though the original stats have been bumped up. It's the enchantments that truly make this a blade worth having. It is unique.
The end boss battle of this quest is no walk through the park. Come prepared and remember to save first. My level 10 character got pasted to the floor the first time.
Updates:
*Lost Sword can now played with or without OBSE. If you already have the mod, visit the download page and download the updates, copy over the old .esp with your choice of new.
In the non-OBSE version, the recharge function on the sword is currently not working. WillieSea and Mage are on it and will have a fix soon.
For those suffering the freeze problem at the end scene, the update fixes this!
There is also a full version of the mod available for download without OBSE for those who do not have or want it. Enjoy.
Darkseed Team:
Shadowhider - Textures/Graphics
WhoGuru - Writing & Dialogue
Da Mage - Textures, Coding & CS
DarkRider - Voice Overs
Varus Torvyn - Technical Adviser/Textual Adviser
Knite 0 da nine - Jack of all trades
WillieSea - Adviser and Sword Savior Extraordinaire
Incompatiblities:
None-known, please inform us.
Requirements:
TES IV: Oblivion
OBSE - Download latest version here: http://obse.silverlock.org/download/index.html
Downloads:
At TESA - http://tesalliance.org/forums/index.php?/files/file/5-an-arane-cey-lost-sword-of-the-ayleids/
At TES Nexus - http://www.tesnexus.com/downloads/file.php?id=20184
Contact:
WhoGuru - Message at Official ES Forums or TES Alliance
Shadowhider - Message at Official ES Forums
Da Mage - Message at Official ES Forums
DarkRider - Message at Official ES Forums or TES Alliance
Thanks:
Bethesda Softworks - For making such a great game and the CS
NifTools
Blender Foundation
Legal:
You cannot re-release this mod in any form without permission from the Darkseed Team.
If you do we will hunt you down and do horrific things to your pet/s.
Images:
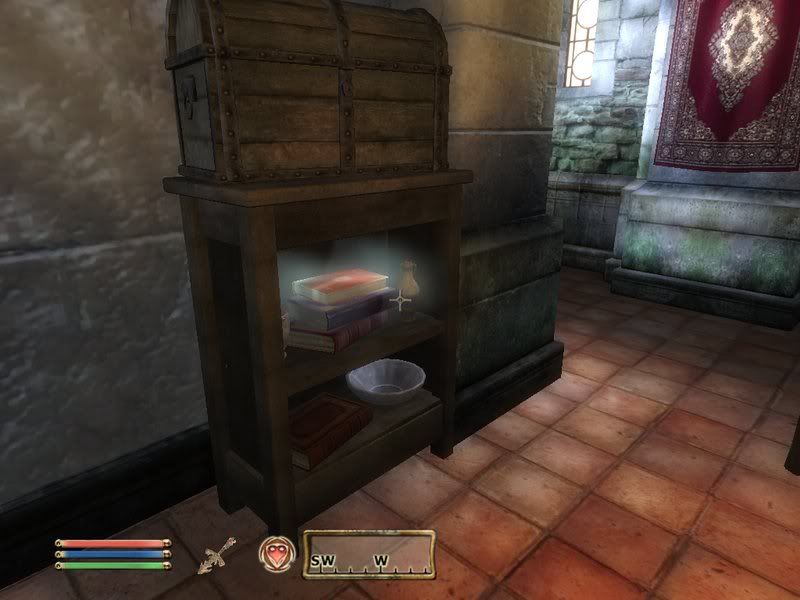
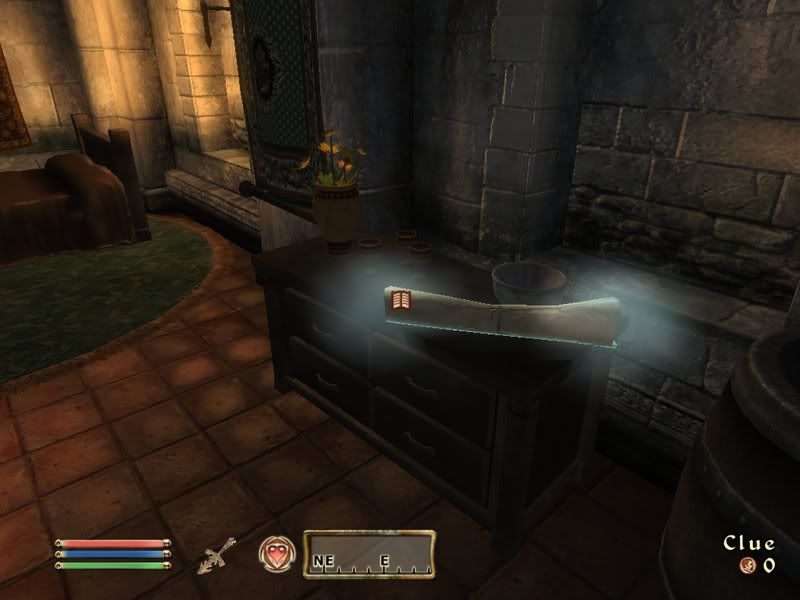
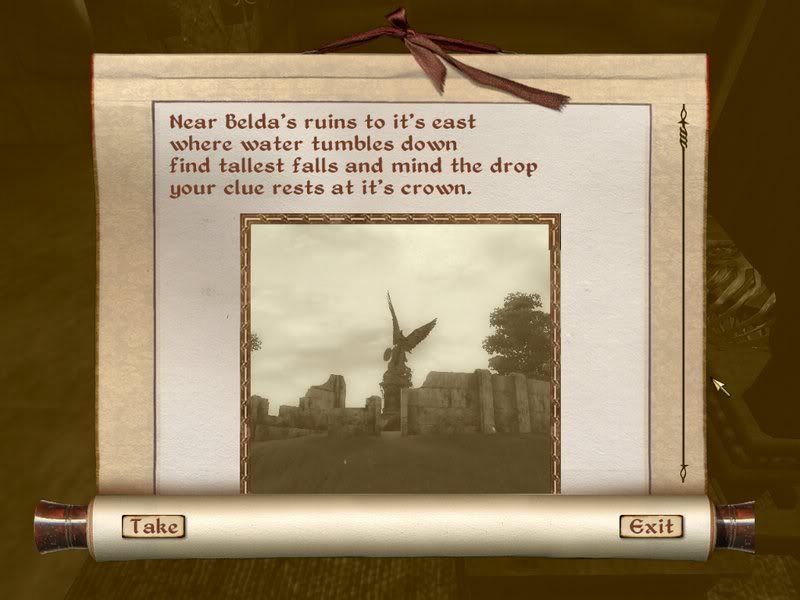
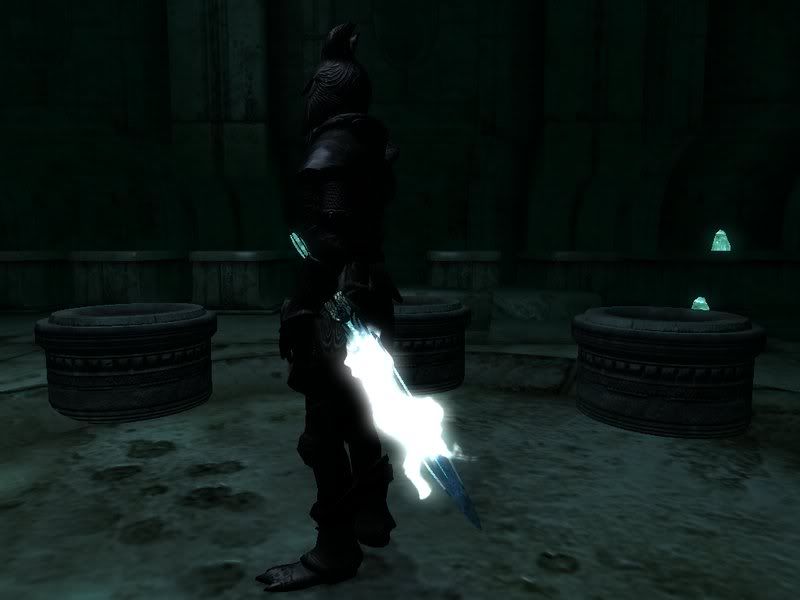
-
A tall, young woman, flame of hair and eyes like wet moss on a cloudy day slides into the tavern. Unnoticed, as she wishes for the moment, she makes her way behind Darkrider. With the deft skill of the consummate thief, she lifts a few septims from his purse. Slapping him on the back, she tosses the coins to the barkeep.
"Poor me a Root Beer and one for my friend here!" Heads turn and she gives Darkrider a mischievous wink. "I'm the Guru and pleased to stand you to a drink. To what shall we sing?"
-
 1
1
-
-
Found this lovely place from a link in "Hey YOU"s sig on the TES forums. Since I can't pass up an opportunity to talk about my favorite addiction, all things Elder Scrolls, I had to join up...and perhaps find some more outlets for my writing.
If nothing else, I'm a font of Morrowind/Oblivion information and have written...well...8 guides for Oblivion, working on the 9th.
I get bored, I play and I write.So, see you round the forums.
-
Hello there. I see you need a writer, it just so happens I am one...are one?
I've just finished writing for a small mod, soon to be released. We're planning a sequel to it as well, if this goes over like we think it will.
However, I could always use something else to write. Multiple projects are a great way to fend off writers block.
If you can put your outline down in a concrete format, A to B to C, I can write some preliminary stuff for you and see how you like it.
You can also find me on the TES official forums and the Avid Alchemist's Alcove under the same name, WhoGuru.
I'd be happy to help, your premise sounds fantastic and a bit claustrophobic for the player.
[RELz]An-Arane Cey: Lost Sword of the Ayleids
in Oblivion Mods
Posted
So true, and it's a raining! LOL Turns out the biggest problem Mage is having, graphic wise is trying to remove that stock red effect Oblivion gives to enchanted weapons. �He's tried several ways to remove it, found one that kind of works but he doesn't like it. If anyone has any ideas on this, he has a thread in the official forums where you could give him a pointer!
http://www.bethsoft.com/bgsforums/index.php?showtopic=
It just makes the sword look a bit crap in your hand as the red clashes badly with the other colors.