Jump to content

DOWNLOAD MODS

Are you looking for something shiny for your load order? We have many exclusive mods and resources you won't find anywhere else. Start your search now...

LEARN MODDING

Ready to try your hand at making your own mod creations? Visit the Enclave, the original ES/FO modding school, and learn the tricks of the trade from veteran modders...

JOIN THE ALLIANCE

Membership is free and registering unlocks image galleries, project hosting, live chat, unlimited downloads, & more...

PacificMorrowind

Ambassadors
  • Posts

    280
  • Joined

  • Last visited

Everything posted by PacificMorrowind

  1. Get Tamriel Rebuilt Maps 1 + 2, then you won't know much and just stick away from VV where you know too much. Of course with maps 1 + 2 you just have (for the most quests) to play as a telvanni (or imperial supporter) Pacific Morrowind
  2. never done this before, but I'll give it a look tonight (hopefully) and see if I can do it... if I can I can probably figure out why it didn't work for you. Pacific Morrowind
  3. bingo for Arthmoor Pacific Morrowind
  4. okay question: what is the name of the location that has the Crusader's Shield in knights of the nine: A. Fort Charlemagne B. Fort Bulwark C. Ceyatatar D. Misty Swamp E. Fort Deepend Pacific Morrowind
  5. Well that is partially dependent on your oppinion; the "correct" answer would be Maglir... however I abhor Modryn Oreyn so if I wasn't going for correct I'd say him. Pacific Morrowind
  6. sure... I probably forgot to mention a step that is automatic for me and hence I don't think of it as a step. Pacific Morrowind
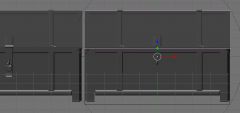
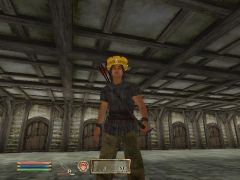
  7. Oh yes looks like I wasn't quite clear there. It does need to be parented to a skeleton but you don't need the whole skeleton, you just need the one bone, so: In blender select your headband -then import a vanilla helmet with the setting "import skeleton only and parent selected" - now export again and it should work fine Unrelated to that but on in your screenie there I saw you texture path... and it needs to be changes to textures/rest of path... if you have the stuff before textures the textures will only load for people with the exact setup as you... good thing to get in the habit of fixing. Pacific Morrowind
  8. PacificMorrowind

    Pacific Morrowind's Album

    Just a nice little home for my screenshots and pictures of my work... some have been requesting that lately.
  9. ah I understand... hope no offense taken? On cuirasses I can totally see the point to that. I never did that step... jumped from no seams to the seams on a cuirass. Pacific Morrwind
  10. with one bone weight painting is EASY - with mutliple weight painting becomes complicated. for one bone just go into weight painting mode (where it says edit mode or object mode normally) then just create the bone/select the bone as per last post set all the numbers in that section to 1, except area of brush set large. then make all the model fully red by brushing around it (you will have to rotate, since wieght painting is just on the normal you can see... it doesn't go through the mesh to the other side. Pacific Morrowind
  11. 118 downloads

    Name: Pose Pack 2 Version: 1 Date: 9/7/2009 Category: Pose mods Requirements: Oblivion Patch 1.2.0.416, Author(s): Greek Storm & Pacific Morrowind Source1: TESA Source2: TESNexus Description =========== Greek Storm did up a pile of Poses and then I did up scripting so you can use them for screenshots/posing. when you start up with this active you'll get a "actors ball" type item, just click it to use. Load Order ============== In BOSS but until the next public update: really doesn't matter... put anywhere Install =============== If using BAIN: just click install package Manual Install: copy the contents of archive to your data folder (overwriting if requested) Uninstall ================ Bain: just click uninstall on the package Manual 1. Delete the files/folders associated with the mod. Files to remove when uninstalling: delete: ObliviondataPMGSPP2.bsa ObliviondataPMGSPP2.esp ObliviondataPMGSPP2 - readme.txt (this file) History ======= 1.0 initial release Contact ======= You can find me on the official Bethesda Games forums (www.bethsoft.com/bgsforums/) as PacificMorrowind - PREFERED You can fine me on TESA as PacificMorrowind - PREFERRED You can find me on TESNexus as PacificMorrowind You can send me an email here: PacificMorrowind (AT) gmail (Dot) com Also for help you can try my BGS thread: http://www.bethsoft.com/bgsforums/index.php?showtopic=1005400 Credits ======= Thanks to Bethesda for creating Oblivion. Thanks to TESA most especially DarkRider. Thanks to TESNexus.com for the a one-stop-shop resource for authors and players. Licensing/Legal Feel free to reuse scripting, if you want to use the poses ask Greek Storm (on bethsoft) Pacific Morrowind
  12. for most of the heads that should work for whatever. for heads on complete bodies I don't know... havent' tested for in the body region rather than head it will definitely require "real" rigging... way more complicated. in short: 1. import body, 2. import Your Object (YO here after) 3. position YO in to right position (doh too many positions in one sentence) in relation to body 4. select the skelton 5. enter edit mode 6. find the bone closest to YO... select it and note it's name 7. select YO 8. enter weight paint mode 9. in links and material (under the editing pane (f9), create new vertex group and name it the bone name you noted down earlier (f.e. bip01 neck) 10. weight paint YO to full 1. for all the verts for that bone (vertex group) 11. if YO is close to only 1 bone test else, you have to paint the areas that are closest to each bone 1, decreasing towards the next bone... I'm not really the person to ask if this is a multibone object Pacific Morrowind
  13. I'm sure others will suggest other ways but this is what I do: 1. if there is a similar helmet import it (including skin partition), if not import the imperial male head... or any other but that is the standard base head (including skin partition). 2. make your mesh - either editing exising helm or creating from scratch to fit the head 3. select the helm (each piece will have to be done individually if it is in multiple pieces) 4. go to weight paint mode 5. go to the editing panel (f9) 6. either select exisiting bone (vertex group, under links and material) named bip01 head or create a new vertex group and name it bip01 head. 7. paint all verts of the helm to 1 for that bone. 8. repeat steps 3 to 7 until done all seperate meshes if applicable 9. export to nif (including skin partition) - before exporting select all parts of the helm but NOT the skeleton. 10. you should be good to go - however you will want to create a ground mesh so before moving on: ground mesh: 1. delete the skeleton (it will be named sceneroot (or similar) in 99% of cases) 2. select the helm (or if multiple meshes for the helm select each one individually and do steps 3 & 4 for each) 3. go into edit mode 4. go to scripts->hull-> select convex->select 0.100 for precision -> say okay 5. select all applicable helmet pieces and the hull(s) you made in steps 3-4 6. export to nif; in the collision options in the right hand side of the panel, select clutter, metal (if helm is metal if not select one of the other ones or edit later in nifskope), weapon body location: none, don't export skin partition and now your really should be good to go... go test! edit: to answer your specific questions: 1. duplicating the head to start with is perfectly fine... for many things the best, how good it is depends on the helm you're creating 2.extruding is fine (you are reweighting in my instructions anyways, also the UV map you will want totally different from the vanilla head so I have no idea why they would say that). 3. for a helmet no need to import a skeleton, the skeleton from a preexisting helmet or head (just the one bone bip01 head) will work fine. 4. what seperate a static mesh from a non-static: animation basically... for clothing/creatures rigging (weight paint/vertex weights) tells it how to animate when the skeleton animates, for other things morph animations, transform animations and for clutter havok is basically a form of animation - just one you don't have to do anything for (other than right settings on export). Let us know if you got any more questions Pacific Morrowind
  14. well for the head it is pretty easy (for body it is VERY hard) (max instructions) - import the head.nif from meshes/creatures/dog/ - import your horns - move horns to right position in relation to that head - export (just the horns) - open in nifskope - copy and past the nistringextradata block from the head.nif to your new nif - save as whatever.nif in meshes/creatures/dog - in the CS select that file as well as whatever other meshes you need for the dog/wolf (in the creature details pane). (that works for skeletons... and certainly should work for dogs but I haven't tested so if it doesn't just report back). Pacific Morrowind
  15. that would be the wrong way to add horns... waste of disk space. It would work fine but the best way to do it would be: -model horns, - rig them to the bip01 head bone (IIRC) - save in the mesh in meshes/creatures/dog - in the model list in the CS select them as well as the head, eyes, body. A full new creature on the other hand will take a fair while and a fair bit of skill... because then you have to do a lot of rigging, modeling, and animating. Pacific Morrowind
  16. Glad to see you on here! This is a really nice site, where I hang most of my online TES time.

    Pacific Morrowind

  17. okay open the file in question in nifskope. press f2 and f3 (or not if the menus are already open) to open the block list and block details panes. then click ninode 0 (usually scene root but may be named something else) in the block list; then on the details pane scrolls down to num children and the expandable slot of children. change the num children to how ever many it is plus what bones you need to add to it. then expand children and press the refresh button. scroll to bottom of children and add the node numbers for the bones that you want to parent to the scene root into the empty slots. Pacfici Morrowind
  18. B is correct, so go ask the next question IS Pacific Morrowind
  19. Question 1 is A... Scotti. Question 2: I'll go for D Pacific Morrowind
  20. I for one would love to see some more advanced UV mapping tutorials... also some skinning tutorials for getting smooth bone interfaces. Welcome, I've enjoyed your mods on nexus. Pacific Morrowind
  21. Some one needs to go kill some scamps... the looks to be a scamp head not a goblin head. Looking really great RDD... I'll get some meshes done soon for ya. Pacific Morrowind
  22. Ace in one for Critterman... ask the next question Pacific Morrowind
  23. A quest in what village/town will send you fishing: A. Bravil B. Leyawin C. Weye D. Hla Oad E. Sutch
×
×
  • Create New...